Wednesday, 3 February 2021

HMS Fearless (L10)

HMS Fearless (L10) was the first of two purpose-built LPD (landing platform docks) commissioning in 1965, the second being HMS Intrepid (L11) commissioned in 1967. The LPD were designed to be used by the Royal Navy to support a Royal Marines amphibious assault force (700 troops, 15 tanks, 27 vehicles and 5 helicopters) and provide a platform for Brigade Headquarters prior to, and during, the assault phase. 

As a result of defence cuts, HMS Intrepid went into reserve in 1976, being brought back into active service in 1979 to allow HMS Fearless to be refitted. Following the announcement in 1981 that both LPDs were to be decommissioned, HMS Intrepid, then already undergoing decommissioning, was rapidly brought back into commission in 1982, to join HMS Fearless, as part of the British Task Force committed to Operation Corporate, to recapture the Falkland Islands. 

The Task Force comprised 3 operational entities:

  • Battle Group led by the aircraft carriers HMS Hermes and HMS Invincible under Admiral Sandy Woodward with responsibility for securing air and sea superiority 
  • Paraquet Group sent ahead of the Battle Group under Captain Brian Young Antrim, to launch Operation Paraquet, the retaking of South Georgia 
  • Amphibious Group, which followed some weeks after the Battle Group, led by HMS Fearless and HMS Intrepid under Commodore Mike Clapp, would lead the amphibious landings at San Carlos Water. 

HMS Fearless, the HQ for the staff of amphibious force, sailed from Portsmouth at 1000 on 6th April to join the Battle Group, who left and arrived a day earlier, at Ascension Island on 17th April. While the Battle Group continued on to the Falklands the following day, HMS Intrepid joined HMS Fearless on 20th April. Both then left Ascension with the Amarda of navy and troop carrying merchant ships, which made up the Amphibious Group, on 7th May. This split in the Task Force was by design, Sandy Woodward wanted to ensure his Battle Group was free to remove as much of the Argentine threat of submarine, ship and air attack, without having to worry about protecting or risking the loss of any of the Amphibious Group at the same time. 


In the early hours of 19th May, 1,500 troops were moved from P&P’s liner Canberra, the largest requisitioned troop ship of the Amphibious Group, to the two LPDs. Once each were packed with around six hundred and fifty Royal Marines, at 0145 on the morning of 21 May, 40 Commando, together with a FV101 Scorpion and a FV107 Scimitar tank, were loaded into landing crafts - four of which were small ones to be lowered over the side, four were larger LCUs to be floated out of the ships’ stern docks once they were flooded down, and headed down San Carlos Water. Meanwhile HMS Intrepid’s LCUs made their way to SS Norland, the P&O roll-on roll-off  Ferry,  to pick up Colonel H Jone’s  2 Para. At 0730 40 Commando were wading through the shallows from Fearless’s landing craft and onto San Carlos beech. The landing of both HMS Fearless and HMS Intrepid’s troops was unopposed but Argentina’s response was swift. By the end of the first day, its aircraft had inflicted significant damage to British warships, the worst being to HMS Ardent. Devastated by bombing, with several major fires, she was abandoned and sank. Her crew transferred to Canberra,

The end came on 14 June 1982 with the successful recapture of Port Stanley, and the Argentinian surrender. 

Other key events in HMS Fearless’s service before the Falklands War

  • Command platform for British Counter-Terrorism operations in Aden in 1967-1968
  • The venue for talks between Harold Wilson and Ian Smith in 1968, over the future of Rhodesia. 
  • Ferried several Centurion AVRE demolition vehicles, derived from the Centurion tank, to Northern Ireland to be deployed as part of Operation Motorman in July 1972,
  • Featured in the 1977 James Bond film The Spy Who Loved Me as the ship that picks up Bond's escape pod.

HMS Fearless was placed out of commission for three years in 1985 prior to a two-year refit at Devonport and recommissioned in 1991. Meanwhile HMS Intrepid was placed in reserve status and being in such poor physical condition by this time, was used as a source of spares for HMS Fearless. HMS Intrepid was decommissioned in 1999 with HMS Fearless following in 2002. HMS Fearless completed 35 years service with the Royal Navy, the pinnacle of which must have been her 3 month involvement in Operation Corporate, and her key role in the recapture of the Falklands Islands.

----

The model

I made and treasured this Airfix model of HMS Fearless for many years back in the 80s and so it was great to rediscover probably even the same aged kit that I made back then. 

Purchased second hand, missing its helicopters and 3 of its 4 landing craft it was still a nice trip down memory lane. I managed to source a set of Wessex helicopters and positioned 2 on Fearless’s deck in the same configuration as on Airfix’s box art; with one over position 4, covering its numbered transfer which self destructed, and one airborne, probably with filled with SAS troops en route to their next mission. The single landing craft I attached leaving the ship’s stern dock, camouflaged in white tiger stripes as applied for the Falklands landings, with the addition of 2, naive scratch built, Scorpion and Scimitar tanks, which were first to land with 40 Commando on D-Day, 21 May 1982.


---

The Kits

Brand: Airfix
Title: HMS Fearless
Number: 03205
Scale: 1:600
Released: 1968 - 2005 | Rebox (Changed box only)


Brand:  Fujimi
Title: Water Line Series Royal Naval Plane
Scale: 1:700
Released: 1984 | Rebox (Changed box only)


Thursday, 28 January 2021

Harrier 809

Harrier 809 is aviation historian, Roland White's, fascinating and previously untold story about the formation of a new Sea Harrier squadron, 809 Naval Air Squadron (NAS) in the opening weeks of the Falklands War. 

With all the available Sea Harriers and aircrew having already set sail for the Falklands, Lieutenant Commander, Tim Gedge, left behind to look after operations in the UK, was tasked with building a new squadron, seemingly out of nothing. While he arranged to withdraw spare aircraft from test facilities and requested BAe to speed up its production line, pilots were recalled from exchange tours with global allies; some would end up being sent into action with fewer than ten hours in the cockpit of a Sea Harrier, less frontline training than was given to a Spitfire or Hurricane pilot in WWII. The reason for this urgency, was the expectation that the high rate of attrition of the unproven Sea Harrier, pitched against the Argentine's combat hardened Mirage III and Skyhawks, would prevent Britain gaining vital air superiority over the Islands, and leave the Task Force unprotected, at the mercy of the Daggers and Exocet carrying Super Étendards!

Hasegawa's Sea Harrier kit came with both ladder and in-flight refuelling probe

Extra dark sea grey camouflage scheme used by 800 & 801 NAS and the Barley Grey of 809 NAS

As the 8 randomly sourced Sea Harriers started to arrive at RNAS Yeovilton, Weapons Training Instructor (WTI) Bill Covington, recently recalled from an assignment with the US Marines' Harrier force, noted that while they may have been in various states of repair, they all shared the same gloss dark sea grey and gleaming white undersides that was the standard livery for the Navy's Sea Harriers. Camouflage it was not and while he had been tasked with getting the Squadron prepared with weapons and tactics training, his first consideration was to get the aircraft looking more suited to the theatre they were deploying to. Mr Philip J Barley of the Defensive Weapons Department, Royal Aircraft Establishment (RAE), Farnborough was recalled from his Easter holidays to assist. In the 1970s the MOD would run camouflage trails using full sized aircraft. In the 1980s, however, there was no budget for such extravagance and so Barley and Bert, the RAE's model-maker, had to make do with building a number of Airfix kits! Coincidentally, Airfix's only contemporary 1:24 scale model jet, was the Hawker Harrier. Once constructed and painted each were used to trial the effectiveness of new camouflage schemes. The final decision was for a simple, overall light grey scheme, 'Barley Grey', with red and blue national marking toned down to salmon pink and powder blue. To complete the look, using the same pastel colours and added to all the aircraft's tail, was 809's original squadron crest, dating back to 1941, the Phoenix.

Salmon pink and powder blue national markings and 809 NAS Phoenix crest

Lieutenant Commander, Tim Gedge, prepares for Quick Reaction Alert 

As the Task Force's only 2 available aircraft carriers had already set sail for the Falklands, 809 Squadron's pilots had to first fly themselves to the Ascension Islands. Here they met up with the repurposed container ship, Atlantic Conveyor, which had already been loaded with a cargo of six Wessex helicopters from 848 NAS and five RAF Chinook helicopters. After precariously landing the eight 809 Squadron Sea Harriers and six RAF Harrier GR.3 jump jets, 809 Squadron then kept a Sea Harrier on Quick Reaction Alert during Atlantic Conveyor’s journey south. After a vertical take-off, it was calculated that it was capable of shooting down the shadowing Argentinian reconnaissance 707 airliner at a maximum range of 183 miles. London even had a pre-prepared press release written in anticipation of this happening. There would however, be no guarantee that the Harrier would be able to land back onto Atlantic Conveyor. It would most likely be a one way trip for the pilot and he would have to hope he could safely eject and be rescued from the sea! Fortunately the 707 had been warned off by London's threat, that should it reappear, it would, without warning, be shot down.

Sea Harrier on Quick Reaction Alert during Atlantic Conveyor’s journey south

Once the Atlantic Conveyor joined up with the aircraft carriers, HMS Hermes and HMS Invincible, off the Falkland Islands, 809 Squadron's Sea Harriers were divided up between Lieutenant Commander Andy Auld's 800 squadron and Commander Sharkey Ward's 801 squadron. It is said that Sharkey suggested that 809's Barley grey was the wrong colour and their aircraft should all be repainted in extra dark sea grey used by both Auld's and Sharkey's squadrons. Gedge, however, is reported to have responded that it was actually 800 and 801's scheme which was wrong, in that Barley Grey was the new camouflage especially created by the RAE! The Barley Grey was reluctantly allowed to remain, but as there were insufficient aircraft for more than one Sea Harrier squadron on each carrier, 809's Phoenix had to go. While Auld's and Sharkey's original Sea Harriers, because of their dark colour scheme, were dubbed by Argentine pilots “La Muerta Negra” (The Black Death), it is interesting that following the conflict it is the lighter grey and pastel markings that became the more typical camouflage to be seen adorning military aircraft. After all, the objective of camouflage is not to be seen, which it would appear, Mr Philip J Barley's experiments with the Airfix models achieved!

Hasegawa's 1:72 kit of the FRS Mk.1

For this Sea Harrier build I used Hasegawa's 1:72 kit of the FRS Mk.1, which I specifically purchased because it included the 809 squadron markings, however, the Royal Navy lettering supplied for the tail was in black typeface and not the pastel blue used when they flew to Ascension Islands. So, I had to use a set of the later 'Barley Grey' decals that came with the ESCI Sea Harrier kit I built last week. Even though they are, however, a little too dark, they are least the right colour! The ESCI kit also had a nice set of pastel blue and pink warning decals which for some reason Hasegawa had totally omitted from their kit! Just shows that it pays to hoard old decals. 

The Hasegawa kit's superior interior 

One other dislike of the Hasegawa kit is the way the wings slot into the fuselage. Italeri and ESCI have a complete top wing section making for a much nicer fit, while both Hasegawa and Airfix seem to share the traditional separate wing configuration. On the flip side though, Hasegawa's Martin Baker ejection seat is far superior to any of the other 3 companies provide, and even included a piece of glass for the HUD, leaving me inspired to go to town on the cockpit area!


------

The Model


Brand: Hasegawa
Title: Sea Harrier FRS Mk.1
Number: 01235 (Also listed as B5)
Scale: 1:72
Type: Full kit
Released: 2008 | Rebox (Changed box only)


The Book


Thursday, 21 January 2021

Sea Harrier FRS Mk1

The Sea Harrier (SHAR) first entered service with the Royal Navy in 1979 as the maritime version of the then, ground attack Harrier flown by the RAF.  Other than their shared VSTOL capability the similarities really end there. Being the only fixed wing aircraft available to the Royal Navy, the SHAR was designed to perform a multi FRS (Fighter, Reconnaissance, Strike) role against ships, aircraft and land based targets. In the right hands, its state of the art Blue Fox radar could pick up surface vessels at a 100 miles and a head on air target at just over 20 miles. It had waterproofing and a raised seating position, to provide all round visibility.

Sea Harrier XZ457 Black 14  

During the 1982 Falklands War a total of 28 SHARs made their way, as part of Operation Corporate, to the South Atlantic to protect the British Taskforce from Argentine aircraft attack. Maintaining a near permanent CAP (Combat Air Patrol) above the fleet, armed with the latest Sidewinder AIM-9L, air to air missile, the SHAR was instrumental in enabling the successful landing of British Army troops to reoccupy the Falkland Islands. Although 6 SHARs were lost during the campaign, 2 from ground fire, none were a result of air to air combat. 

1/72 scale Sea Harrier FRS Mk1 kit, from the Italian model maker ESCI,

I have finished this 1/72 scale model of the Sea Harrier FRS Mk1, as XZ457/14, which, during the 1982 Falklands War as Black 14, earned the distinction of the highest-scoring aircraft of the conflict by bringing down a total of 4 Argentine military aircraft. First flown in December 1979 and wearing the code 104, XZ457 was delivered to 700A NAS (Naval Air Squadron) Fleet Air Arm Yeovilton in January 1980. 700n NAS were the Intensive Flying Trials Units formed to prepare for new aircraft types coming into service; 700A NAS at Yeovilton had responsibility for the Sea Harrier. XZ457/104 was then assigned the aircraft number 14, as in the model, when 899 NAS was made the operational Sea Harrier squadron and took over from 700A NAS. 

Built and painted for the diorama 

When in April 1982, 899 NAS's Sea Harriers boarded HMS Hermes and HMS Invincible to be incorporated into the ranks of 800 NAS and 801 NAS for Operation Corporate, XZ457/14, was assigned to the Taskforce’s Flagship, HMS Hermes

It was Black 14, which following an attack on HMS Ardent on 21st May, with Lieutenant Clive (Spag) Morrell at the controls, shot down one A-4Q Skyhawk A-307 with a Sidewinder and another with 30mm cannon fire, both pilots, Capitan de Corbetta Philipi and Teniente de Navio Arca, ejected safely. On 24 May, Lt Cdr Andy Auld, flying Black 14, destroyed two Daggers C-419 and C-430 of Grupo 6 with two AIM-9Ls; both pilots, Mayor Puga and Capitan Diaz, ejected safely. 

Black 14 in the finish and markings of those she returned to the UK on 21st July 1982

The finish and markings I have used depicts Black 14 as she during the conflict itself in May/June 1982, with one exception being the 4 white aircraft kill silhouettes which were apparently added on her return to the UK on 21st July 1982. In April 1982, however, when she sailed south on HMS Hermes, XZ457/14 was in the peacetime dark sea grey and white underside scheme. The white undersides, the 899 NAS fin markings of a black and white winged fist and the Royal Navy lettering on the fin were all over-painted during the voyage.  

While this kit, from Italian model maker ESCI, made for a very enjoyable build, especially pleasing being the fit of the upper wings across the back of the aircraft, the Martin Baker ejector seat was the poorest interpretation I've seen, and the instruction for mounting the yaw vane, off centre in front of the cockpit, was woefully incorrect. With the kit being released in 1983, just months after the SHAR’s returned from the war, I’m happy to excuse them these couple of flaws, in what is otherwise a nicely crafted kit.

Here’s a nice picture of the real Black 14 aboard HMS Hermes with her first pilot Lt Simon Hargreaves ... 

Lt Simon Hargreaves, the youngest pilot with 800 NAS with Black 14 on Hermes 

Simon Hargreaves spent 20 years in the Royal Navy as a Sea Harrier pilot and at the time of the Falklands War he was the youngest and most inexperience pilot with 800 NAS and only out of training a couple of months. On 21st April 1982 he was scrambled to intercept an unidentified radar contact approaching the Taskforce from 20,000 feet. The contact was an Argentine airforce Boeing 707 reconnaissance aircraft, searching for the British fleet and Hargreaves became the first pilot to engage with the enemy

The continued sorties by the 707, requiring the launch of a SHAR to shepherd it away, finally resulted in the British Government warning the Argentines, that the next time, it would be fired on without warning. It was not seen again. 

In 1996 Hargreaves was appointed Commanding Officer of 899 NAS, the same one Black 14 joined Hermes from before sailing to the Falklands.

----

The Model


Brand:  ESCI
Title:  Sea Harrier FRS MK1
Number:  9030
Scale:  1:72
Type:  Full kit
Released: 1983 | Initial release - new tool

Thursday, 14 January 2021

HMS Invincible (R05)

The Invincible class anti-submarine helicopter through-deck cruisers, ordered from from Vickers Shipbuilding and Engineering in 1973, were intended to counter the North Atlantic Soviet submarine threat. To meet this challenge, 3 ships were originally to be configured to carry up to fourteen Sea Kings and a Sea Dart missile launcher as its main armament against air attack. 

As construction started fallout from the Secretary of State for Defence, Denis Healey's controversial 1966 White Paper decision not to renew Britain’s aircraft carriers hit home. The report suggested that as the RAF had sufficient global reach to make the fixed wing carriers redundant and that as Britain would no longer have a need to undertake unilateral military action; the Royal Navy's powerful carrier fleet would not be renewed. The Royal Navy was, therefore, going to have to get creative if it was to retain a dedicated air defence for its ships. At the time, the RAF's ground attack Hawker Siddley Harrier jump jet was the only fixed wing aircraft capable, through its unique V/STOL (vertical and/or short takeoff & landing) capabilities of using Invincible's shortened runway. A solution was found in 1975, when the British government authorised the development of a maritime Harrier and the addition of a ski-ramp to the ships’ bows to assist in takeoff from the short runway. 

Three Invincible class aircraft carriers were finally built: HMS Invincible being commissioned on 11 July 1980, HMS Illustrious on 20 March 1983 and HMS Ark Royal on 1 November 1985. Although small in stature and power, the Royal Navy had at least won its battle to retain a small token carrier force. But then, just as things were looking positive for HMS Invincible, in February 1982, as a consequence of Defence Secretary, John Nott, 1981 Defence White Paper, it was announced that HMS Invincible was to be sold to Australia for £175 million!

All was not lost, however, as in the early hours of Friday 2 April 1982, HMS Invincible’s Captain, Jeremy JJ Black, just 3 months into what was to be a very short command, was awakened by a call. It was a signal from the Commander in Chief to bring his ship to four hours’ notice for sea; Argentina had just invaded the Falkland Islands. On Monday 5 April, HMS Invincible, with eight Sea Harriers from 801 NAS and twelve Anti Submarine Sea King helicopters from 820 NAS, embarked Portsmouth as part of Operation Corporate, to sail 8,000 miles and re-occupy the Falkland islands. 

On 1 June, the Australian Prime Minister, Malcolm Fraser, then confirmed to the British government that in view of circumstances, the sale of HMS Invincible to Australia could be cancelled and in July 1983, a year after the end of the Falklands conflict, the Ministry of Defence duly announced that it had withdrawn its offer to sell HMS Invincible and the Royal Navy could keep its three-carrier force.

During the 1990s, Invincible was deployed to the Adriatic where, while her helicopters aided refugees, her Harriers were involved in NATO military strikes during the Yugoslav Kosovo War. On a lighter note, in 2003, Invincible featured in an episode of the BBC’s Top Gear involving The Stig racing a white Jaguar XJS on the deck in an attempt to reach 100 mph and stop before the end of the runway. The stunt ends with supposedly Stig and the Jaguar ending up in the sea. 

Following the war, HMS Invincible underwent several refits to increase the ship's efficiency in operating aircraft. The angle of the ship's ski-jump was increased, her hangar modified to allow for more aircraft (nine Sea Harriers and twelve Sea Kings) and accommodation for a further 120 crew (aircrew and command staff) was added. The ship's magazines were enlarged, allowing Sea Eagle anti-ship missiles to be carried for the Sea Harriers, while also increasing the number of torpedoes carried for the ship's helicopters. Air defences and the air-sea search radar and sonar were upgraded while the old and characteristic Sea Dart launcher was removed from its bow, enabling the ship's flight deck to be enlarged. 


She was decommissioned on 3 August 2005 but she and her sister  Invincible class carriers were to be replaced, this time with two much larger Queen Elizabeth-class aircraft carriers, with the first, HMS Queen Elizabeth, commissioned in late 2017. They displace around 65,000 tonnes each, more than three times the displacement of the Invincible class. 

The British aircraft carrier force remains far from redundant!


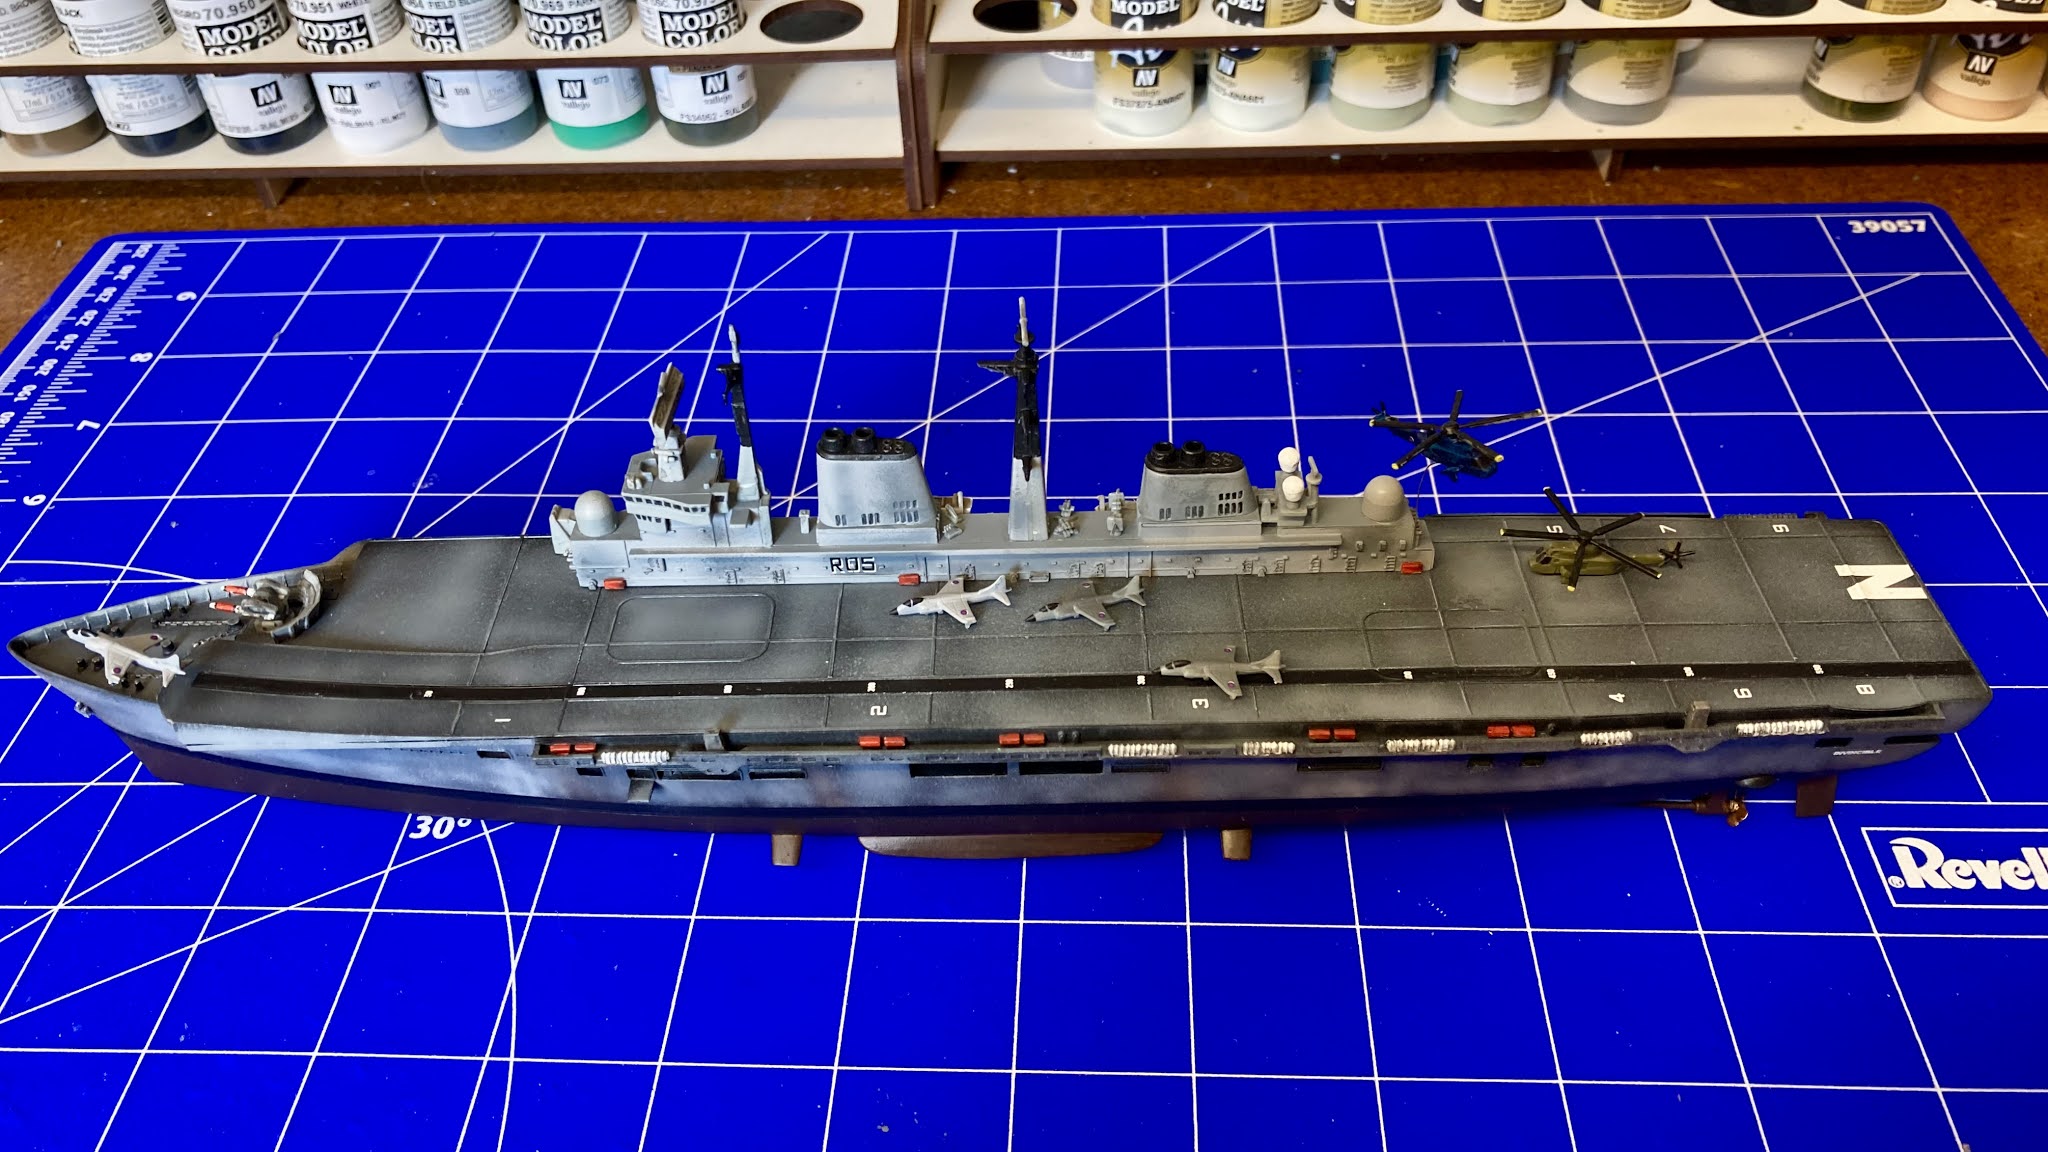
Revell’s 1:700 scale British Legends model, HMS Invincible 

The kit of HMS Invincible used for my build, was Revell’s 1:700 scale British Legends model, and perfectly labelled Falklands War. This is a 2020 re-boxed kit of one first released in 1998 by the Hong Kong model maker Dragon. Overall it was a very enjoyable build, with a good bit of detail and cleanly fitting parts. I probably went a little overboard with my weathering, very much being inspired by the rust streaked pictures of both of the other Falklands War legends, HMS Hermes and HMS Fearless. And why not apply a little artistic licence to show her as I think she deserved to look, after sailing 8000 miles and facing 3 months of battle!


Revell's box art also inspired me to have a Sea Harrier flying off the ski ramp and a Sea King helicopter just launched, on air sea rescue duty, both held aloft on thin pieces of fuse wire. You may also spot the different colour schemes of Harriers from 801 and 809 NAS, about which will all be come clear in a later post, and the AntiSubmarine and Commando Sea Kings which were the subjects of two of my earlier builds. 


For the diorama, you may also have noticed that rather than building a full sea scape, I decided to try a bit of CGI, and having a couple more watery scenes to build, this probably won't be the last CGI you'll see from me either. Some may feel that I've been too romanic in placing HMS Invincible against an idyllic sunrise, and may be it's not typically what you'd see on a winter's day in the South Atlantic, but I understand that on the morning of the British D-Day landings at Port San Carlos, the sky was unexpectedly clear, so this is again, is my interpretation of that moment, when HMS Invincible launched her Sea Harriers to protect the British landing ships against Argentine attack.  

Next week, I’ll introduce you to the Sea Harrier. 


------

The Model

Brand: Revell
Title: H.M.S. Invincible (Falklands War)
Number: 05172
Scale: 1:700
Type: Full kit
Released: 2020 | Rebox 


Tuesday, 5 January 2021

Douglas A-4Q Skyhawk

In 1967, the Amarda Nacional Argentina (ANA) - the Argentine Navy - made enquiries as to the possibility of acquiring HMS Hermes, but while Britain deliberated, the ANA struck a deal with the Dutch to purchase HMNLS Karel Doorman, the former war time British carrier, HMS Venerable. As the renamed ARA 25 de Mayo - after the country’s Independence Day - sailed through the Channel en route to its new home, Hawker test pilot, John Farley, took part in an elaborate marketing ploy, to encourage Argentina to place orders for the new Harrier jump jet, by landing one on the flight deck! The ANA Admirals, however, opted for second hand McDonnell Douglas A4 Skyhawks from the US, for a 1/10 of the cost of the Harrier.


The Skyhawk, which first flew in 1954,  was a relatively common US Navy aircraft export of the postwar era. Due to its small size, it could be operated from the older, smaller World War II-era aircraft carriers still used by many smaller navies during the 1960s, and so a perfect match for the former HMS Venerable. These older ships were often unable to accommodate newer navy fighters such as the F-4 Phantom or F-8 Crusader, which were faster and more capable than the A-4, but significantly larger and heavier than older naval fighters.

Airfix 1:72 A-4Q Skyhawk

It is somewhat ironic that during the 1982 Falklands War, HMS Hermes was to be the flagship of the British Task Force on its 8,000 mile mission to recapture the Falkland Islands from the Argentines, and the aircraft it carried were none other than the Harrier jump jet. The aircraft carrier, ARA 25 de Mayo, meanwhile, provided the Argentines with a convenient platform from which to launch their A4 Skyhawk fighter bombers against the British Fleet. 

Argentine A-4Q Skyhawk aboard aircraft carrier, ARA 25 de Mayo

On ARA 25 de Mayo, one of the Skyhawk squadron’s flights, 3 Escuadrilla, was organised into two units of 3, rostered into watches. On 2nd May, Captain de Corberta Alberto Philippi’s unit of 3 pale grey Skyhawks were fitted with low-drag 500lb Mk.82 Snake Eye retarded bombs, chalked on one was the name of its intended recipient: HMS INVINCIBLE. When the time came, however, there was too little wind, nor power in 25 de Mayo’s old catapult, to launch the aircraft with their full bomb load and extra fuel. At that very same time, British concern over a possible Battle of Midway type attack on its carrier force, if they were to get caught in the pincer movement being seemingly being played out by 25 de Mayo, in the south, and the light cruiser, ARA General Belgrano, from the north, led the British government to make the morally difficult decision to sink the cruiser with a couple of torpedos from the nuclear submarine, HMS Conqueror. This great old war time cruiser, which as USS Phoenix had survived the 1941 Japanese attack on Pearl Harbour, had served with the Argentine navy for over 30 years. Its sinking sent such fearsome ripples through the military leadership, that the following day, the Argentine fleet was recalled. 25 de Mayo would take no part in the war, while Philippi’s Skyhawks returned to their base on the mainland and would now have twice the distance to cover to reach the British Task Force.

Chalked on one [bomb] was the name of its intended recipient: HMS INVINCIBLE

After a number of false alarms, on 21st May, after confirmed reports of the British landings, Philippi was to finally lead his 3 Skyhawks on their first action over the Falkland Islands. The target was a frigate, HMS Ardent, that had detatched from the main concentration of British ships and was thought to be operating as a radar picket ship, directing Sea Harriers (SHAR), on Combat Air Patrol (CAP), to intercept Argentine jets and keep them away from the landing force. Flying in, just feet above the sea, HMS Ardent was spotted by the three Argentine fighter bombers. Armed with Oerlikon Cannon, HMS Ardent fired a volley of 20mm shells, kicking up water ahead of Philippi’s lead Skyhawk. As HMS Ardent swung her 4.5 inch gun turret around, Philippi returned fire with his 20mm Colt cannon mounted beneath the cockpit. Jamming after just a few rounds, he pulled up to 300 feet to commence his bombing run, any lower and the bombs’ fuzes wouldn’t arm. The Snake Eye bomb load was released and landed with direct hits on the stern of the ship. Over his shoulder, Philippi got a clear view of HMS Ardent ablaze, with thick oily smoke rising from the mortally wounded frigate. At least one of the other Skyhawks released bombs which added to the inferno, before the three pale grey Skyhawks pealed away, returning in the direction they had come.

HMS Ardent ablaze

Unbeknown to them, however, they had been spotted. First by a couple of SHARs on CAP from HMS Invincible who, being out of range, vectored in another pair of SHARs from HMS Hermes. Philippi had just started to relax, believing they were in the clear, when his wingman called out. The pilots jettisoned their drop tanks and bomb racks hoping to secure what little speed they could to evade the pursuing SHARs. With the SHARs having comparable performance and carrying the new and improved Sidewinder 9L, there was very little Philippi could do but pull eject handle, as the tail of his Skyhawk erupted under the exploding force of the heatseeking missile. At 480 knots, 130 knots over the safe speed to eject, it was amazing that Philippi survived the ordeal as, extracting himself from ejector seat and parachute, he safely swam the short distance to the shore. 

It was not long before his wingman had the second Harrier on his six, but for reasons which became clear later, the Sidewinders would not fire. Switching to the ADEN 30mm cannon slung beneath the SHAR, all 240 rounds were released in a 2.5 second burst ripping holes across the Skyhawk’s wings. Despite losing electronics, hydraulics, oxygen supply and port landing gear, the rugged little Skyhawk miraculously remained airborne but with no way to land, the pilot had to eject over the sea to be later rescued. 

The third Skyhawk was suffered in a similar fate, when again Sidewinders failed to engage, the SHAR pilot switched to guns and striking the Skyhawk in the fuselage, this time it exploded, leaving little recognisable wreckage from the resulting fireball. 

Airfix 1:72 A-4Q Skyhawk

3 Escuadrilla’s, first day of action may have seen the success in the destruction of one British ship, but with the loss of 40% of their available airframes and potentially a third of their pilots, the cost was high. As the day closed, the mainland had no news of the state of any survivors and the Super Étendard pilots of 2 Escuadrilla,  sharing the same base, were now more eager than ever to seek revenge. All they needed was a confirmed target for their Exocet missiles, something they got 4 days later, when they hit the Atlantic Conveyor. 


3 Escuadrilla A-4Q Skyhawk with a 2 Escuadrilla Super Étendard in the hanger

During the 1982 Falklands War, Argentina deployed 48 Skyhawk warplanes (26 A-4B, 12 A-4C and 10 A-4Q aircraft). Armed with unguided bombs and lacking any electronic or missile self-defense, Argentine Air Force Skyhawks sank the Type 42 destroyer Coventry and inflicted a variety of damage on several others: Type 21 frigate Antelope (subsequently sunk during attempted disposal of unexploded bombs), RFA Sir Galahad (subsequently scuttled as a war grave), Type 42 Glasgow, Leander-class frigate Argonaut, Type 22 frigate Broadsword, and RFA Sir Tristram. Argentine Navy A-4Qs, flying from Río Grande, Tierra del Fuego naval air station, also played a role in the bombing attacks against British ships, destroying the Type 21 Ardent.

In all, 22 Skyhawks (10 A-4Bs, nine A-4Cs, and three A-4Qs) were lost to all causes in the six-week-long war.  These losses included eight to British Sea Harriers, seven to ship-launched surface-to-air missiles, four to ground-launched surface-to-air missiles and anti-aircraft fire (including one to "friendly fire"), and three to crashes.


The Model:

Brand: Airfix
Title: Douglas A-4B/Q Skyhawk
Number: A03029A
Scale: 1:72
Type: Full kit
Released: 2012 | New Tool 


Thursday, 31 December 2020

Happy New Year!

Happy Friday, Happy New Year!

I know it’s not Friday but I've lost all track of time over this festive period and today feels like Friday! 

As I switched from scale model making this week, pedalling instead for 20+ hours to complete the cycling 'Festive 500' (km) challenge, I thought I'd share a roundup of my 9 months of lockdown creations and will reopen the model factory, with a new creation, from next week .. there’s actually a sneak preview in the attached, which, if you've been paying attention, you may notice.

Wishing you all a safe, healthy and Happy New Year! 


Wednesday, 23 December 2020

James Bond's Autogyro "Little Nellie"

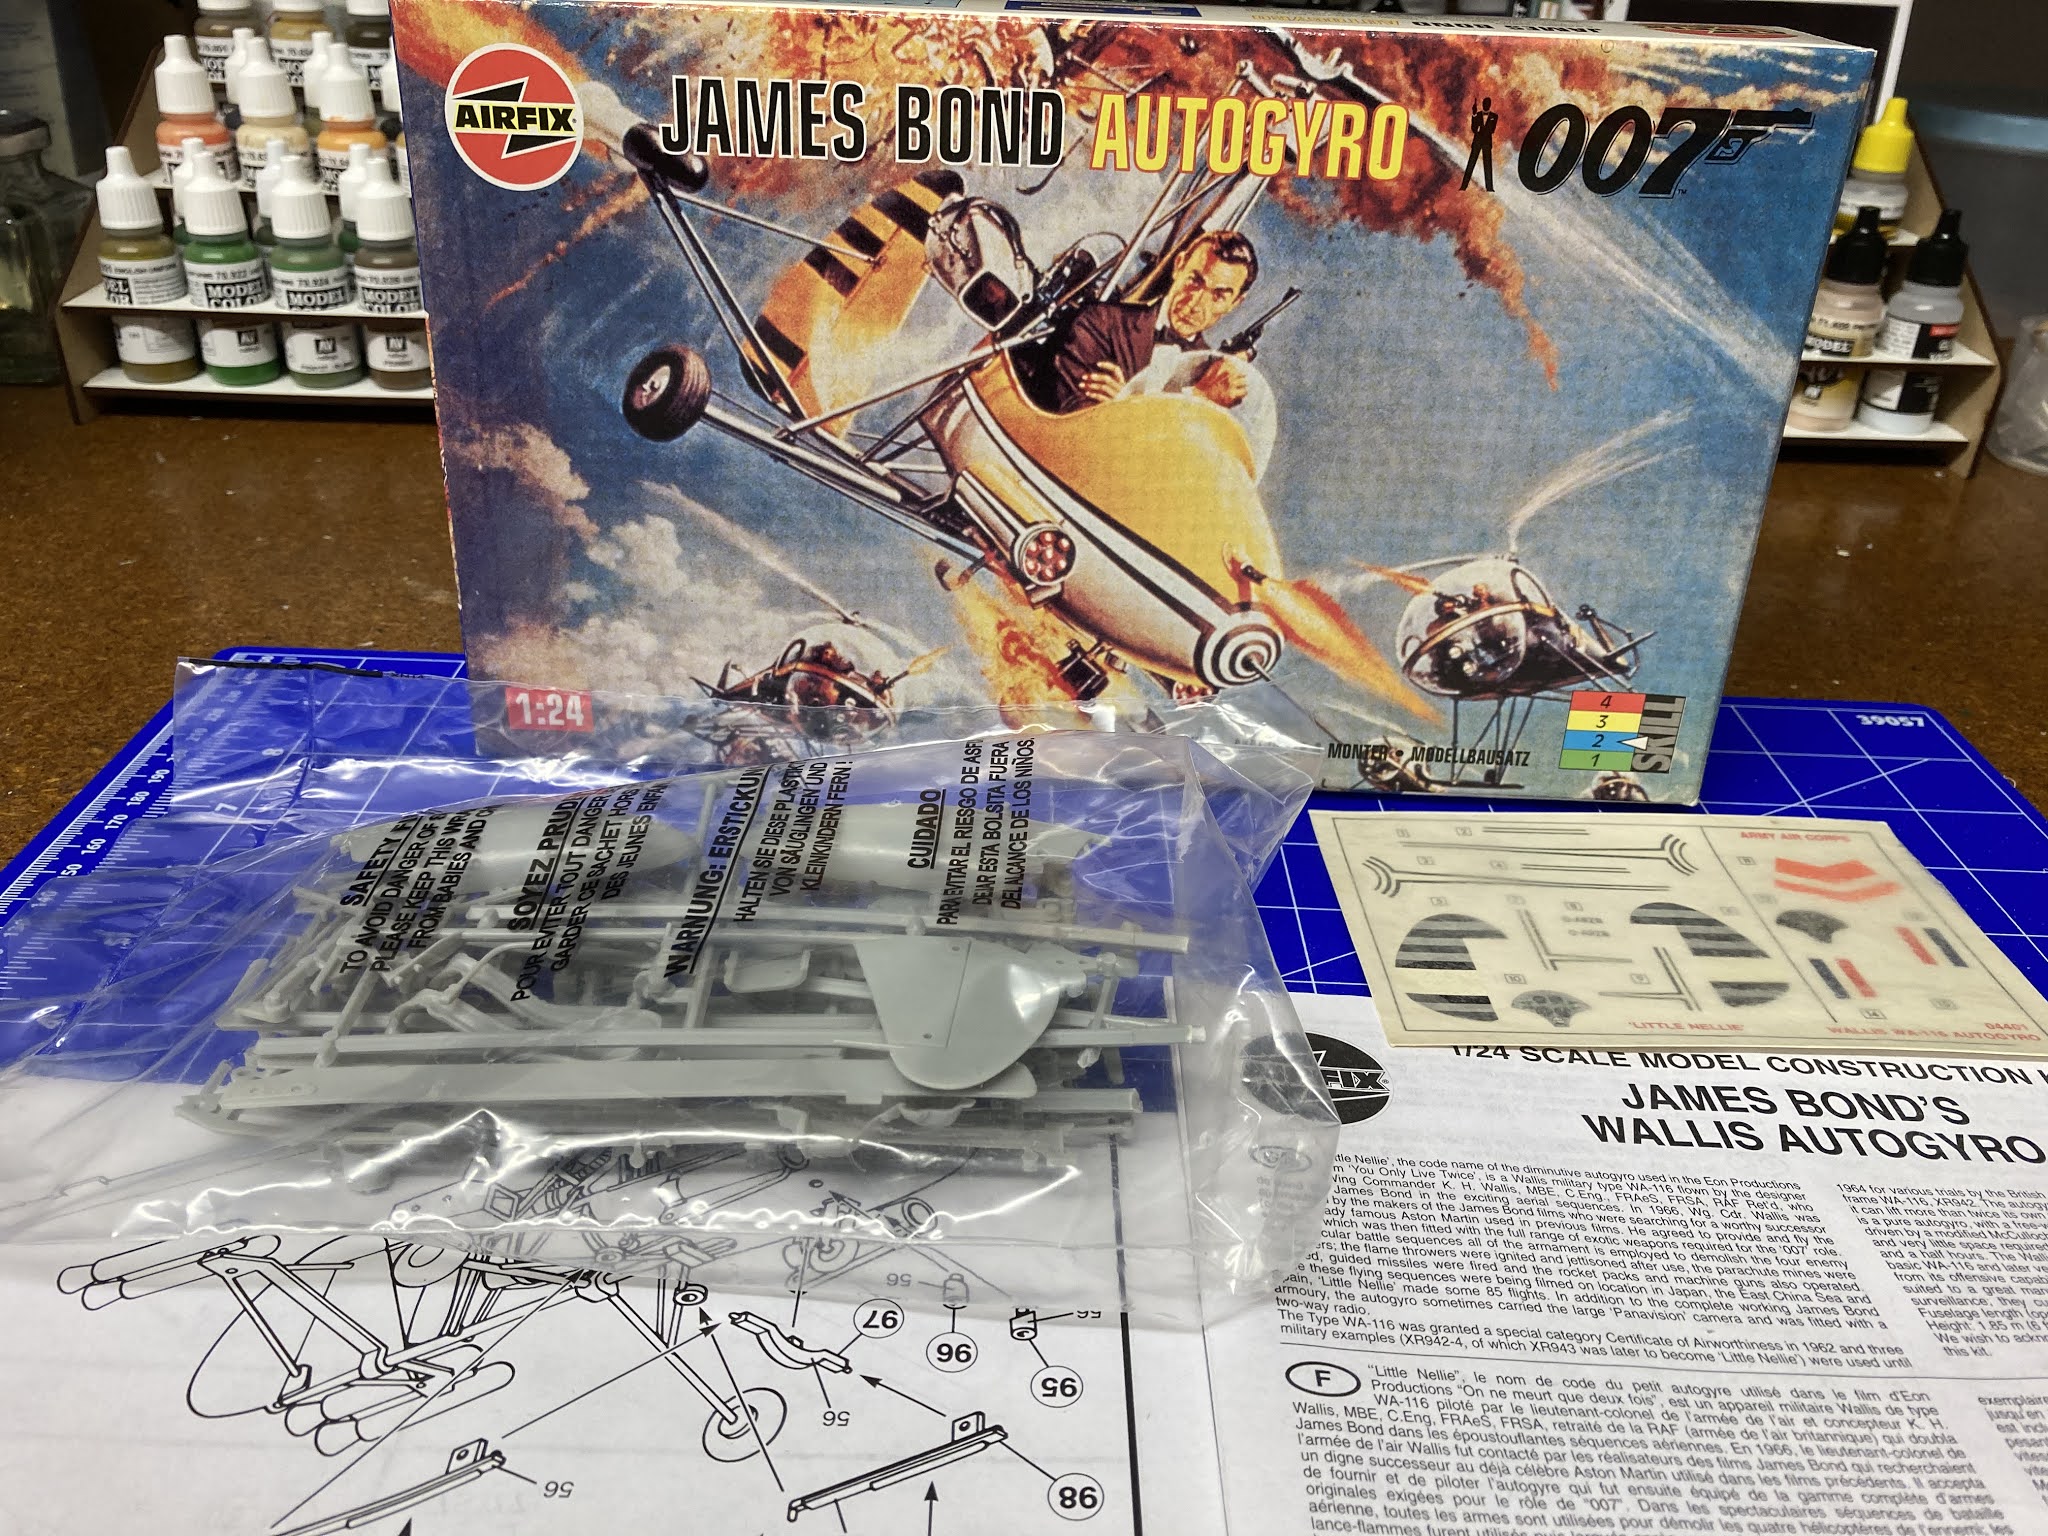
I thought, for my Christmas scale model build, I’d steer clear of anything military and share instead an iconic gadget from a James Bond film! For as far back as I can remember, before they became a commercial TV staple, Bond movies were a highlight in the Christmas & New Year TV schedule. It is for this memory that I make my excuse for building this Airfix 1:24 scale kit of Little Nellie, James Bond’s Autogiro from the 1967 film You Only Live Twice. As if I needed one! 

Airfix 1:24 scale Little Nellie

The model is Airfix's 1:24 scale kit, Little Nellie, James Bond’s Autogiro from the 1967 film You Only Live TwiceLittle Nellie, named after music hall star Nellie Wallace, who has a similar surname to its inventor, was a Wallis WA-116 Agile, a British autogyro developed in the early 1960s by former Royal Air Force Wing Commander Ken Wallis. In 1962, five WA-116s were built by Beagle Aircraft at Shoreham, three were for evaluation by the British Army Air Corps, one kept for Wallis’s own use while aircraft number G-ARZB went on to be transformed into Little Nellie.

Just wondering, if anyone ever used the British Army Air Corps decals! 

You Only Live Twice's film director, Lewis Gilbert, first got the idea to use this Bondlike piece of equipment in May 1966, after reading an article on the Russian-American autogiro expert, Igor Benson, in a Time Magazine. Coincidentally, and before a meeting could be set up with Igor, Ken Adam, Lewis's production designer, heard a BBC interview with Ken Wallace who was about to fly his autogyro for an Italian film company who were making their own spy movie, Dick Smart 2.007, in Brazil! Adam invited Wallis to Pinewood to demonstrate his autogyro and a deal was immediately struck. Shooting was to start in six weeks, so, while Beagle-built WA-116 G-ARZB was made more Bondlike, with various rockets and a new paint scheme, Wallis had just enough time to complete his Dick Smart commitment in Brazil, before joining Little Nellie in Kagoshima, Japan.

Q explains to Bond the additional features of Little Nellie

On 18th September 1966 the arial film unit, led by cameraman Johnny Jordan, started filming Little Nellie’s scene; a dogfight with four Bell H-13 helicopters over Mount Kirshima in Japan. 

These storyboards helped the aerial unit visualise the fight between
  Little Nellie and the SPECTRE helicopters.

The scene opens with Bond flying Little Nellie over a volcanic landscape in search of SPECTRE's secret base. Bond then sees the shadow of four helicopters closing in on his own. He's got company! 
 
The lead helicopter closes in and opens fire with its twin machine guns; you hear Little Nellie take glancing hits, but there's no serious damage. Bond lets it close further, to within range of his 2 rear facing flamethrowers, and with a push of a button the helicopter is engulfed in a fireball. 

Bond pulls back on the joystick to climb above the second and through the clear bubble canopy of the helicopter below, the SECTRE pilot looks up to sees a cloud of aerial mines, hung beneath little parachutes, floating down towards him. Multiple explosions rip the rota blades apart and the helicopter plummets to the ground. 

Dropping in behind the third attacker, Bond fires off a volley of bullets from the 2 forward facing machine guns, but being unable to sight the target within the guns 100 yard kill zone, they fail to hit. Bond, selects another switch, labelled Rocket Launcher. In doing so, a deadly stream of 14 incendiaries and high explosives are released, emptying the two launchers and obliterating the third helicopter.

Bond can't shake the fourth off his six, but Little Nellie has one final surprise for her attackers. The  last button Bond has available, is marked A-A Missiles. 2 heat seeking missiles lignite, race forward, and then turn, like dogs picking up a scent, through 180 degrees, and strike the last attack helicopter, head-on.

SPECTRE 0 : Little Nellie 4.  

Bond reports back to base, Bond reports back to base, “Little Nellie got a hot reception, 4 big shots made improper advances toward her, but defended her honour with great success"!


Airfix 1:24 scale Little Nellie

While the final cut gave the film franchise an audience pleasing visual hit, and another iconic Bond collectable, to join the Aston Martin DB5, it was not created without circumstance. Nine days into the shoot, on 27 September, there was an accident while filming one of the dogfight scenes. John Jordan was sitting with his feet on the skidoo the camera helicopter to film from the side when one of the SPECTRE helicopters flew in too close, slicing through the skid and Jordan's leg! The SPECTRE helicopter crashed into the mountainside, while the camera helicopter managed an unorthodox landing on stone blocks placed under the missing skid, John's foot, meanwhile, could not be saved. After being patched up by surgeons in Japan, it failed to properly heal, and so 6 months later, back in London, John asks for it to be amputated. This was not, however, the end for John Jordan's filming career. Fitted with a prosthetic foot, he was quickly back on set to film the the aerial sequences for both Chitty Chitty Bang Bang and Battle of Britain, produced by 007's Cubby Broccoli and Harry Saltzman, respectively. He even returns to complete the areal photography on next Bond epic, OHMSS.

Another James Bond Collectable - The Commemorative Little Nellie Stamp 17 March 2020 

The real life WA-116 was not without its own issues and although nearly all were used for research or demonstration flying by Wallis himself, the crash and the death of a test pilot, flying one of his autogyros at the Farnborough Air Show in 1970, led to Wallis finally withdrawing all his autogyros from use by anyone other than himself. Little Nellie (G-ARZB) is apparently still airworthy and was still being flown by Wallis right up until his death in 2013.

------

The model


Brand: Airfix
Title: James Bond's Autogyro
Number: 04401
Scale: 1:24
Released: 1967 | Rebox 1996)

BLOGGER IS DEAD LONG LIVE FACEBOOK & INSTAGRAM

It's been a blast Blogger, but not being able to upload any photos of my builds to this blog really makes you meaningless going forward....