Showing posts with label Panzer. Show all posts

Saturday, 7 June 2025

Panzer IV Ausf.H

I'm so pleased to be back building AFVs and in particular the next tank in my 1;35 scale German Panzer project, this one being the Airfix Panzer IV Ausf.. I know @Topcat_Ern did a great built of this one last May in the Normandy 1944 colours, so I thought I'd have another go at the whitewashed look of an Eastern Front version. Unlike that Panzer III that I recently built, which was white over German Grey, this Panzer IV seems to have had the site applied over Dark Yellow, which will be different.

This 2019 Airfix release is based on a 2018 Academy kit and looks really nice. It also has rubber tracks which I don't normally like, but with the armoured skits fitted, you'll not see too much of them.

The first task in the instructions is to drill all the clearly marked out holes for the ancillary bits and bobs later. It's surprising just how long this takes!

Fitting the chassis pieces is the next very simple task ... but I've halted at a decision point surrounding which rear plate to fit, as there two options with no explanation - intriguing! My Osprey New Vanguard guide on the Panzer IV has a drawing of an Ausf H with what looks to be the more detailed drive ends, so I’ve decided to fit the more detailed part G42 for no other reason than that. The same book was also used to decide on the correct ‘cast idler wheel’, the one with the narrower double set of spokes.

This kit seems to have a number of these random decision points. Oddly, such options would normally be easy to decide on as they tend to follow a final scheme; not however, as far as I can see, this one! The next decision point is the type of return rollers to fit. The two options look to be either rubber or steel tyred versions, the latter, I believe, being a rubber saving ‘upgrade’.  Checking through my 1979 collection of Bruce Quarrie “Panzers in Russia” WW2 photo albums, I came across a photo of a PzKpfw IV H and supporting infantry where the Panzer clearly has the rubber saving steel return rollers and so parts H60 & H62 were selected. 

With the wheels installed, superstructure constructed and dry fit to the chassis, it really does look a solid, well designed kit. The challenge facing me now is deciding on which version of bullet splash guard to fit! I’m thinking the more elaborate one with seemingly more protection. 

I've fitted that bullet splash guard with the extra raised section - all the better to protect the crew from projectiles making their way through the join between turret and superstructure. I understand that bullet splash was first seen as an issue for tank crews during WWI. It occurs when a bullet hits an armoured plate, does not penetrate, but fractures into tiny pieces of sharp metal that flies in all directions at high speed. I never stop learning with this hobby! 


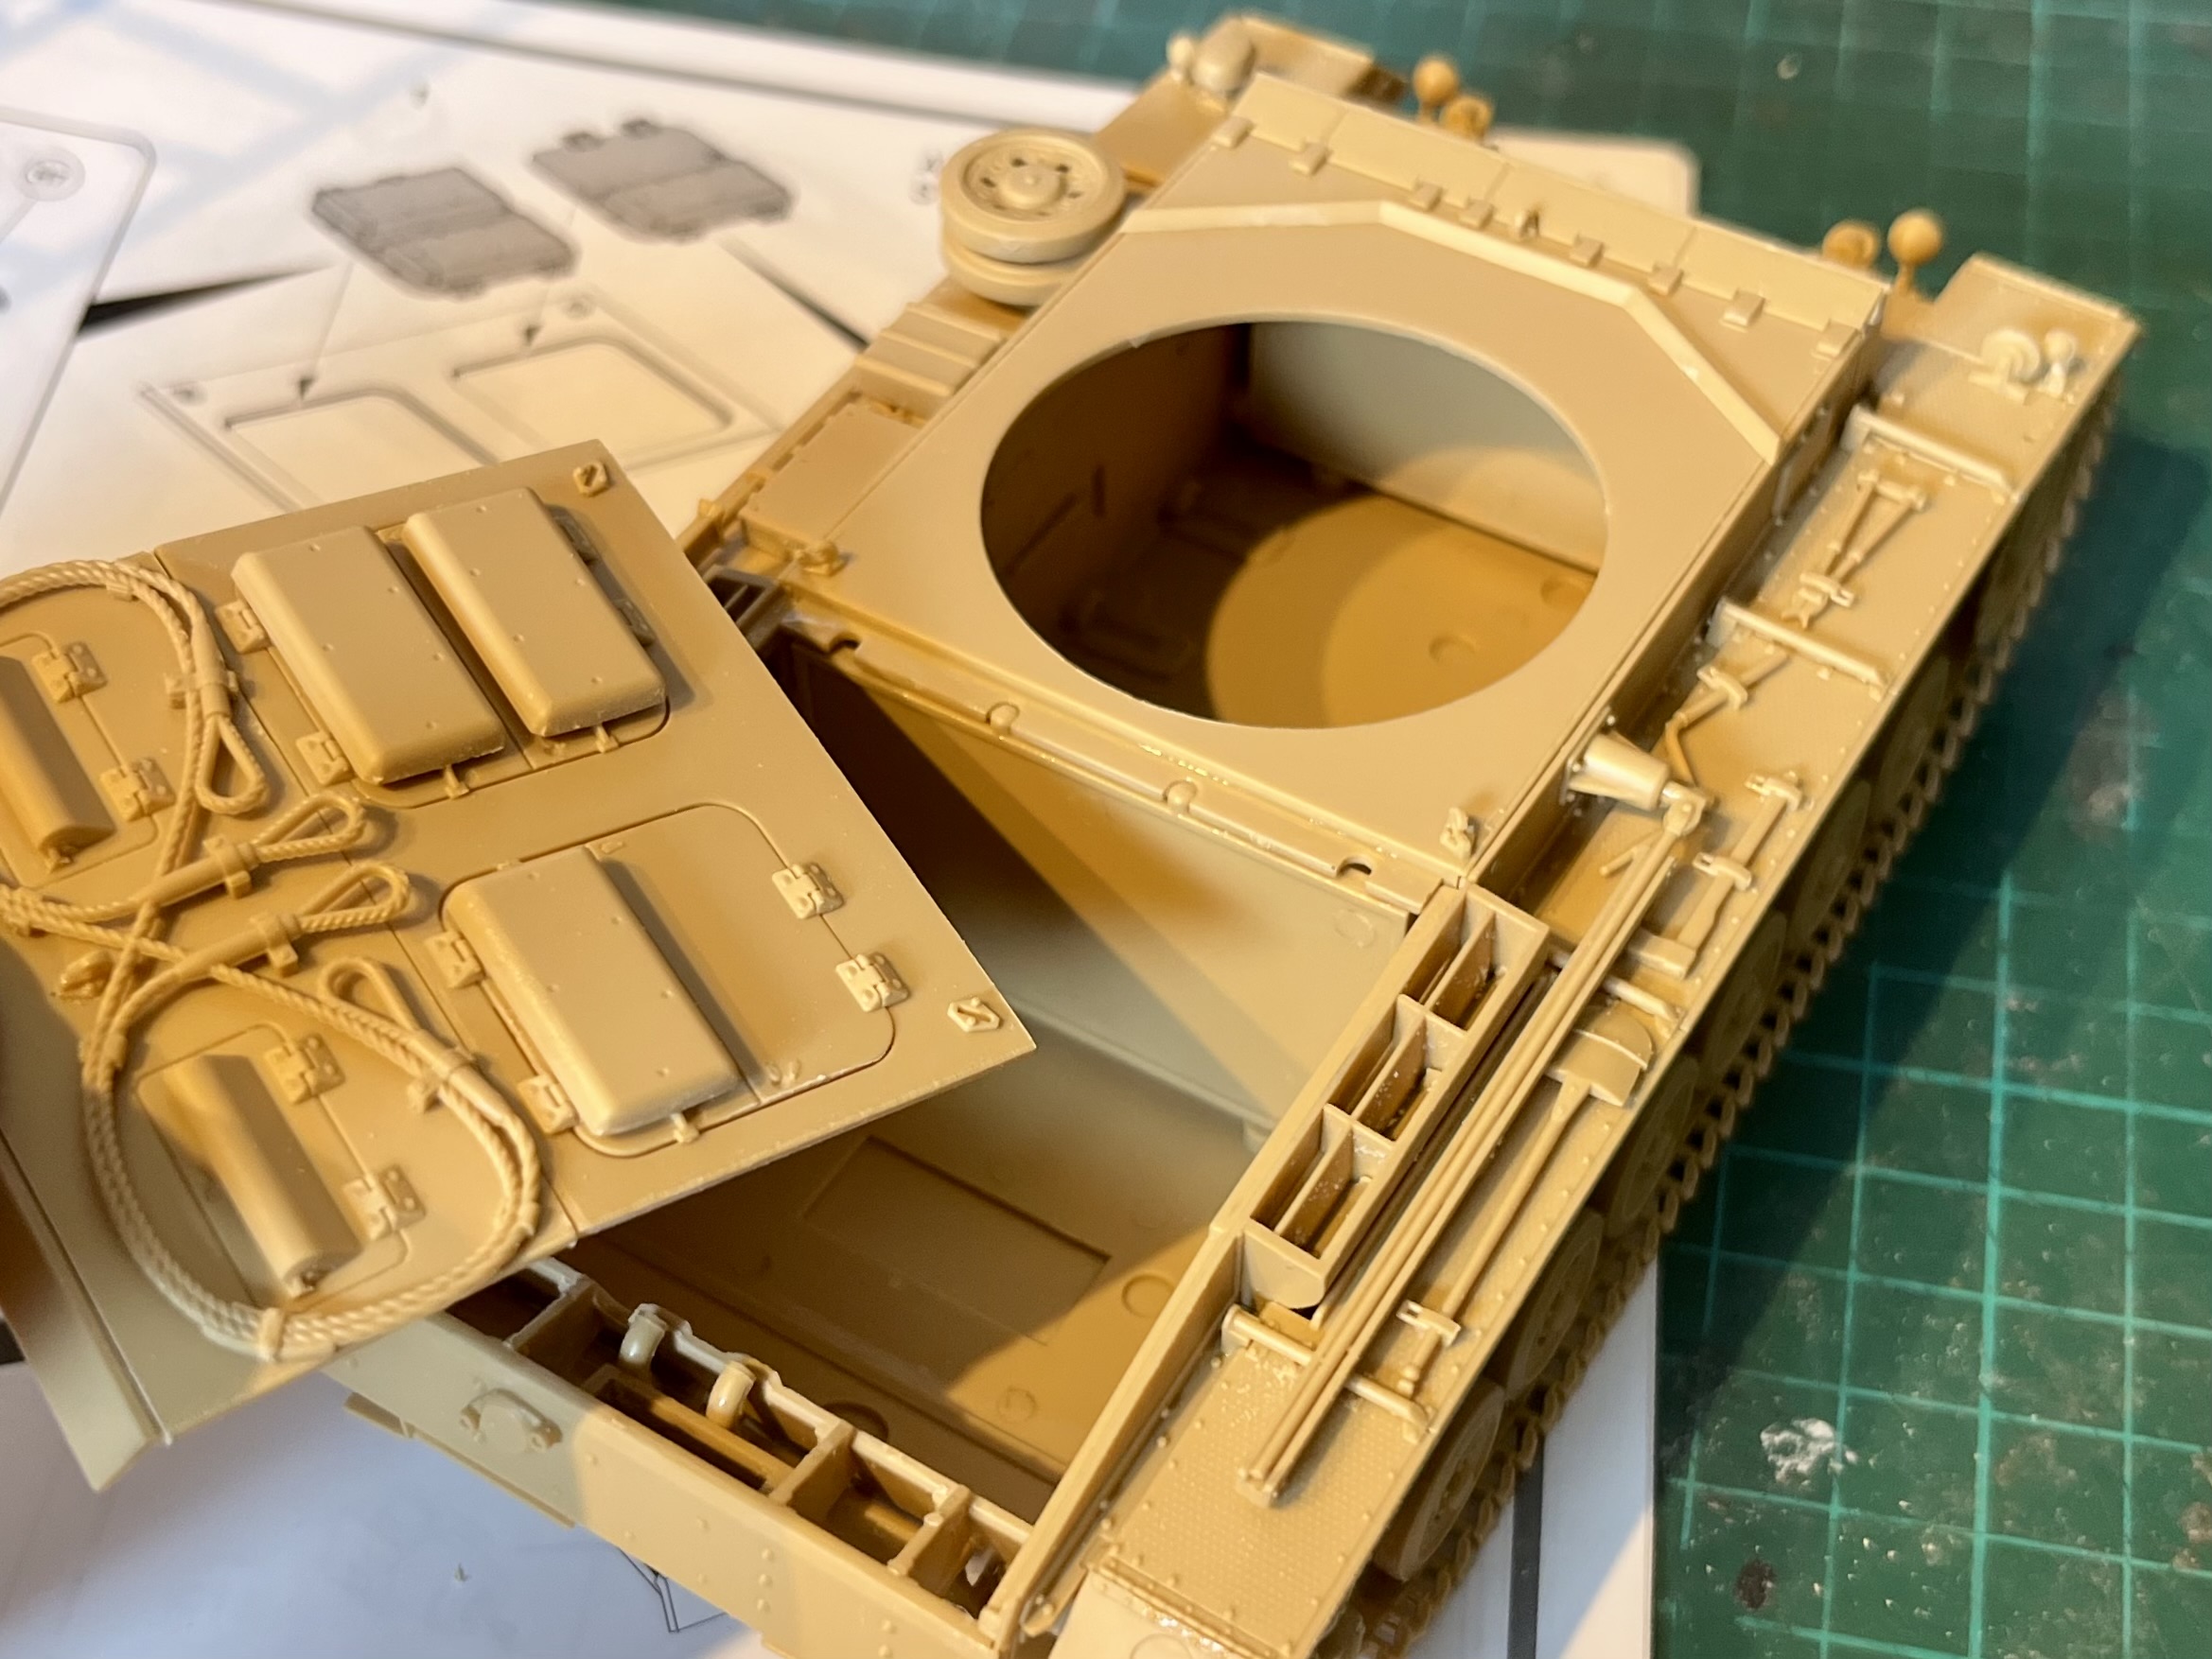
Work on the Panzer IV now focusses on fitting tracks and building the body of the tank. There is really so much detail in this kit, it's fantastic. You'll see from the above picture that I decided to prime the lower drive train area. I did this before fitting it to the superstructure as I wanted to get good coverage in those hidden recesses between the wheels and around the tracks which I sometimes find challenging once mudguards etc. are in place.

Next, I move onto building the skirts and the turret. I believe, having fitted these to the Stug IV, that I can leave the skirts detachable as they should hang nicely off those spiked rails, which means that I can fit them later which is vital if I'm to be able to get to paint the detailing on those tools and spare wheels.

The construction is complete and I’ve really enjoyed building this kit; there’s just so much detail to enjoy. I’ve also found a 3DGizmo German Tank Commander that fits without surgery! I do like having a figure in my tanks.

I decided to apply the chalk white winter camouflage over just the dark yellow base coat rather than apply the addition camouflage colours of green and brown, as I felt these would just get lost. I then distressed the white surface with a Humbrol weathering brush and added grime with set of oils and finally a little snow effect to bring the temperature now to that of winter on the eastern front!

While the Airfix painting instructions suggest this Panzer IV was part of the 3rd or 20th Panzer Division, my research has identified it to more likely to be a tank of the 4th Panzer Division, 35 Panzer Regiment. Both the 3rd and 4th use the Berlin bear emblem, but it’s the official shield symbol that belongs to German 4th Panzer Division that clinches it for me. Quite interestingly, the addition of crossed swords below the emblem was apparently added in August 1943 after the Generalmajor and commander of the 4th Panzer Division, General Erich Schneider (1894-1980) was awarded the Knight's Cross.


One final post from me on this Panzer IV is an embarrassing correction. Someone pointed out to me that I’d attached the Turret Schurzen upside down! Considering the number of Panzer IV pictures I had studied and the time it took me to decide the correct way to fit these, I was stunned and shocked to have made such a school boy error!

So, I carefully removed them from their brackets and using a cotton bud I removed the varnish I’d applied with thinner. I then soaked them, decals down, in a solution of DecalFix for a good hour. 

Carefully using a blade I was able to tease the decals free and rotate them to the correct way up. Unfortunately the bear is handed and so I had to swap them between parts. Now if anyone has used decal softener you’ll appreciate this is no easy task, as a well softened decal is as fragile and temperamental as wet tissue paper! 


Final corrected shots of the Panzer IV


Monday, 28 April 2025

Panzer III Ausf J

Having just built Tamiya's Panzer II, I fancy now working my way through Airfix's Panzer III, IV & VI to complete the set. There are no fewer than 11 runners in this Panzer III kit, more parts than you can shake a stick at and it looks like the tracks are made up of individual pieces distributed across 4 runners, so this isn't going to be one of my sprint builds!


This kit can be built out of the box in one of two Eastern front schemes, so to be different, and as my preferred Afrika Korps scheme is not an option, I'm going to go for the long barrelled Scheme B, finished in White. I've not done one like this before, so will be a nice challenge. Also, with hindsight, this decision is a fortunate one, as the first task in the build is to pre-drill multiple 1mm holes in the 9 seemingly random pieces and if you get carried away, as I did, Scheme B requires one to drill all 20+ holes! 

I’ve built the chassis and running gear. I even blasted through the building of those tracks which I thought would be the end of me; just shows how the more you do something the easier it gets!

One interesting feature of this later Panzer III is the inclusion of the additional armour on the front vertical plate. Something that my Haynes Panzer III Manual - essential reading - covers in detail.

On seeing the reference pictures I have actually opened the visor, shown closed here, and will use some canopy glue to add some armoured glass in the gap Airfix have left in the kit.

I’ve loved building this kit … to me, it's definitely on of the better Academy mouldings I've seen … it’s superb. The only thing missing is a figure, however, for once one of my 3DGizmo German tank commanders does actually fit in the cupola; this one is way roomier than Tamiya's Panzer II. So I'm very happy with that!


This is a very interesting kit and probably deserves building in both markings as it covers the evolution of the Ausf J Panzer III. Following the instructions for Scheme B, the later 1943 Kharkov Offensive variant, I get to fit the spare set of wheels, and the additional spaced armour,  on the front vertical plate and 'Vorpanzer' (front armour) to the turret. The order to add extra armour came from Hitler via Field Marshal Keitel on 7 July 1941. It was the combat in North Africa, rather than Russia, that was the driver behind the order.

In addition to more armour I also get to fit the later 50mm KwK 39 gun, increased in length from the KwK 38's 2.1m (L/42) to 3.0m (L/60). Having previously been rejected, fearing that the longer barrel would restrict manoeuvrability if it protruded beyond the front hull, it increased its AP performance by around 30%.

The detailing of the gun's breach is a really nice touch and while there is an opportunity to have the turret's side hatches open, the lack of additional interior turret detail and being able to see my commander suspended in mid air had led me to close mine. There is however, a good opportunity for someone out there to do some nice interior scratch building, as Airfix (Academy) have started us off with a good bit of breach and inner hatch detailing.


Continuing with the detailing, I love the crisp moulding of this rear hull area. Those hatches could very easily be modified to reveal the Maybach engine beneath (scratch builders take note) and the accuracy of the later fitted mushroom air inlets introduced to improve cooling in North Africa is excellent.

Now, I move onto the fun bit … the colouring in. I have left the main wheels unglued so that, if I desire, I should be able to remove them with the tracks to paint separately, however, I have become more inclined recently to paint and weather them in situ, similarly the tools and boxes. My reasoning here is lightly spraying, as I do, the final camouflage colours over a good black layering of primer, I think provides for some nice shadowing, giving the model a better 3D look about it, and this includes the wheels and tracks. But that's just my view.  I will then aim to complete it in the winter markings of SS-Panzer Regiment 2, Kharkov Offensive, Russia, February 1943.

After a good covering of Black primer, which getting into all those nooks and crannies took quite some effort, I applied a layer of German Grey. I was almost tempted to leave the painting here, but the plain red tank number decals required would be probably not be visible against the dark background and I had promised myself the challenge of trying out a white wash winter camouflage scene. Oh yes, and as a last minute change, I added a bucket left over from a recent Fury Sherman build, something I'd seen in an archive photo and there were those hanging chains at the back just crying out for something to hang from them!

I then sprayed on a layer of diluted Vallejo chipping fluid across the whole tank. I had seen hairspray used in the same way before, but as I had the fluid thought using the correct medium would be OK. As it was, it did take a bit more white than I had anticipated to then evenly cover it owing to the paint forming, in places, into a bit of a crazy paving effect. Although dry, perhaps it needed longer to cure? I'm always a bit too hasty.  As you can see from these two pictures, I painted the solid colours with all ancillaries fixed, al be it I did remove the turret.

Once the White wash was dry, I pulled out my stiff Humbrol weathering brush and with a bit of water I worked on the edges and some of the flat areas which would perhaps get knocked, rubbed or walked on to remove some of the white. I had a number of winter Russian front archive pictures to work from and went for recreating a lighter bit of weathering for this one, it having only recently been painted.

I think those individual track pieces form a quite realistic line over the upper return wheels, the way they sag. They take quite an effort to build but I'm starting to warm to them in favour of the rubber tracks.

The 3DGizmo figure fitted in nicely, but I may have another go at detailing his uniform; I'm feeling his all black covering is lacking something.

I do like the crisp detailing on this kit, I found the suspension arms, particularly interesting as that was a unique feature of this model of tank. I decided also to leave a little of the white wash over painting on some of the tools, like the jack, as I am sure they would not have removed everything when applying the camouflage. 

Finally, I decided to leave the numbers off of the side of the turret and just affix them to the rear. I really did not fancy working them over the raised detail and again, reference pictures I've seen often omit them, as I am sure that after frequent reapplication of the white wash, the crews would soon tire of re-stensiling them back on!

I hope you like the final effect. I can see some things I'd do differently next time, but that's the beauty of this hobby, I don't think we ever stop learning

Wednesday, 23 April 2025

Panzer II

 This is the Tamiya 1:35 Panzer II that I picked up at the Yeovil Model show a couple of weekends ago from Crewkerne Models. 


I’m going to finish it with these Vallejo Afrika Korps colours that I’ve had in my stash since buying 3DGizmo resin figures at least 12 months ago for a Tiger I kit that’s still waiting to be built.

The dropper bottles in these themed sets from Vallejo are diddy little things, so it’s fortunate that the Panzer II is equally diddy! 

I don’t like to gripe but I’m going to. None of my 3D Gizmo  Afrika Korps resin figures fit my Tamiya Panzer II. The Commander’s aperture is no smaller than a Panzer IV or Tiger’s, why would it be when it is the right size for a 1:35 scale tank commander! Now I’ve loved 3D Gizmo for some years but, really, for £28+ I would have expected them to have done a little bit more homework here. 


The only fix I can see is to amputate the resin figures legs and do a bit of hip sanding … though I may just now go with the Tamiya figure and put it down to my long list of scale modelling experiences. I am starting to more frequently find these aftermarket bits and bobs a waste of money … perhaps it’s just because I’m beginning to be a bit of an old hand at this scale modelling lark! 

Using the Vallejo WW2 Afrika Korps AFV Camoflage set to paint my Tamiya Panzer II. 


Don’t know if it’s just the smaller bottles, they are diddy, but although badged their Air range, it was a little thicker and less easily spayed. 

Tamiya’s 1:35 scale Panzer II completed in the markings of R06, of the 15th Panzer Division, Afrika Korps. 


Used for reconnaissance rather than in an offensive role the full sized one was captured by the US Army on the surrender of the Axis forces in North Africa in 1943. 


I finished the kit with Vallejo’s Afrika Korps themed acrylic paints and weathered it with oils. 

Tuesday, 17 May 2022

Panzer V Panther Ausf A

I was given this Tamiya Panzer V Panther Ausf A as a birthday gift over a year ago, but you know how it is, when you have an extensive stash, the forward looking build calendar is full for some considerable time!

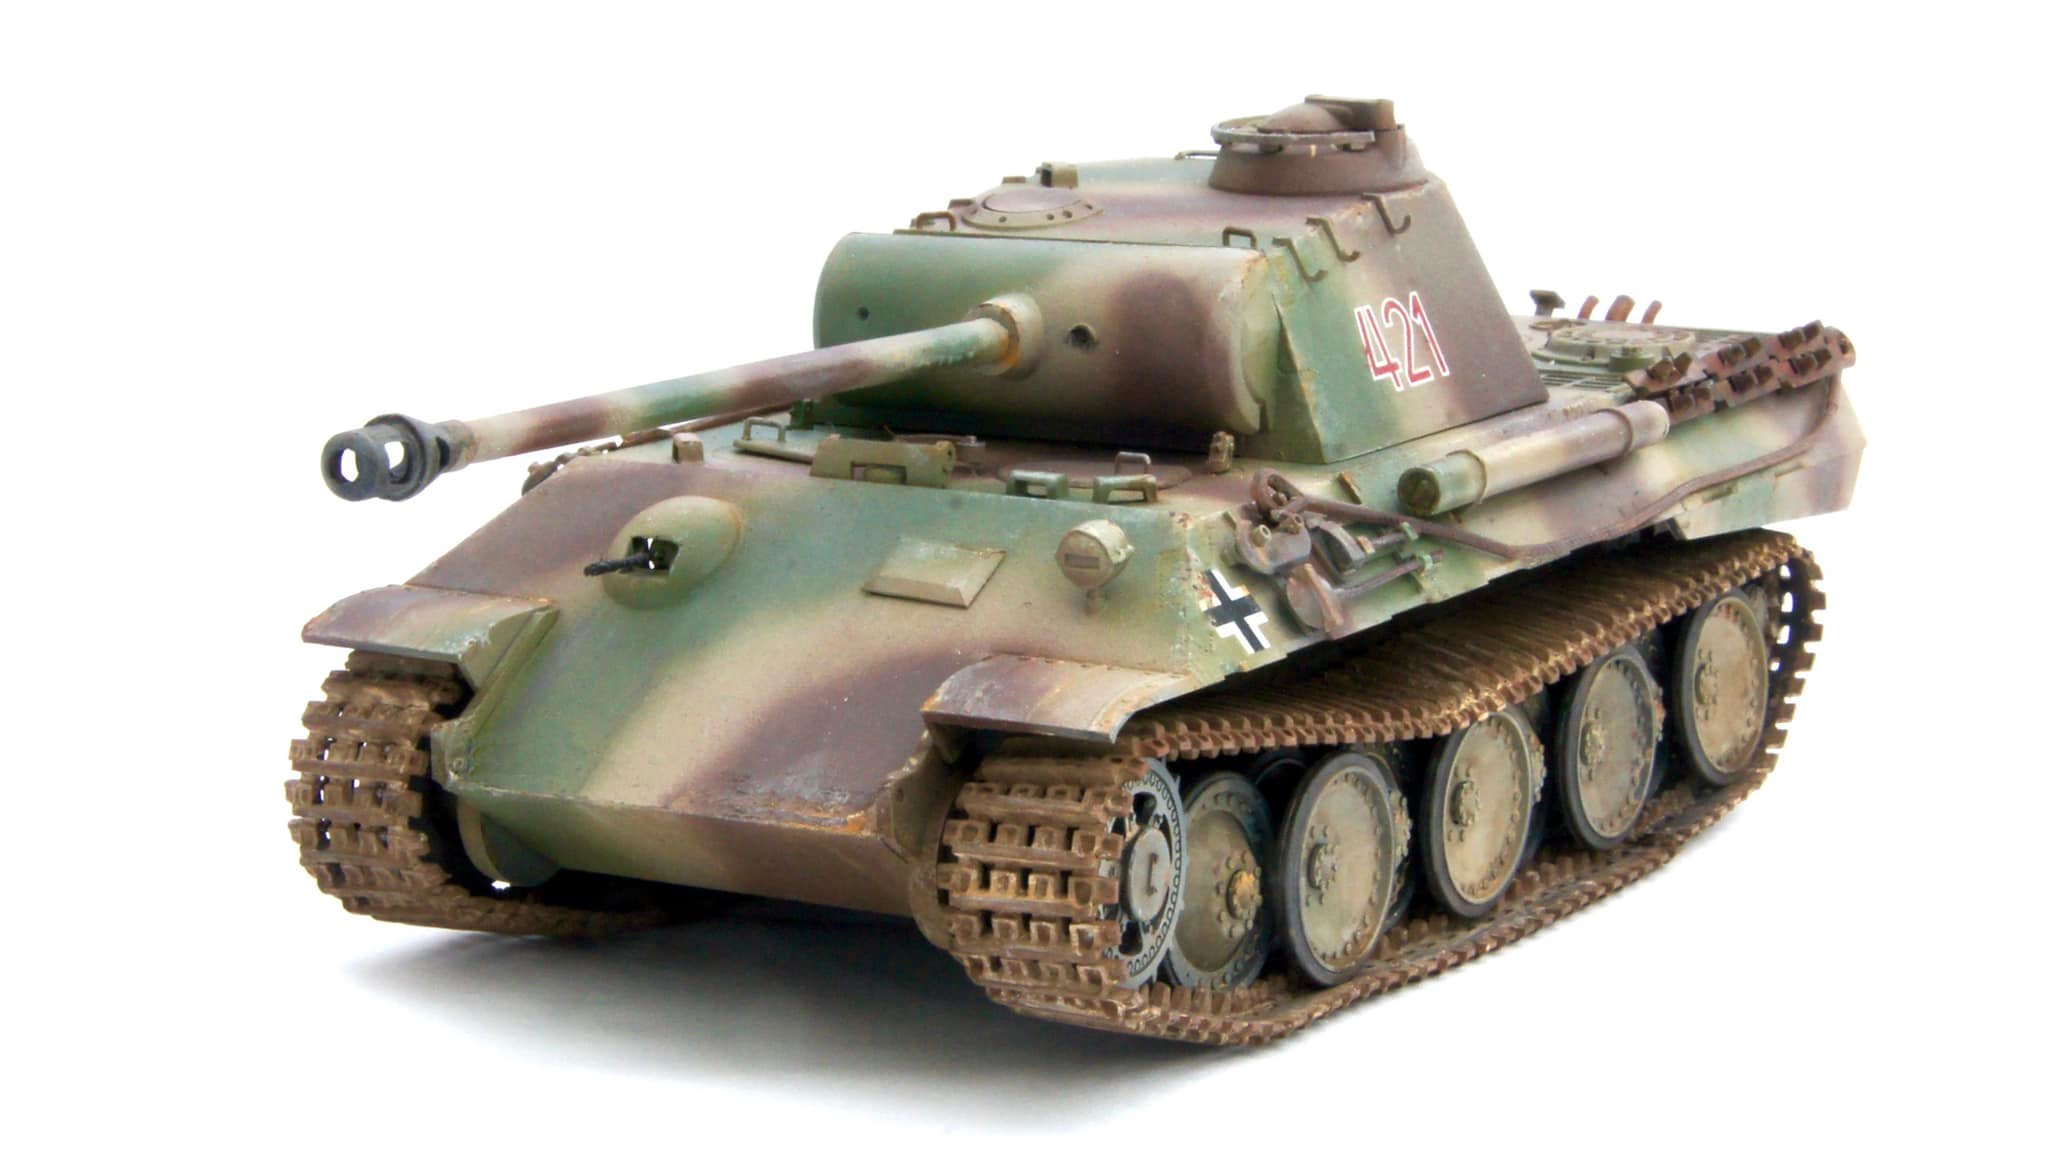
This is only my second venture into 1:35 scale AFVs, and although a 1960s mould, was great fun to build. I’ve also tried out a number of new weathering techniques, something which I’m discovering has many new opportunities in this scale. 

I’ve completed this Panther in the colours of a tank which may have served with the 2nd SS Panzer Division Das Reich during the 1944 Normandy campaign and a larger version of the 1:72 ‘mini me’ tanks I built for my Pegasus Bridge epic last year. I hope you like it  


BLOGGER IS DEAD LONG LIVE FACEBOOK & INSTAGRAM

It's been a blast Blogger, but not being able to upload any photos of my builds to this blog really makes you meaningless going forward....