My first Luftwaffe aircraft in ages. This is the Airfix 1:72 scale Messerschmitt BF109E-4 (1538) as flown by Oberleutnant Anton Schon with 8 Staffel Jagdgeschwader 54 (8/JG54), Luftwaffe in 1940
I had a real challenge with both the masking and airbrush on this build
At the age of 28, Anton was KIA on 27 September, 1940 over Tilbury-Kent while trying to put his crippled 109E fighter down, when he hit a fence, somersaulted over main road and crashed in flames near Brenley House, Boughton, near Canterbury, Kent, 12.05pm.
I loved the number of different decals included with this kit
He was buried at Boughton under Blean churchyard, and later moved to the War Cemetery at Cannock Chase, Block 1, Gr 177.
The detailing Airfix have thrown in is really impressive compared to an Me109 I have in my collection from 10 years ago.
Prior to his death, he had already he survived a mid-air collision on 15 November, 1939 over Lingen/Ems and on 12 August, 1940 being wounded over the Guines-South airfield in NE France c. 10.5 km S of Calais and 1 km SW of the village of Guînes when his aircraft sustained 60% damage. The airfield served as a forward Luftwaffe fighter field in 1940, abandoned after the Battle of Britain.It was on this same date that he recorded his first victory, a Spitfire at Ramsgate. One of the first fighter pilots to receive the EK 2 (Iron Cross 2nd Class).
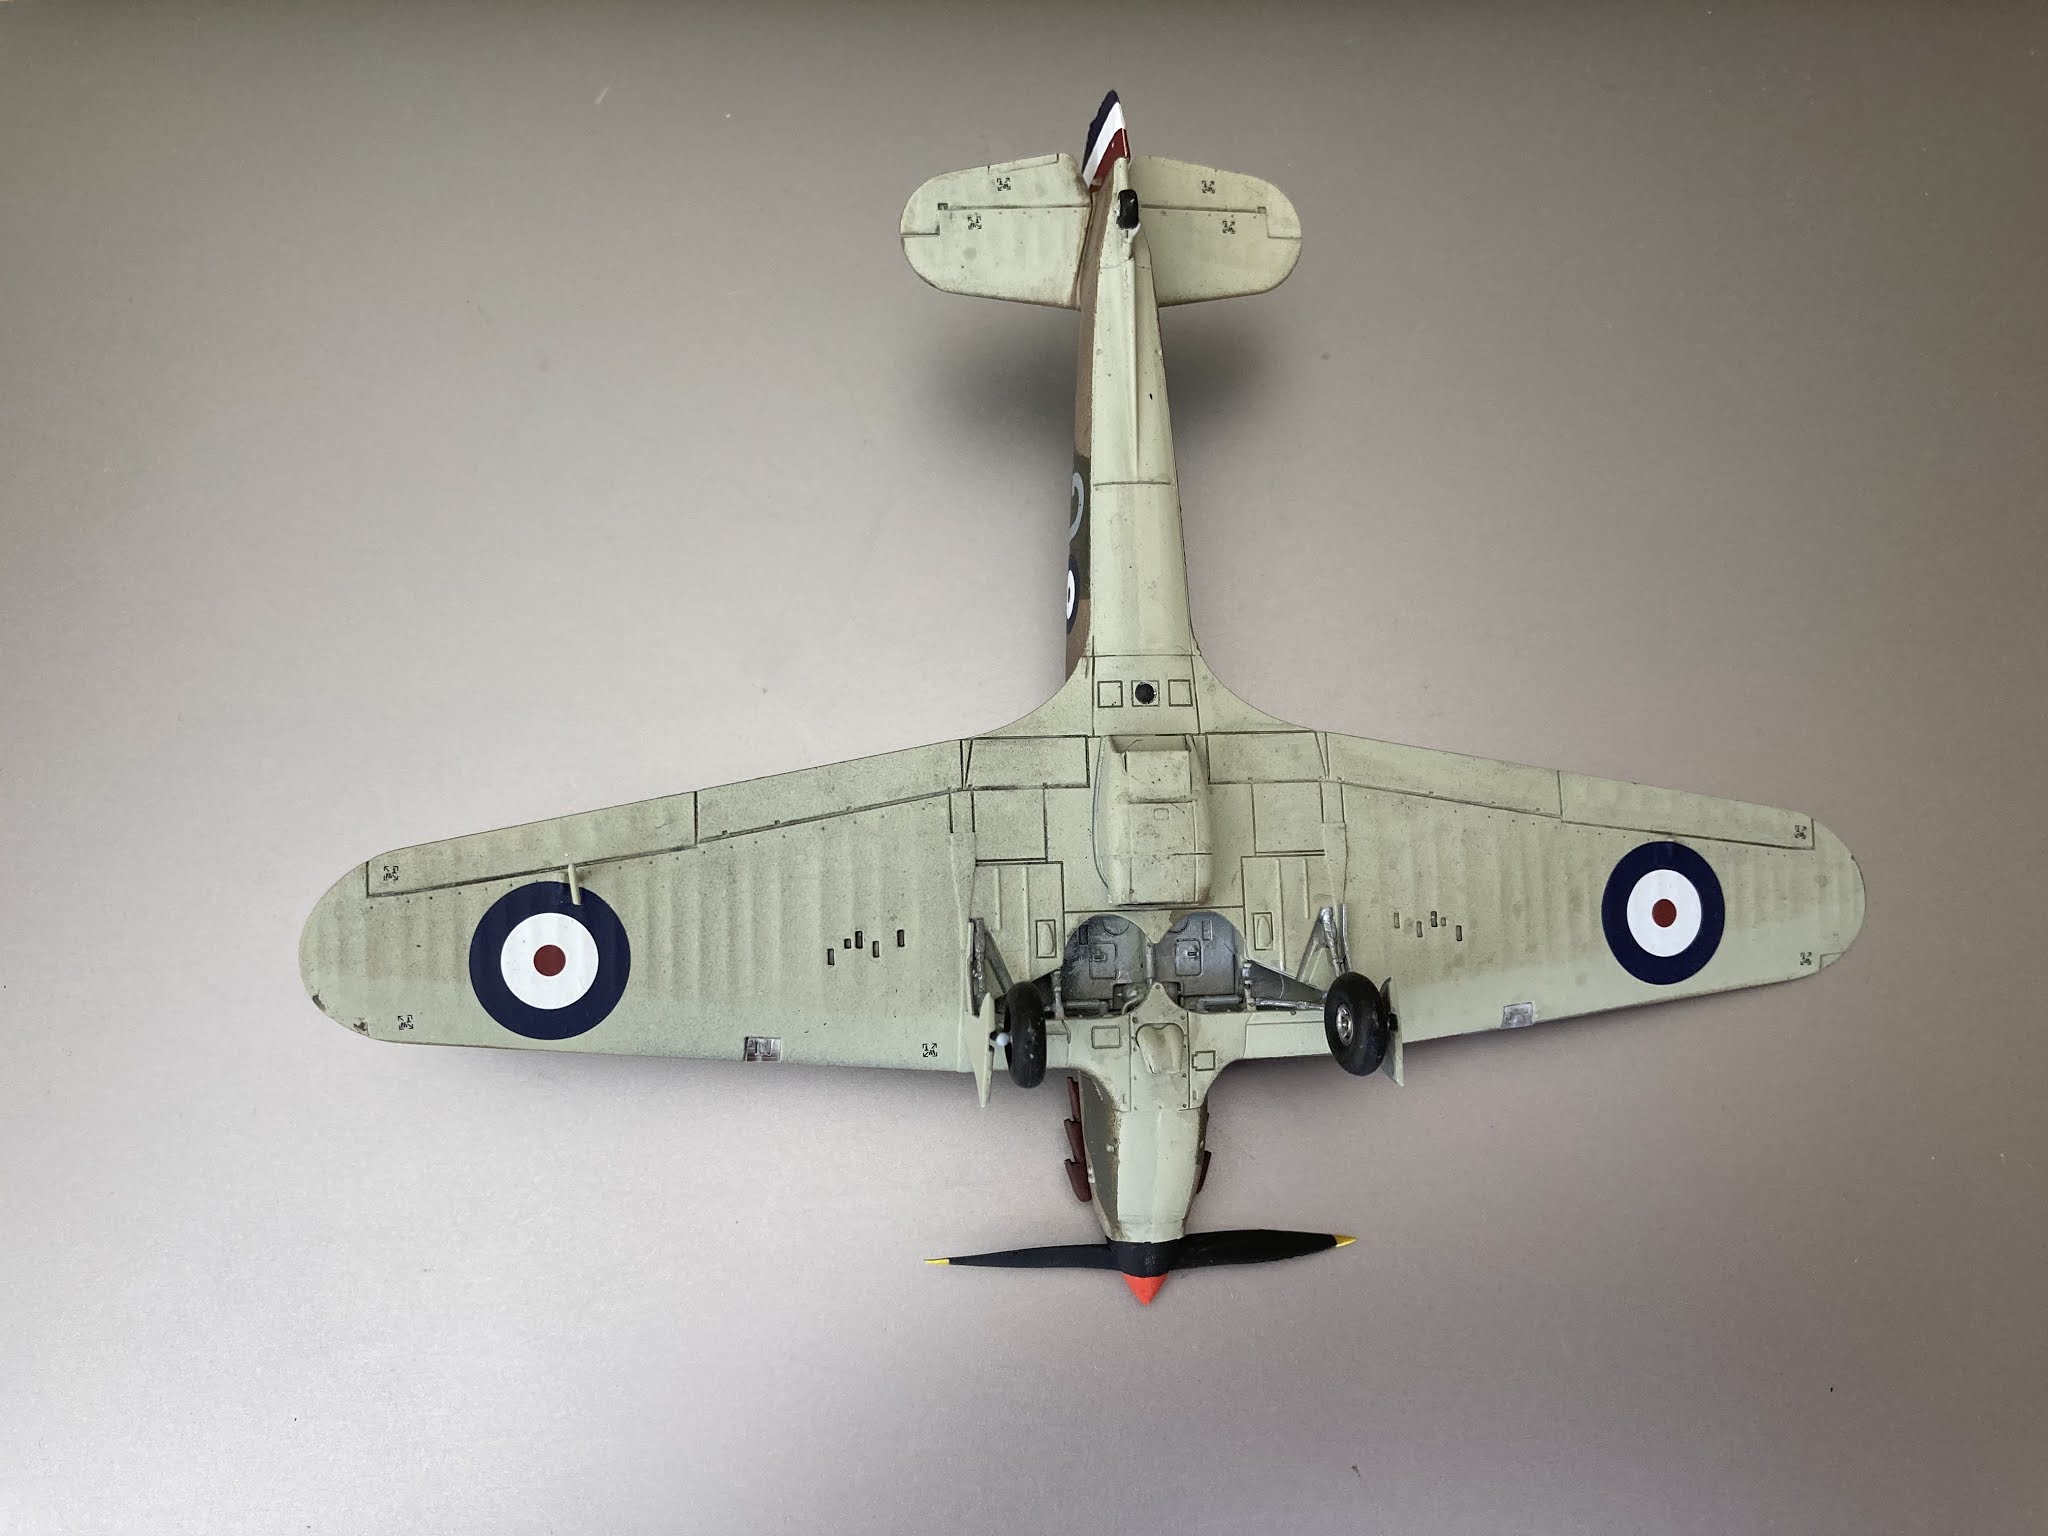
My second Hurricane in as many months is, Paul Richey’s ‘Phoney War’ Hurricane Mk1. This is a very nice and simple build, after the efforts on Pegasus Bridge, of an excellently produced 1:72 Airfix kit. It's the same kit I used as part of my Douglas Bader tribute. While that one was slightly ruined by me using AMMO of MIG Jimenez's version of RAF paints, where the green was far too bright, for Richey's Hurricane I invested in a set of Hataka's paints which look so much better!
1:72 Airfix Hurricane Mk.1
Flying Officer Paul HM Richey, is also the author of ‘Fighter Pilot’, a must read classic book of what it was like to be a fighter pilot in the war. Before he was wounded on 19 May 1940, Paul Richey had claimed ten victories, and later returned to operations in 1941, ending the war as a Wing Commander.
Note in the pictures the small roundels both on wings and fuselage. Originally these would have had a yellow outer ring which were painted out. The yellow returned to the fuselage roundel for the Battle of Britain while on the wings the red and blue were extended to fill the gap left by the yellow ring which was not replaced.
The two bladed propeller on the first Hurricanes was a throwback to the biplanes which it replaced and was made of wood. These had a tendency, as Richey discovered, to self destruct in the air when pushed to limits never dreamed of when first designed for the early biplanes. They were soon replaced with metal three bladed propellers.
Also taken from the early RAF biplanes is the full red white and blue stripes covering the tail rudder. these too were soon replaced with the more familiar boxed version positioned in front of the rudder.
Can you notice the contrasting wear added around the gun access panels?
For this build, I went slightly against the Airfix plans and left the squadron markings and serial numbers off the aircraft, so as to show Richey's aeroplane as it appeared in mid 1940. I also attempted a different weathering approach on this kit. I kept it light but wonder if you notice the contrasting wear I've added around the gun access panels?
One may just make out the black under paint on the tail
No.1 squadron were innovative in looking at markings and camouflage on their aircraft, also being instrumental in the overpainting of their earlier black and white underside, a look I also decided to go with and one which was later adopted by all British aircraft by the time of the Battle of Britain.
I bought Italeri's amazing Pegasus Bridge kit some 12 moths ago with a view to building it into a diorama in time for a 6th June, D-Day anniversary release. Having retired in April this year, I thought what a perfect time to make a start, little did I appreciate how close to the wire it would get!
The diorama ended up taking up 25% of a large repurposed Scalextric baseboard which I have been using since mid last year to showcase some of my model builds. After constructing and painting the bridge itself, all made from laser cut wood - the smell of which filled my loft space workshop - the challenge was with way to orientate it.
The Orientation of the Bridge
My original plan was to have the Café Gondrée, the small coffeehouse located on the west bank of the Caen Canal, at the northwest end of the Bénouville Bridge, now commonly referred to as the Pegasus Bridge and the glider on the southwest of the picture. Based on this design, I set about cutting out the canal, making it full width to accommodate the bridge then narrowing it to accommodate the glider. Meanwhile, my idea was to use the east of the remaining board for a later D-Day landing diorama.
My plan, however, started to unravel when I both totally underestimated the space required for the glider and was, in any case, having issues in sourcing a decent enough model which could play the part of the Café; the only reason for positioning the diorama in this way.
The view I originally intended to have
The view I finally settled on
Finally, after rotating the bridge through 180 degrees, it was clear that I preferred both the view this offered of the bridge and the space now available to the glider in the north east corner of the board. This unfortunately meant that I had not only lost the option to use this space for that later D-Day landing diorama, but I had also cut the canal too short! I could, in truth, have extended the canal to the east, but having spent hours to line, seal and edge the original cutout, I settled on making do with what I had.
The final view
Adding Water to the Canal
The reason I had to line and seal the cutout was to ensure when I added the water effect, it didn't all seep out through the layers of cardboard. Although the seal held firm, the space still required 1.5l of Woodland Scenics Realistic Water, which, at a cost of £25 per 500ml of fluid, I was very glad I had not gone and extended the canal! I'm still a real novice at water effects and learned loads on this one.
While not easy to see from the pictures, the process went as follows: I coloured the bottom of the cutout with a mottled blend of brown, green and blue acrylic paint. On applying the first layer of water, and there were 4 layers applied in all, the small ripples in plastic sheeting used to seal the cutting seem to get enhanced and annoyingly rose above the water level. The second layer of fluid then reacted badly with the first, creating its own ripples. I've no clear idea why this happened and can only think that it was because the first layer had not cured sufficiently. I later learned that to cure, the Realistic Water requires a temperature of above 20 degrees and we were going through a cold snap, made worse by the diorama being in the attic!
For the third layer, after removing the unusable sludge, I added a little grey and blue paint to some of the water to provide a better feeling of depth, and to hide some of the damage I had left in removing the old. In adding the paint, I made my second mistake in shaking the bottle. In addition to the 20 degree rule, the instructions also stated "do not shake". This third layer of water thus had small bubbles added, which while I was able to pop all the larger ones with a cocktail stick, left areas of aerated water, not a look I was after! The forth later of unshaken coloured water, however, sealed these bubbles beneath the surface and with hindsight, I think add a further element of both interest and depth. The sun had also come out and the loft space was now at the perfect temperature for very rapid curing, leaving me with a smooth and very realistic look of water.
While on the subject of water, I also added one of my poor German figures splashing head first into the canal together with a few bullet splashes. The water rising up around the soldier was crated by soaking cottonwool in the Realistic Water and then applying it to the surface of the hardening water and the bullet splashes were teased up at the same time using a cocktail stick. The final effect of adding the last layer of water, once this had all cured, I think made this look even more realistic.
The 6 Scenes
In addition to the centrepiece of the bridge itself, there are 6 clear scenes unfolding in this diorama which I will take you through in chronological order for June 1944.
1. French Resistance
Within 24 hours of D-Day, the BBC broadcast prearranged coded messages to the French Resistance to disrupt occupying German forces' transport and communication lines.
In the southeast corner of my diorama I have a small unit of Resistance med and women bringing down telephone wires to prevent the German troops at the bridge from calling on reinforcements. The wire, which you may just be able to see, is made of nylon thread and the explosion effects are made from painted cottonwool.
2. The Glider Landings
Six Airspeed Horsa gliders, piloted by 12 NCOs from 'C' Squadron, Glider Pilot Regiment, towed by Halifax bombers took off from RAF Tarrant Rushto, east of Blandford Forum in Dorset. Major John Howard and second in command Captain Brian Priday, leading 'D' Company, 2nd (Airborne) Battalion, Oxfordshire and Buckinghamshire Light Infantry, had the mission to seize the bridges over the River Orne and Caen Canal at Bénouville and Ranville intact and hold them until relieved.
Italeri's 1:72 Scale Horsa Glider crashed into barbed wire
My diorama is intended to show, Major John Howard's number one glider, which had Staff Sergeant Jim Wallwork at the controls, crashed into the barbed wire surrounding the canal bridge defences at 00:16 on 6th June 1944.
For the model of the Horsa Glider I used Italeri's 1:72 scale kit which was a lengthy and interesting build in itself. For speed, and as this was not going to be a display piece, I decided to use the decals of the D-Day black and white stripes rather than masking and painting them in as I would normally do, and likewise I sprayed the camouflage pattern freehand rather than masking, as no one was going to be getting up close to inspect this model.
Italeri provide some nicely crafted figures to accompany the glider kit
I would have liked to have left the tail broken away from the body, as they are apparently intended to do to facilitate a speedy exit from the glider, but as it was number 2 glider and not this one which broke up on landing, I went with the doors open view instead. With hindsight, I wish I'd gone with the tail off configuration as I only intended this diorama to give a feel for the event, rather than be an accurate interpretation.
3. The Canal Bridge Defences
Surrounding the canal bridge were trench defences and a gun emplacement. I constructed the trench by cutting out a channel in the card base and affixing pieces of painted toothpicks to the sides to replicate the trench being shored up with logs of wood.
Trench and 'large' anti-tank gun emplacement
The gun emplacement was cut from leftover wood from the Pegasus Bridge kit, and while the gun itself should have been a much smaller version, it looked so lost in the possibly oversized emplacement I built, that I dug out and repainted an old 88mm anti tank gun I had stashed away, which much better fitted scene.
Canal Bridge Defences
4. The Artillery Park
There is no evidence that I can find that there was ever an Artillery Park at Pegasus Bridge, but the kit provided a sign to one together with 3 pieces of artillery which had to be placed somewhere!
There was however, a pillbox, for which I added a couple from my stash together with a barrier which actually came with Italeri's Vietnam War set I made last year, but did not really fit in. I think that just as with my Artillery Park sign, Italeri throw in random bits they have for dioramas just to complete their kits.
Within this Artillery Park scene, I've used oil barrels and boxes which cane with the set, sandbags again from the Vietnam War kit, an Airfix German jeep, barbed wire made of binding found on an old paper pad
and the random artillery pieces provided, with the bridge. I also don't know whether there were any mines planted around the bridge, but I was on a roll with my sign production so it does have mines in my diorama!
5. Panzer Park
There is much written about how after the disastrous performance of the German Army on the Eastern Front in 1942 resulted in Hitler retained personal command of the Panzer devisions and then how on D-Day, no one would wake him to request their release now once he woke would anyone bring up the subject, because he was in a foul mood! Finally, by 4pm on 6th June, having earlier dismissed the landings as a feint, Hitler released two divisions of Panzer Group West, the 12th SS and Panzer Lehr, for deployment to the coast. While they played no part in preventing any Allied troops landing in Normandy, by the 7th June, they were at Caen, to participate in the defence of the town, action which severely held up the Allied's advance.
For my diorama, I thought I'd construct a small tank park with examples of some of the armour used in the campaign and all freshly painted in their Normandy tiger striped camouflage!
The models are a set of Airfix classics while the motorcycle was a late addition from Italeri's German Motorcycle set.
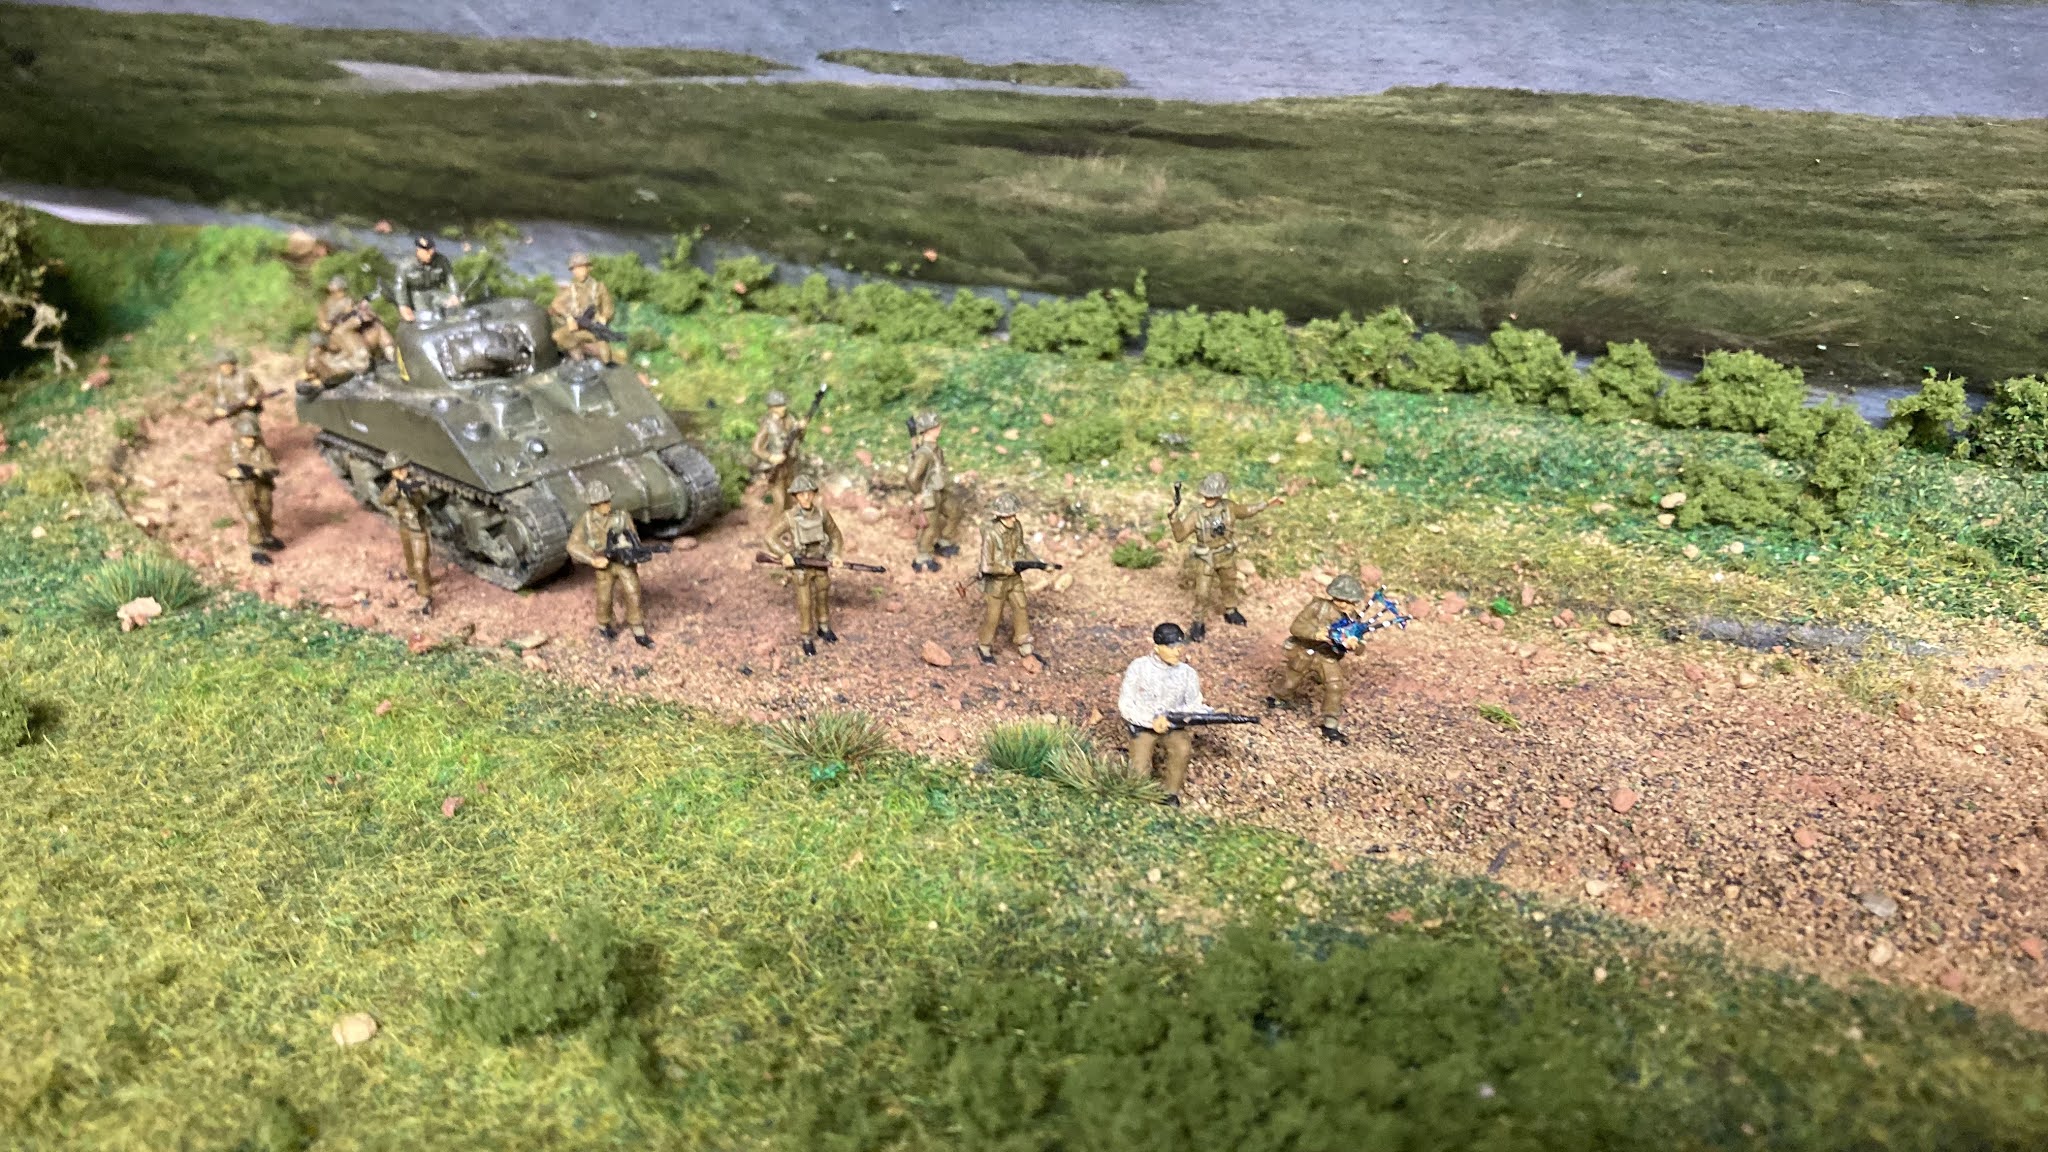
6. Arrival of Lord Lovat's Commandos
While first company of the 7th Parachute Battalion, commanded by Major Nigel Taylor, made there way to the bridges in the early morning, it is the arrival of Lord Lovat's Commandos from Sword Beach that marks the moment in history when Major John Howard and his glider troops were officially relieved.
It was at 13:30 on 6th June, that the men at the bridges heard the sound of bagpipes, played by Lord Lovat's piper, Bill Millin of No. 4 Commando, 1st Special Service Brigade. As the commandos arrived, they crossed the bridges and joined the rest of 6th Airborne Division defending the eastern perimeter. Some of the tanks accompanying the commandos moved into Bénouville to reinforce its defences, while others crossed the bridges with the commandos.
Airfix do not provide a piper in their British Infantry figures, so I had to make one. I also used on or my French Resistance figures to portray Lord Lovat, as he was known to wear an Aran jumper over his battle dress and there was the perfect figure in Caesar Miniatures box of Partisans.
The Video
One of my all time favourite films has to be 'The Longest Day' and so having built the bridge and related models, I just had to make a quick video using soundbites from the classic film to tell the story of the day. I hope you enjoy it!
On being liberated from Colditz on 16th April 1945, after three and a half years as a POW, Douglas Bader was itching to get back into combat, but when just 3 weeks later, on on 8th May 1945, Victory in Europe was declared, any opportunity that there may have been slipped away. Although the war against Japan was still stubbornly unresolved, and an RAF contingent known as Tiger Force was being prepared for operations against the enemy in the Pacific, the atomic bombs were to bring an end to the war before the Tiger Force never became operational.
After resting and recuperating, Bader was posted to his old station at Tangmere, with the rank of Group Captain, to command the Fighter Leaders’ School of the Central Fighter Establishment under Air Commodore Richard Atcherley, who had served with Douglas in 23 Squadron at Kenley in 1930. The appointment did not go well.
Bader, was completely out of touch with the air fighting tactics that came into force at the war’s end; tactics which, among other things, had seen fighter aircraft used increasingly in the ground-attack role. The aircraft being flown had also changed dramatically since his incarceration; even the Spitfire now in service was far removed from his Spitfire Mk.V in which he had crashed over France and many squadrons were now being equipped with the new fangled Gloster Meteor jets! Bader was, therefore, reassigned to command the North Weald sector of 11 Group, giving him control over twelve fighter squadrons based on six airfields and opportunity to organise probably the most spectacular flypast ever flown.
Battle of Britain 5th Anniversary Flypast
15 September 1945 was a day of great nostalgia for Bader as thousands crammed the streets of London, their eyes turned towards the sky, for the anniversary of the greatest air battle over the capital five years earlier.
Bader prepares to lead the flypast
Group Captain Douglas Bader had been chosen to organise a flypast of twenty squadrons and around 300 aircraft. The air armada was led by twelve Spitfires, each flown by a Battle of Britain veteran and out front, in the very first ‘vic’ of Spitfires, was Bader.
They assembled over Bader's base at North Weald and followed a route that took them in formation over Barking, West Ham, the East India Docks, Hyde Park, Northolt, Ruislip, Elstree, Walthamstow, Greenwich, Wimbledon, Teddington, Brent Reservoir and finally back to North Weald, where they dispersed to their home airfields. They swept across the capital under low cloud, the sky filled with the massed thunder of their engines.
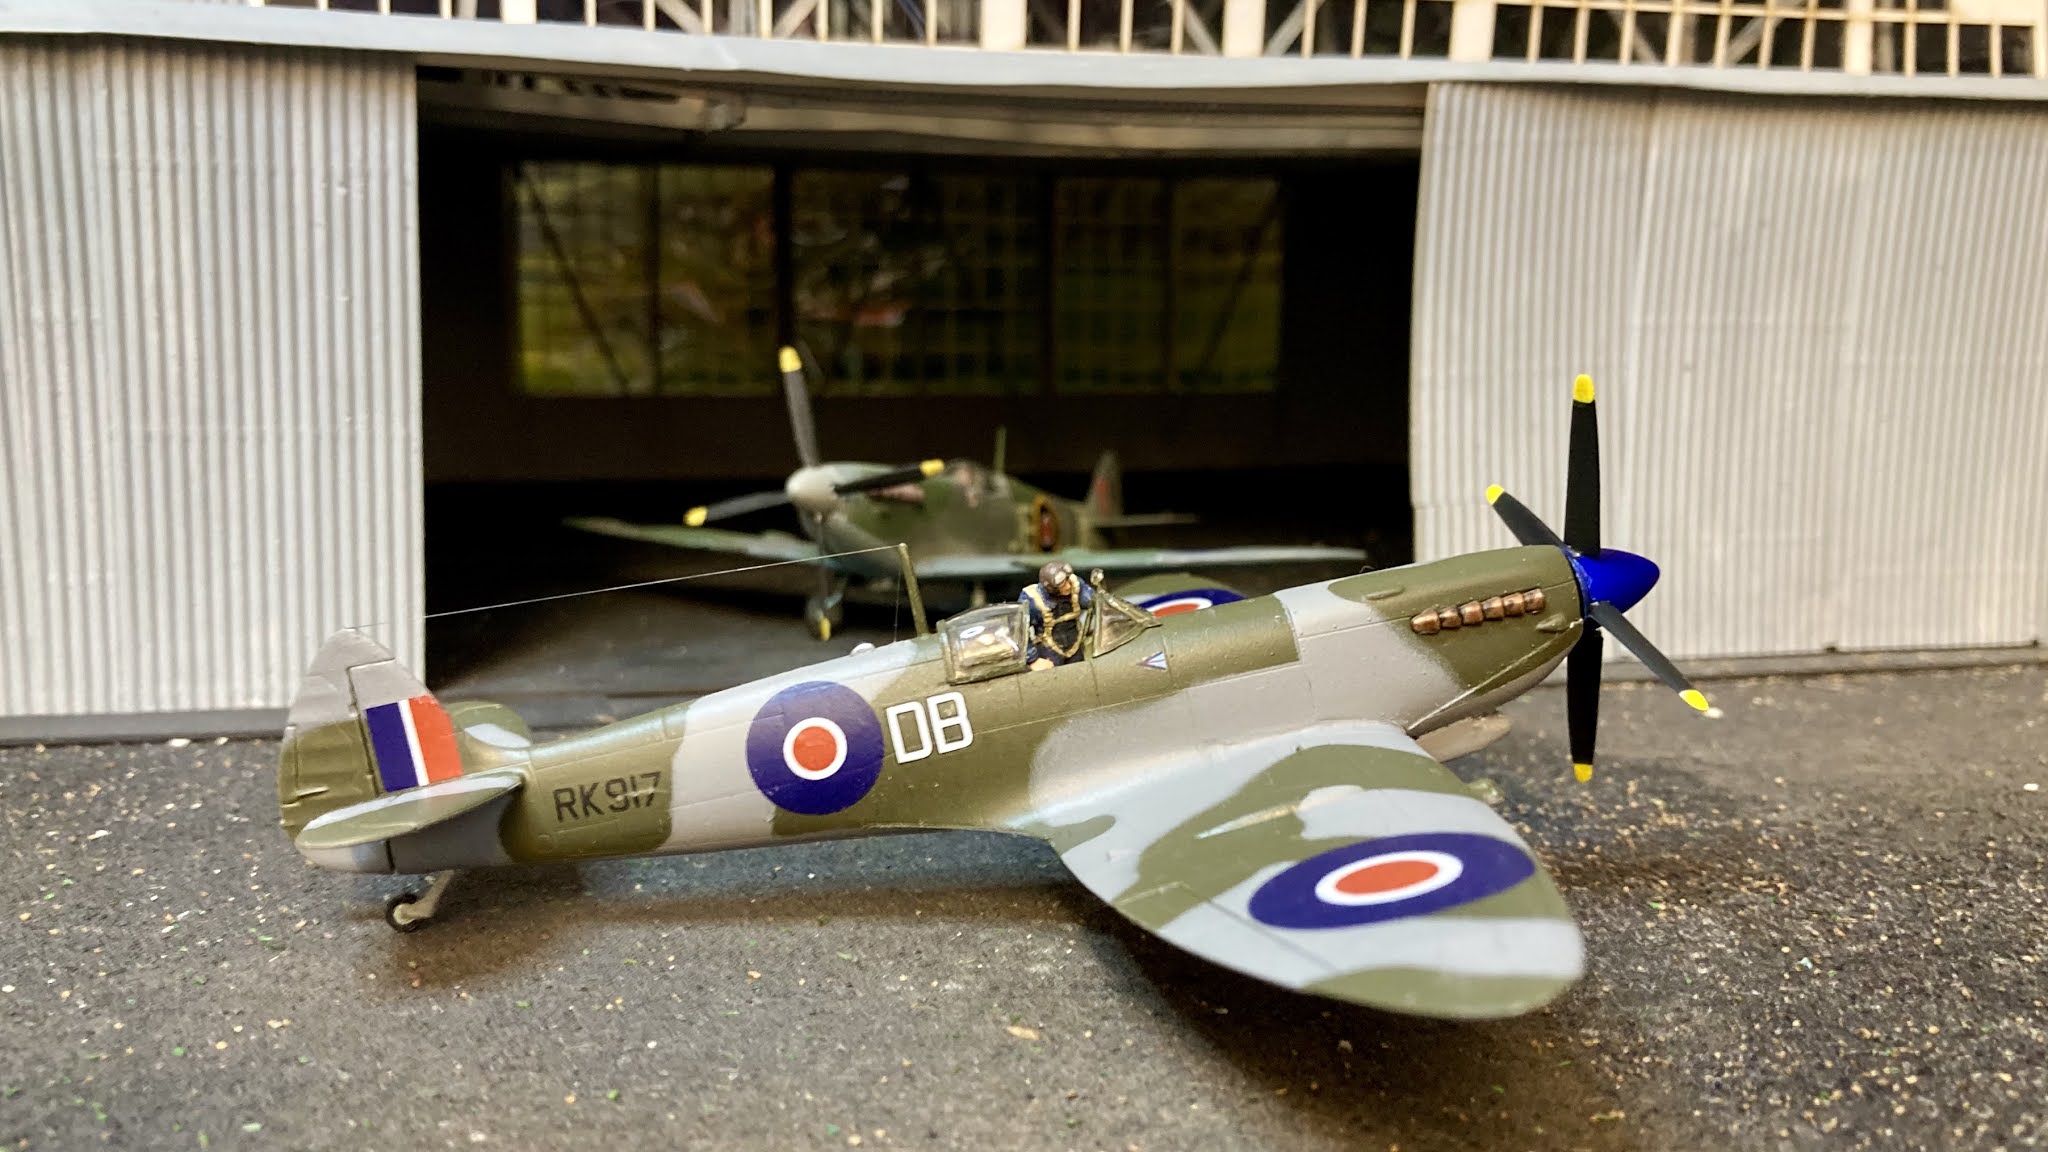
Douglas Bader's Spitfire Mk.IXe RK917
This final of my 4 aircraft tribute to Douglas Bader is the Spitfire Mk.IX which he flew when he led this 5th anniversary fly-past over Central London to commemorate the Battle of Britain, September 15th 1945.
Bader adopted RK917 as his personal aircraft while in command of the North Weald sector. As such it differed in markings, equipment and weaponry in comparison to other of the squadrons' aircraft.
What's interesting about RK917's markings were that for some reason the outer yellow ring of an otherwise standard Type C1 fuselage roundel had been over painted in blue, resulting in the incorrect ratio of the outer blue ring in proportion to the red and white of the roundel. In addition to the non-standard fuselage roundels was added the custom DB codes in white with a black outline.
RK917 was also painted very differently from the standard day fighter scheme. Compare in the photo below the tone of the lighter grey of Bader’s aircraft in the immediate foreground, with the tone of the same area on the aircraft behind and you'll note that there is no visible demarcation between the grey applied to the upper surfaces and the grey applied below. The colour scheme Bader is using is not the regular Day-Fighter scheme but more typical of the RAF night fighter scheme of overall Medium Sea Grey with a Dark Green disruptive pattern.
It is also clear from the archive images that on the day of the flypast, that RK917 had no tail band nor yellow leading-edges on the wings and the spinner was also probably Roundel Blue and not Sky as was applied for the rest of the squadron.
May be, RK917 was freshly painted for the flypast, the paint in archive pictures certainly look new and clean and perhaps the colours are so odd might have been to make his aircraft more easily visible during the formation assembly ready for the flight over London. Who knows!
The Model
For Bader very distinctive Spitfire Mk.IXe, wearing an RAF nightfighter colour scheme, odd fuselage roundels and “DB” codes, I used Italeri's 1:72 scale Spitfire Mk.IX kit, Freightdog Model's set of Post War Spitfires decals and Hataka's WW2 RAF acrylic paints.
Italeri's 1:72 scale Spitfire Mk.IX, Hakata paints, Freightdog decals & the finished model
The kit was very nice to build. The various options suited the Mk.IXe variant and the added cockpit detail in permitting the access door and canopy to be left open was a real bonus on such a small scale kit. All I needed to add were a set of spue moulded seat belts and a bit of detailing to the access door itself. The only disappointment with the kit was the moulding of the wingtips which did not align well to the main wing.
As Bader's aircraft appeared to have been completely unarmed at the time of the flypast and the cannon stubs on both wings were sealed with domed covers, I had to similarly remove those canon barrels which came pre moulded to the kit's wings. For completeness, I should also have removed the navigation light behind the cockpit as this is not visible in the archive pictures, but I so liked the fact that Italeri had included it I just had to use it.
After my earlier bad experience with Ammo MIG's RAF colours, in particular their supposed dark green, I followed a fellow modeller's recommendation and went with Hataka's WW2 RAF acrylic paints for this build and was not disappointed. Having now used Vallejo, MIG and Hataka paints, I must confess the latter's RAF colours at least, look best to me. All I need to perfect now, is my use of Blu-Tak masking, as I'm still struggling to get a finish I'm happy with.
The final touch was to add a bit of thread for the aerial and a pilot. I decided not to add any weathering as RK917 was supposedly in a display ready condition, cleaned and freshly painted for the Flypast.
In my last post, the Battle of Britain had just been won and Douglas Bader's 242 Squadron, flying Hurricanes, had just been moved east from Duxford to Martlesham Heath to join 11 Group, defending the approach to London.
It is now early March, 1941, and Leigh-Mallory, Air Officer Commanding (AOC) No. 11 (Fighter) Group, sends for Bader. He tells him that approval has been for the establishment of a Wing Commander (flying) at each of the Group sector stations. Bader is to be promoted into one of these new Wing Commander roles, with operational control of three fighter squadrons. The big wing concept, over which Douglas had fought so hard, was at last about to come to full fruition. He is given the choice of either Biggin Hill or Tangmere. Douglas selects the Tangmere station.
Bader’s Tangmere Wing consisted of 145, 610, and 616 Squadrons, all equipped with the Spitfire Mk.V. The Mk.V was essentially a compromise aircraft, rushed into service to meet an urgent requirement for a fighter with a performance superior to the latest model of Messerschmitt, the Bf 109F. It, however, failed to provide the overall superiority Fighter Command needed so badly. At high altitude, where many air combats took place, it was found to be inferior to the Bf 109 on most counts, and several squadrons equipped with the Mk.V took a severe mauling that summer.
In July 1941 the Wing received delivery of the Spitfire Mk.Vb. These replaced the eight machine guns of the Mk.Va and earlier variants with four machine-guns and two 20-mm cannon. The cannon arrangement enabled pilots to open fire at much longer ranges, and from the outset Bader did not like it; he had always been a staunch advocate of close-in fighting, and maintained that the cannon would tempt a pilot to open fire from too great a distance, with a consequent drop in the chances of success. Even when the Wing was fully equipped with Mk.Vb he stubbornly persisted in flying a Mk.Va, which was armed with machine-guns only. He always claimed that he never managed to score any hits on anything when flying a cannon-armed aircraft. He was wrong, but stubbornly refused to admit it.
During the summer of 1941, Bader's Tangmere Wing flew target support missions over Northern France. On Saturday 9th August, 145 squadron was to fly top cover and was first away, followed by 616 and 610. Bader was flying in Red Section of 616 Squadron. Each aircraft were recognisable by the code letters that identified the squadrons to which they belonged: SO for 145, DW for 610, YQ for 616, and Bader, as Wing Leader, carried no code; only the large letters DB, one on either side of the fuselage roundel. 145 Squadron missed the rendezvous point, reducing the Tangmere Wing by one-third of its strength; nevertheless, its task was target support, and there could be no question of calling off the operation. Together 610 and 616 Squadrons set course over the Channel and in land from Le Touquet to the airfield of Bethune-Labuissière, the target of the Bristol Blenheims they were protecting.
Red Section, like the others, climbed in finger four formation. It resembled the outstretched fingers of a right hand, with a Spitfire at each fingertip; from left to right, it was Flying Officer Jeff West, a New Zealander; then the Wing Leader; then Cocky Dundas and finally Flying Officer Johnnie Johnson, who one day would make a name for himself as the RAF’s official top-scoring fighter pilot. It was a truly formidable quartet.
The Spitfires were at thirty thousand feet when twelve Messerschmitt 109s (BF 109)were spotted prowling about two thousand feet below. Having the superior height advantage, Bader's Spitfires were beautifully positioned for a ‘bounce’. He took Red Section down in a steep dive towards the centre four Messerschmitts. The German pilots, fully realising their peril, broke away hard in all directions and individual dogfights spread out across the sky.
With the melee done, the Spitfires landed back at Westhampnett, Tangmere’s satellite airfield just north of Chichester to refuel. All the Spitfires of the Tangmere Wing were accounted for, all that its, with the exception of Buck Casson, Blue Section, and the Wing Leader, Bader, both of whom were missing somewhere over France.
Almost forty years later, in Fight for the Sky, Douglas Bader himself described what had happened to him that morning, high over France:
He said that he did everything wrong. He signalled ‘attacking’ and dived down too fast and too steeply. He closed so fast on the BF 109 that he had no time to fire. Levelling out at 24,000 feet, there was then no one in sight, he was alone in the sky.
Ignoring his own advice to pilots when alone, which was to get down to ground level and fly home, and noticing a couple of miles in front at the same height three pairs of BF 109 he dropped down just below them and closed in to attack. Oblivious to this lone Spitfire's presence, the back one of the middle pair was destroyed with a short burst of machine gun fire from close range. Bader was just opening fire on the second when he spied the left hand pair of BF 109 turning in towards him. He thought, now was time to go home.
He then made his final mistake. The rule is: always turn towards your enemy, never turn your back; if you do, you lose sight of your enemy and present yourself as a target. The remaining pair of BF 109 to his right were still flying straight and level, so he turned towards them, intending to pass over the top or even behind them, so that he could then dive away for home in the opposite direction. At this stage there was no problem ... but this was a morning dogged by bad judgement and it wasn't over yet. Banking hard over to the right he crossed too close to the second BF 109 collided and lost his tail!. Had he turned left towards the enemy coming at him, as was the rule, there would have been no danger, except from a lucky bullet!
Bader managed to get out of his Spitfire, less one leg which had got caught somewhere in the top of the cockpit. He had sustained two broken ribs and lacerations to his throat and one hand when he landed. Douglas was taken to a hospital in St Omer, where once as he recovered from his injuries, he attempted the first of many escapes. It was not long before Bader was recaptured and while he never managed to successfully escape back to Britain, he never gave up trying and did his uppermost to be as much of a nuisance to the German authorities as humanly possible. The fact that a year later, on 18 August 1942, he was confined to Colditz castle, the forbidding fortress perched high on its rock some twenty-eight miles south-east of Leipzig, is testament to how successful Bader was at this.
On 13 April 1945, the prisoners were awakened by the roar of aero-engines as American Thunderbolt fighter-bombers swept overhead, diving down to strafe some unseen target as armoured spearheads of General Hodges’ 1st US Army, approached from the west. All night, shells screeched overhead as the Americans battled it out with the SS, who were positioned behind a ridge to the east. At about eight o’clock in the morning of 16th April, the Americans liberated Colditz. Douglas had been a prisoner for three and a half years.
For my Douglas Bader Spitfire Mk.Va, I had to use Airfix's 2002 release of their Supermarine Spitfire Mk.I kit. No one, as far as I could make out has ever made a MkVa and as the Mk.I was visually similar to the Mk.Va, in that the latter just had an uprated engine, it made sense to use this as my base kit.
The DB code letters and W3185 serial number decals were an after market purchase and I again used the Ammo MIG early WWII RAF colours - despite their overt brightness - to complete this build of the Spitfire Mk.Va in which Douglas Bader crashed out of the sky over France in the summer of 1941.
In April 1933 Douglas Bader was invalided out of the service having lost his legs on 14 December 1931 when he crashed doing some ill advised low level aerobatics, prematurely ending his RAF career. With the outbreak of the Second World War in September 1939, however, the RAF hierarchy - desperate for pilots - decided that this pilot, albeit with no legs, was indeed fit for operational flying.
On 7 February 1940, Flying Officer Bader was posted to 19 (Fighter) Squadron at Duxford. It was equipped with Supermarine Spitfire Mk1 fighters, and its commanding officer was one of the men who had taken off alongside him on that fateful afternoon, eight years and just under two months earlier; his old friend, Squadron Leader Geoffrey Stephenson. Bader saw little action during the so called phoney war until 28 May, when his squadron was ordered to fly their Spitfires down to Martlesham, an airfield near the coast a few miles to the east of Ipswich, following which the order was simple and consisted of just four words: ‘Patrol Dunkirk, 12,000 feet.’ Bader finally opened his score of enemy aircraft destroyed on a 1 June when he shot down a Messerschmitt 109.
A nimble Douglas Bader leaps from his Hurricane Mk.I
On 24 June 1940, the now Acting Squadron Leader Bader assume command of No. 242 squadron, part of Leigh-Mallory's 12 group, at Coltishall, near Norwich. Freshly back from the bitter fighting in France, the squadron's mainly Canadian air and ground crews had escaped with little more than the clothes they stood up in. While the squadron was fully up to strength, with 18 brand-new Hurricanes, it was doubtful whether they could be kept flying for very long as all the spare parts and tools had been lost in France, and repeated requisition demands for replacements had produced no result. With equipment and moral of the squadron in equal short supply, the initial reaction to the arrival of their new commander, with no legs, was close to being the last straw. After putting on one of Bader's breathtaking flying displays for the pilots, he then drafted a signal to both Group and Fighter Command Headquarters: ‘242 Squadron now operational as regards pilots but non-operational repeat non-operational as regards equipment.’ This caused more than a little stir up to Air Chief Marshal Sir Hugh Dowding, the C-in-C Fighter Command, but it had the desired result. The required supplies arrived and one of the Canadian pilot's was soon then to report ‘Legs or no legs, I’ve never seen such a God-damn mobile fireball as that guy.’!
There was, however, little work for 12 Group until on 30 August, Douglas at last got the call for his squadron to fly south, to Duxford. Here in the south, the offensive against the RAF airfields had been relentless and the squadrons of Park's 11 Group were almost exhausted, their airfields mercilessly battered and it was time for Dowding to bring in his first reserve, 242 Squadron. Bader was instrumental in perfecting attack formation and strategy, suggesting even the idea of pulling together multiple wings to intercept attacking aircraft en masse. However, while 12 Group may have been able to have formed up in time, 11 Group were far too close to the coast to receive sufficient prior warning to join them.
Not convinced by these Ammo MIG paints, too bright!
Then, on 7 September, came the German high command decision that dumbfounded every Luftwaffe combat leader. From the highest level - that is to say, from the Fuhrer’s Headquarters - came a directive ordering the Luftwaffe to switch its priority from the British fighter airfields to London. This then placed the attackers within range of both 11 and 12 Group and Bader's 'Big Wing' theory could finally be put to the test. With the Hurricanes of 242 and 310 (Czech) Squadrons and the Spitfires of 19 Squadron the plan of action was simple enough. The wing would be scrambled from Duxford as soon as radar detected the enemy force building up over the Pas de Calais, and by the time the Germans set course over the Channel the British fighters would be waiting for them over the Thames estuary, with the two Hurricane squadrons at twenty thousand feet and the Spitfires about five thousand feet higher. The battle would be joined over eastern Kent, with the Spitfires taking on the enemy fighter escort while the Hurricanes went for the bomber formations, breaking them up and generally hampering their progress, buying just a little time for the 11 Group squadrons to get to altitude and attack in turn; by which time, if all went to plan, the enemy would have completely lost their cohesion.
The nose art that No. 242 Squadron’s aircraft carried .. i.e. a cartoon showing a boot kicking Hitler. I believe the boot may have originally been marked “242”, though this decal does not have this .. the decal instructions also had it positioned lower and further forward than in the original picture.
By mid-September, Leigh-Mallory was totally committed to the big wing idea, and he assigned five squadrons to Duxford with Douglas Bader as wing leader. As well as the three original units (242, 310 and 19) there were now two more, 611 (West Lancashire) Squadron with Spitfires and 302 (Poznan Polish) Squadron with Hurricanes. Together, the squadrons were known semi-officially as the 12 Group Wing. On 13 September, Douglas learned that he had been awarded the Distinguished Service Order. The following morning, the five squadrons of the 12 Group Wing assembled at Duxford for the first time, and twice in the course of the day Bader led the sixty fighters into the air to patrol the northern outskirts of London.
The Battle of Britain was effectively over by the end of October and the squadrons of Fighter Command returned to more or less routine convoy patrol work, with just the occasional skirmishes with packs of enemy fighters. For the most part, German bombers were now coming by night but with the science of night-fighting still very much in its infancy, the day fighters were ill-equipped to deal with these night-raiders.
The Airfix Kit .. it's 2020 new decals I never used
Late in 1940 Bader's 242 Squadron began to receive more modern Mk.2 Hurricanes. Powered by a two-stage super-charged Rolls-Royce Merlin XX engine and fitted with a Rotol constant-speed three-blade propeller, the Mk.II had a top speed of 342 mph at 15,200 feet and a much better rate of climb than the Mk.I.
On 16 December, 242's Hurricanes were moved east to Martlesham Heath, where the squadron joined 11 Group. Douglas now had a DFC to add to his DSO, while the squadron’s pilots had also earned nine DFCs since he took over in June. Between then and the end of the year, No. 242 had claimed the destruction of 67 enemy aircraft for the loss of six of its own pilots, of whom one had been killed accidentally while diving out of a cloud.