I bought Italeri's amazing Pegasus Bridge kit some 12 moths ago with a view to building it into a diorama in time for a 6th June, D-Day anniversary release. Having retired in April this year, I thought what a perfect time to make a start, little did I appreciate how close to the wire it would get!
The diorama ended up taking up 25% of a large repurposed Scalextric baseboard which I have been using since mid last year to showcase some of my model builds. After constructing and painting the bridge itself, all made from laser cut wood - the smell of which filled my loft space workshop - the challenge was with way to orientate it.
The Orientation of the Bridge
My original plan was to have the Café Gondrée, the small coffeehouse located on the west bank of the Caen Canal, at the northwest end of the Bénouville Bridge, now commonly referred to as the Pegasus Bridge and the glider on the southwest of the picture. Based on this design, I set about cutting out the canal, making it full width to accommodate the bridge then narrowing it to accommodate the glider. Meanwhile, my idea was to use the east of the remaining board for a later D-Day landing diorama.
My plan, however, started to unravel when I both totally underestimated the space required for the glider and was, in any case, having issues in sourcing a decent enough model which could play the part of the Café; the only reason for positioning the diorama in this way.
The view I originally intended to have
The view I finally settled on
Finally, after rotating the bridge through 180 degrees, it was clear that I preferred both the view this offered of the bridge and the space now available to the glider in the north east corner of the board. This unfortunately meant that I had not only lost the option to use this space for that later D-Day landing diorama, but I had also cut the canal too short! I could, in truth, have extended the canal to the east, but having spent hours to line, seal and edge the original cutout, I settled on making do with what I had.
The final view
Adding Water to the Canal
The reason I had to line and seal the cutout was to ensure when I added the water effect, it didn't all seep out through the layers of cardboard. Although the seal held firm, the space still required 1.5l of Woodland Scenics Realistic Water, which, at a cost of £25 per 500ml of fluid, I was very glad I had not gone and extended the canal! I'm still a real novice at water effects and learned loads on this one.
While not easy to see from the pictures, the process went as follows: I coloured the bottom of the cutout with a mottled blend of brown, green and blue acrylic paint. On applying the first layer of water, and there were 4 layers applied in all, the small ripples in plastic sheeting used to seal the cutting seem to get enhanced and annoyingly rose above the water level. The second layer of fluid then reacted badly with the first, creating its own ripples. I've no clear idea why this happened and can only think that it was because the first layer had not cured sufficiently. I later learned that to cure, the Realistic Water requires a temperature of above 20 degrees and we were going through a cold snap, made worse by the diorama being in the attic!
For the third layer, after removing the unusable sludge, I added a little grey and blue paint to some of the water to provide a better feeling of depth, and to hide some of the damage I had left in removing the old. In adding the paint, I made my second mistake in shaking the bottle. In addition to the 20 degree rule, the instructions also stated "do not shake". This third layer of water thus had small bubbles added, which while I was able to pop all the larger ones with a cocktail stick, left areas of aerated water, not a look I was after! The forth later of unshaken coloured water, however, sealed these bubbles beneath the surface and with hindsight, I think add a further element of both interest and depth. The sun had also come out and the loft space was now at the perfect temperature for very rapid curing, leaving me with a smooth and very realistic look of water.
While on the subject of water, I also added one of my poor German figures splashing head first into the canal together with a few bullet splashes. The water rising up around the soldier was crated by soaking cottonwool in the Realistic Water and then applying it to the surface of the hardening water and the bullet splashes were teased up at the same time using a cocktail stick. The final effect of adding the last layer of water, once this had all cured, I think made this look even more realistic.
The 6 Scenes
In addition to the centrepiece of the bridge itself, there are 6 clear scenes unfolding in this diorama which I will take you through in chronological order for June 1944.
1. French Resistance
Within 24 hours of D-Day, the BBC broadcast prearranged coded messages to the French Resistance to disrupt occupying German forces' transport and communication lines.
In the southeast corner of my diorama I have a small unit of Resistance med and women bringing down telephone wires to prevent the German troops at the bridge from calling on reinforcements. The wire, which you may just be able to see, is made of nylon thread and the explosion effects are made from painted cottonwool.
2. The Glider Landings
Six Airspeed Horsa gliders, piloted by 12 NCOs from 'C' Squadron, Glider Pilot Regiment, towed by Halifax bombers took off from RAF Tarrant Rushto, east of Blandford Forum in Dorset. Major John Howard and second in command Captain Brian Priday, leading 'D' Company, 2nd (Airborne) Battalion, Oxfordshire and Buckinghamshire Light Infantry, had the mission to seize the bridges over the River Orne and Caen Canal at Bénouville and Ranville intact and hold them until relieved.
Italeri's 1:72 Scale Horsa Glider crashed into barbed wire
My diorama is intended to show, Major John Howard's number one glider, which had Staff Sergeant Jim Wallwork at the controls, crashed into the barbed wire surrounding the canal bridge defences at 00:16 on 6th June 1944.
For the model of the Horsa Glider I used Italeri's 1:72 scale kit which was a lengthy and interesting build in itself. For speed, and as this was not going to be a display piece, I decided to use the decals of the D-Day black and white stripes rather than masking and painting them in as I would normally do, and likewise I sprayed the camouflage pattern freehand rather than masking, as no one was going to be getting up close to inspect this model.
Italeri provide some nicely crafted figures to accompany the glider kit
I would have liked to have left the tail broken away from the body, as they are apparently intended to do to facilitate a speedy exit from the glider, but as it was number 2 glider and not this one which broke up on landing, I went with the doors open view instead. With hindsight, I wish I'd gone with the tail off configuration as I only intended this diorama to give a feel for the event, rather than be an accurate interpretation.
3. The Canal Bridge Defences
Surrounding the canal bridge were trench defences and a gun emplacement. I constructed the trench by cutting out a channel in the card base and affixing pieces of painted toothpicks to the sides to replicate the trench being shored up with logs of wood.
Trench and 'large' anti-tank gun emplacement
The gun emplacement was cut from leftover wood from the Pegasus Bridge kit, and while the gun itself should have been a much smaller version, it looked so lost in the possibly oversized emplacement I built, that I dug out and repainted an old 88mm anti tank gun I had stashed away, which much better fitted scene.
Canal Bridge Defences
4. The Artillery Park
There is no evidence that I can find that there was ever an Artillery Park at Pegasus Bridge, but the kit provided a sign to one together with 3 pieces of artillery which had to be placed somewhere!
There was however, a pillbox, for which I added a couple from my stash together with a barrier which actually came with Italeri's Vietnam War set I made last year, but did not really fit in. I think that just as with my Artillery Park sign, Italeri throw in random bits they have for dioramas just to complete their kits.
Within this Artillery Park scene, I've used oil barrels and boxes which cane with the set, sandbags again from the Vietnam War kit, an Airfix German jeep, barbed wire made of binding found on an old paper pad
and the random artillery pieces provided, with the bridge. I also don't know whether there were any mines planted around the bridge, but I was on a roll with my sign production so it does have mines in my diorama!
5. Panzer Park
There is much written about how after the disastrous performance of the German Army on the Eastern Front in 1942 resulted in Hitler retained personal command of the Panzer devisions and then how on D-Day, no one would wake him to request their release now once he woke would anyone bring up the subject, because he was in a foul mood! Finally, by 4pm on 6th June, having earlier dismissed the landings as a feint, Hitler released two divisions of Panzer Group West, the 12th SS and Panzer Lehr, for deployment to the coast. While they played no part in preventing any Allied troops landing in Normandy, by the 7th June, they were at Caen, to participate in the defence of the town, action which severely held up the Allied's advance.
For my diorama, I thought I'd construct a small tank park with examples of some of the armour used in the campaign and all freshly painted in their Normandy tiger striped camouflage!
The models are a set of Airfix classics while the motorcycle was a late addition from Italeri's German Motorcycle set.
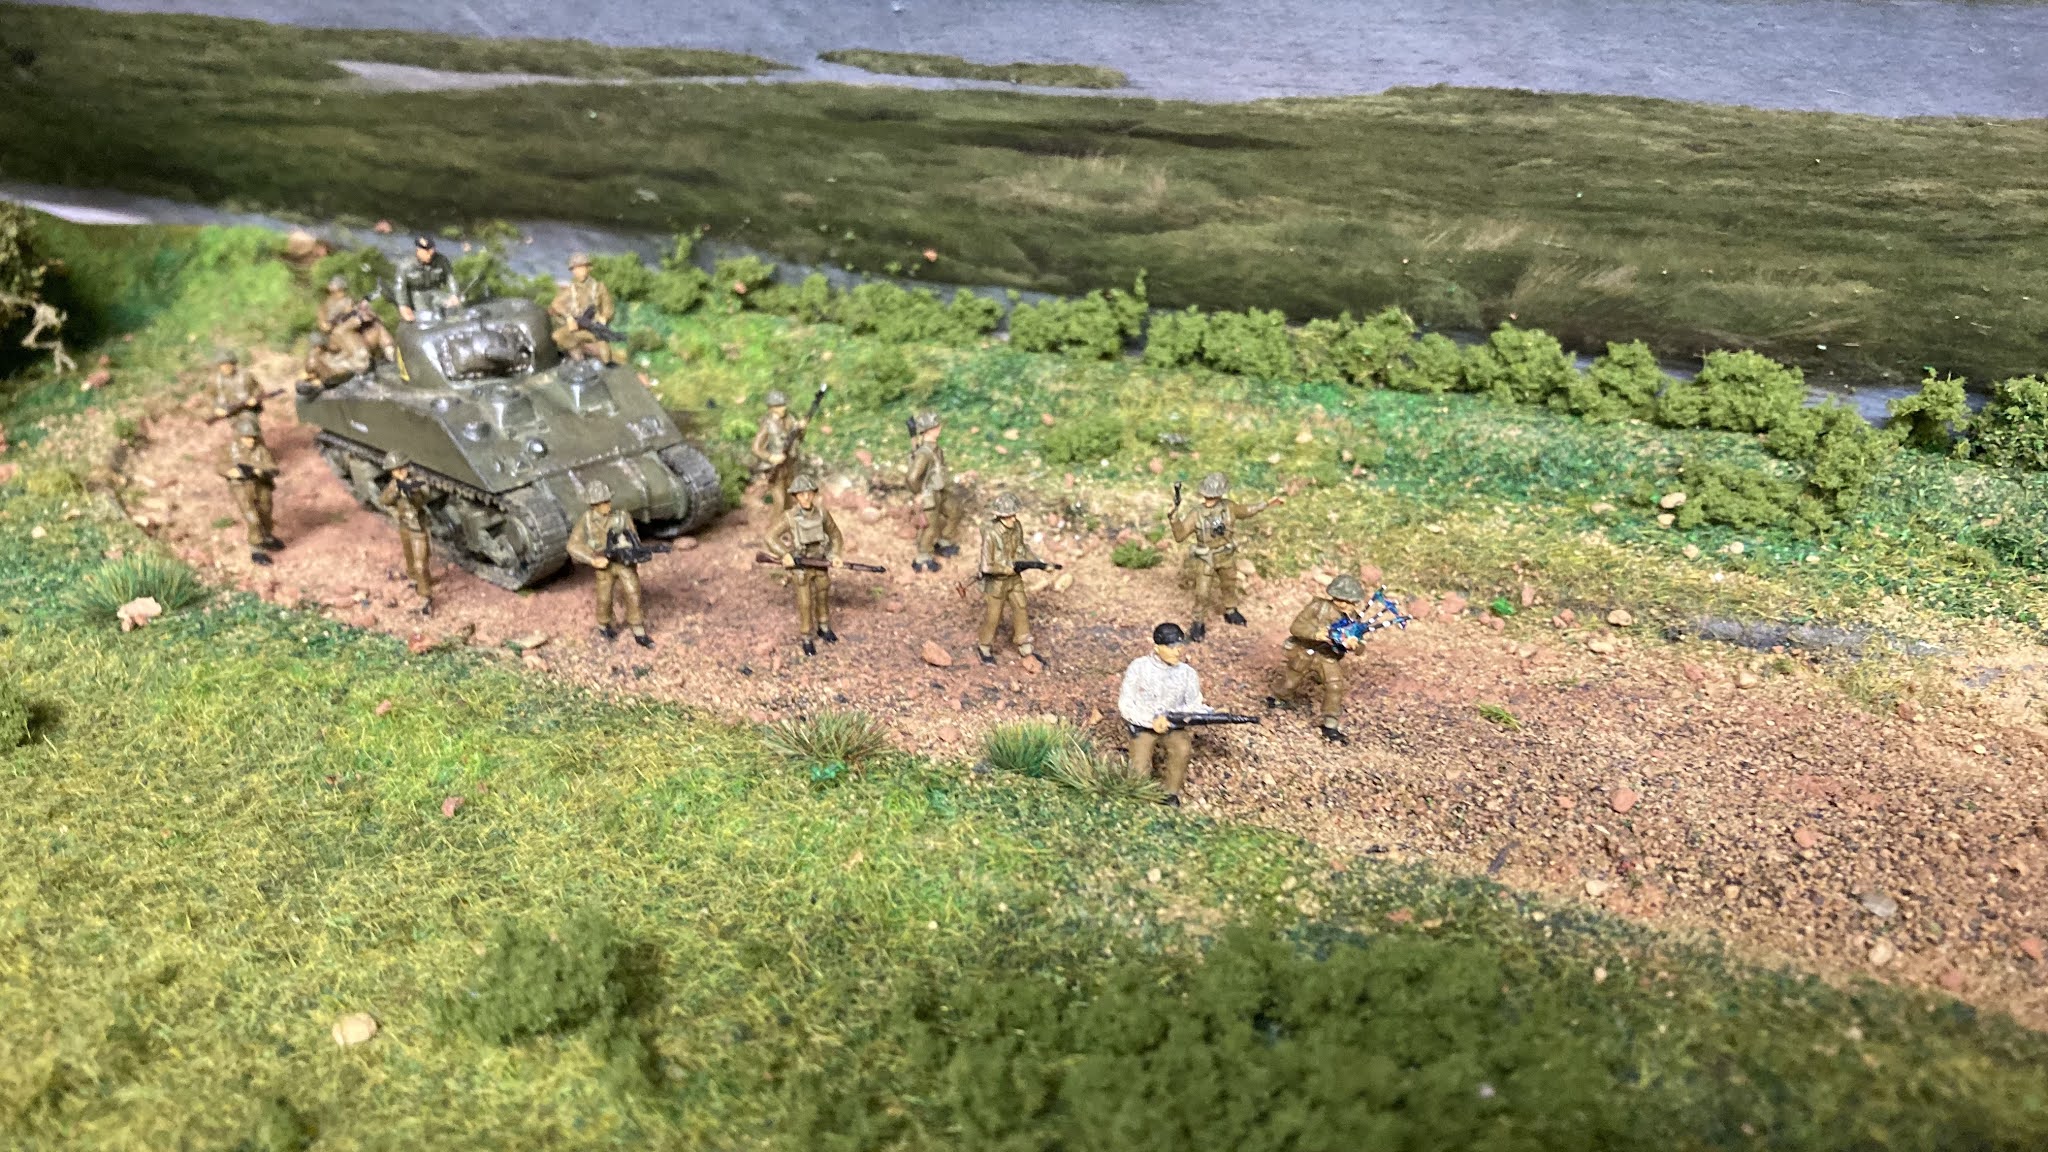
6. Arrival of Lord Lovat's Commandos
While first company of the 7th Parachute Battalion, commanded by Major Nigel Taylor, made there way to the bridges in the early morning, it is the arrival of Lord Lovat's Commandos from Sword Beach that marks the moment in history when Major John Howard and his glider troops were officially relieved.
It was at 13:30 on 6th June, that the men at the bridges heard the sound of bagpipes, played by Lord Lovat's piper, Bill Millin of No. 4 Commando, 1st Special Service Brigade. As the commandos arrived, they crossed the bridges and joined the rest of 6th Airborne Division defending the eastern perimeter. Some of the tanks accompanying the commandos moved into Bénouville to reinforce its defences, while others crossed the bridges with the commandos.
Airfix do not provide a piper in their British Infantry figures, so I had to make one. I also used on or my French Resistance figures to portray Lord Lovat, as he was known to wear an Aran jumper over his battle dress and there was the perfect figure in Caesar Miniatures box of Partisans.
The Video
One of my all time favourite films has to be 'The Longest Day' and so having built the bridge and related models, I just had to make a quick video using soundbites from the classic film to tell the story of the day. I hope you enjoy it!


No comments:
Post a Comment
Note: only a member of this blog may post a comment.