Sunday, 26 July 2020

de Havilland D.H.103 Hornet

With the last of my photo reconnaissance Spitfires having unexpectedly flown us out to the Far East and into the opening years of the 1948-1960 Malayan Emergency, I've had the opportunity to uncover a number of very interesting aircraft and factoids from this period which I am now dying to share with you. We will, therefore, be hanging around in Malaya for a few more weeks yet, as I unveil new builds with hopefully interesting backstories of firsts, lasts and intriguing random factoids.

For build 19 of my Lockdown Scale Modelling Project, I’ve selected a kit almost as vintage as the aircraft itself. This is Frog’s 1971 model of the de Havilland D.H.103 Hornet. Frog was a well-known British brand producing model kits between the 1930s to 1970s. Launched in 1932, they created the world’s first kits made from cellulose acetate. Polystyrene models were then introduced in 1955 and by the 1970s, Frog's catalogue included a large number of lesser-known aircraft types only to be manufactured by the company; such as this Hornet. The last Frog-branded kits were produced in 1976, whereupon many of the Frog moulds were sold to the Soviet Union to be marketed under the Novo name. 

It was a real experience constructing this model. The instructions were considerably less detailed than today’s kit modellers would expect to find and in a musty condition that would not have been there when new! The decals also required quite some tempting to remove from their backing paper and liberal quantities of Decalfix fluid to soften and affix them to the finished model. 

In finishing the build, I've tried a new painting technique, replacing my brushes with an airbrush and marking out the camouflage pattern with masking fluid. It was a challenging and lengthy process and only time will tell if I attempt it again! 
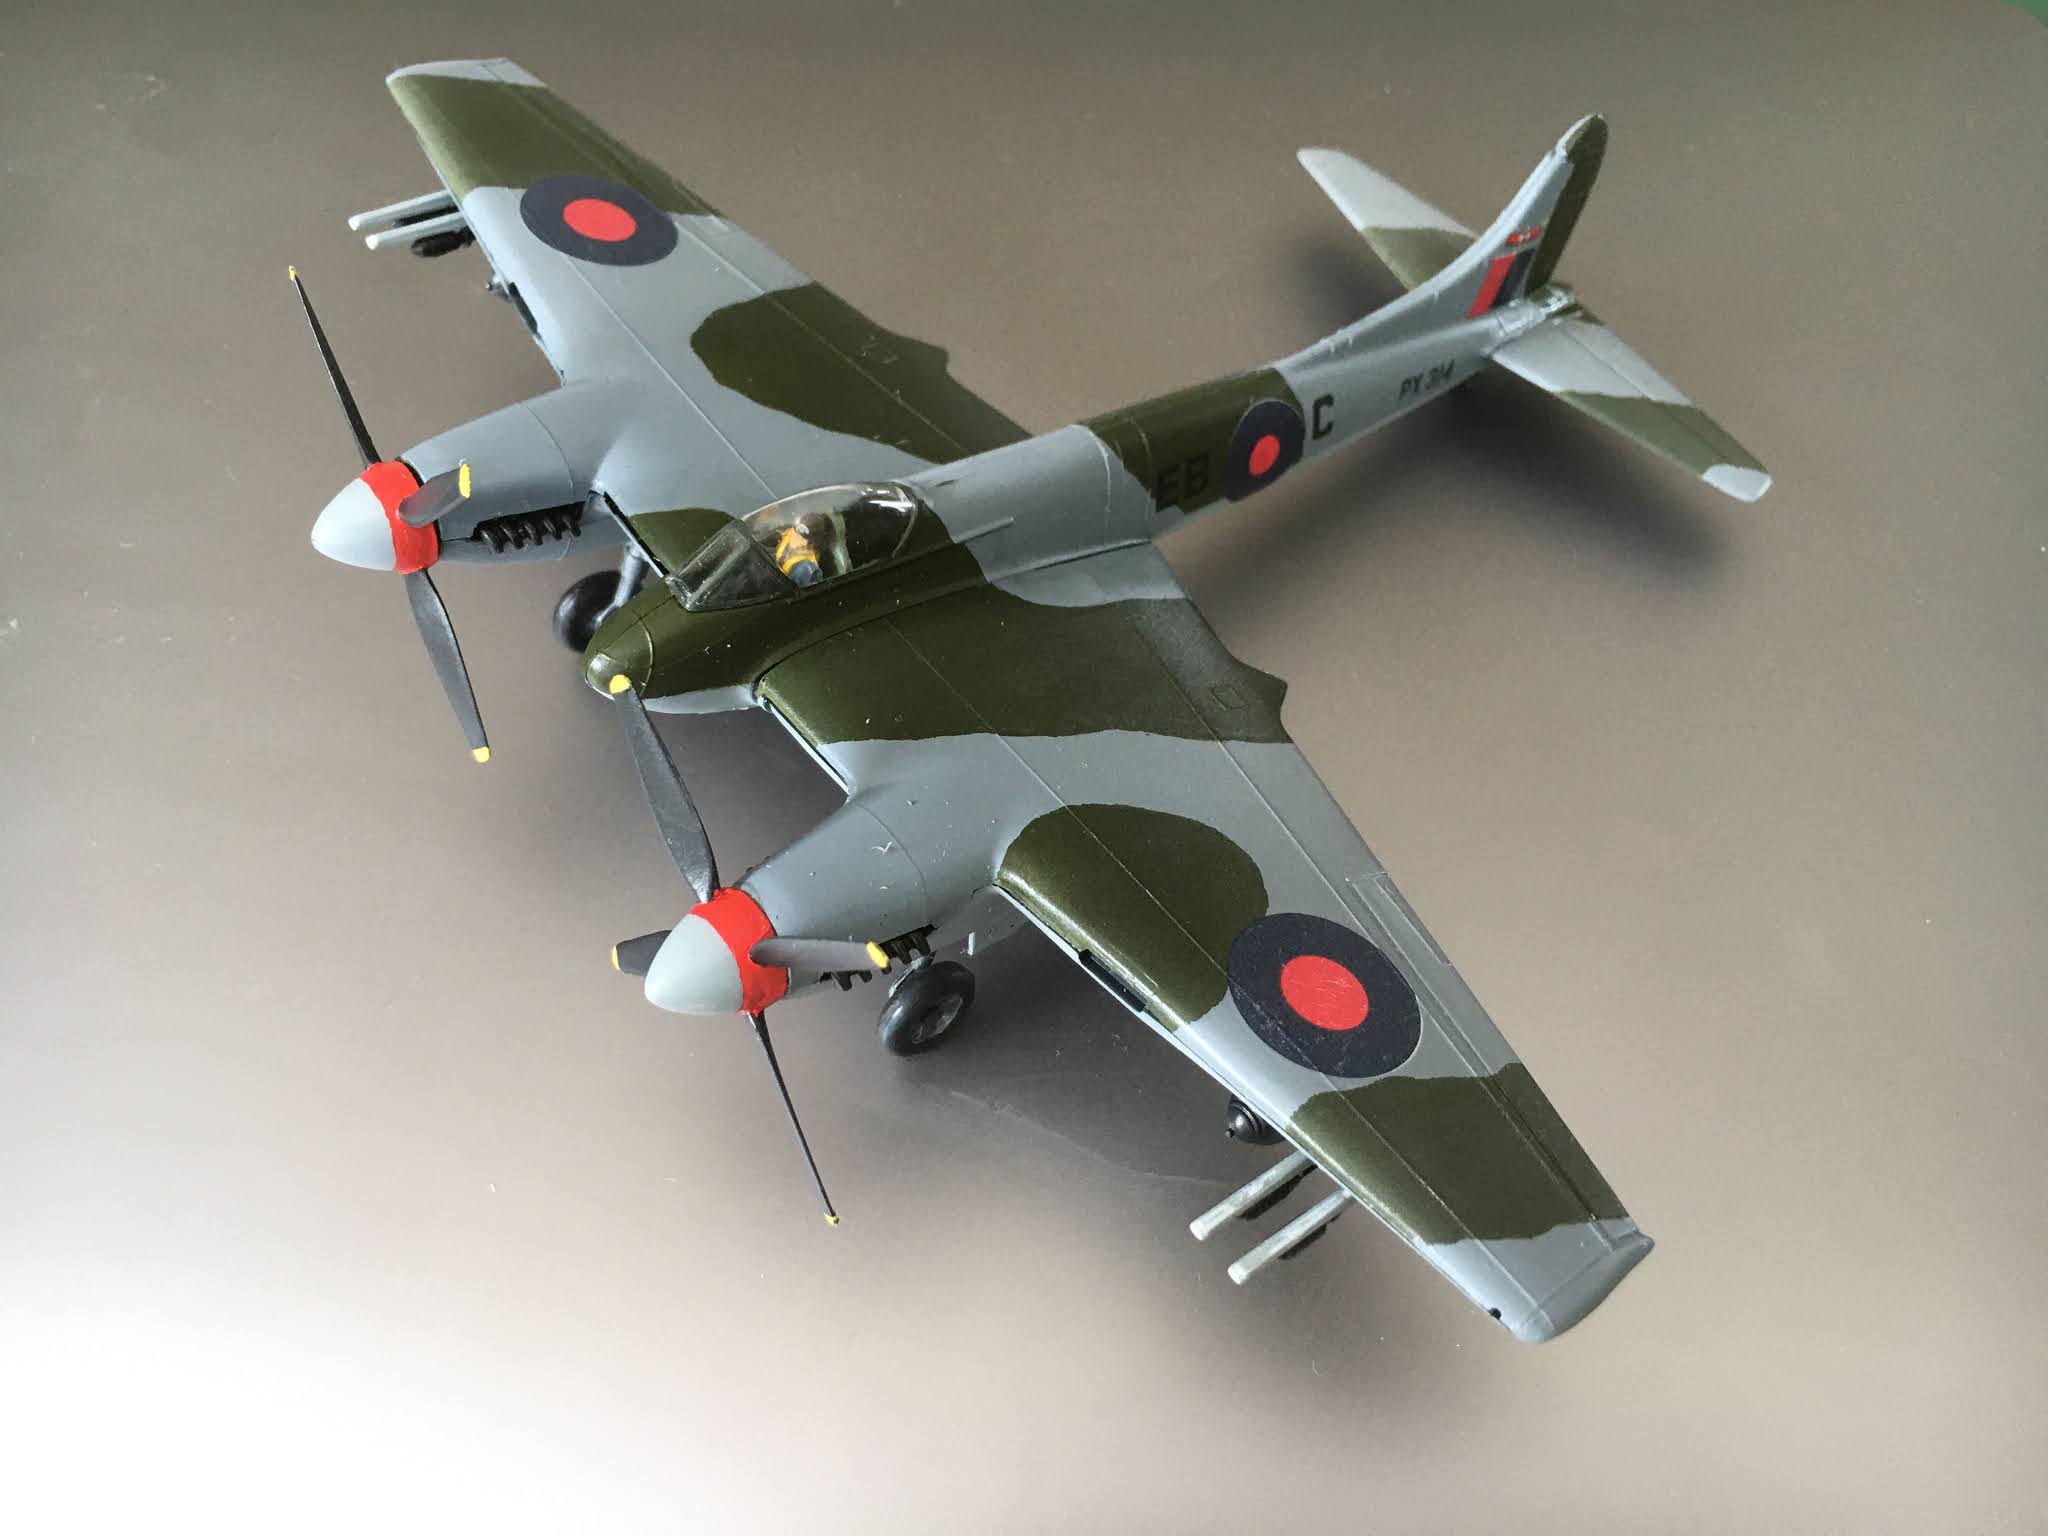
My Frog 1:72 scale de Havilland D.H.103 Hornet

The de Havilland D.H.103 Hornet, the forgotten successor of the very successful de Havilland Mosquito. While the Mosquito took multiple leading roles in World War Two and then went on to star in its own book and blockbuster film, 633 Squadron, the Hornet arrived too late to take up its intended role and was then quickly withdrawn from service on the arrival of the jet era. 

The de Havilland Hornet represents in many ways the peak of piston engine fighter design. With its slim fuselage, clean lines and tightly cowled engines, great attention was paid from the outset on maximising performance.

The original de Havilland D.H.103 Hornet

The Hornet prototype (RR915) flew for the first time on 28th July 1944. Powered by a pair of 2,070 hp Merlin engines driving opposite-handed propellers for increased stability and handling, it could reach an astonishing maximum speed of 485 mph at 22,000 ft, making it the RAF's fastest ever propeller aircraft.

Two main marks saw service with RAF Fighter Command: The F Mk 1 and the F Mk 3 with the latter (my model) having an increased fuel capacity and a large dorsal fin. For its standard armament it had four 20mm cannon in the nose and then an option of rockets, bombs or 200 gallon drop tanks carried under the wings.
 
It was conceived for operations in the Pacific Theatre against the Japanese, however, the conflict had ended before the aircraft reached operational status. It first saw combat in 1951, when Hornets were redeployed from Fighter Command to the 33, 45, 64 and 80 squadrons of the Far East Air Force (FEAF) to support ground security forces in operations against Communist guerrillas during the Malayan Emergency. The Hornets replaced the Bristol Beaufighters and Supermarine Spitfires that had been operating in Malaya since the outbreak of hostilities in 1948. With their long range and good endurance, they were able to spend hours loitering over a given target area, a key attribute when target identification was often very challenging and time consuming. 

de Havilland Hornet refuelling at RAF Seletar, Singapore

The Hornet proved to be very reliable; 45 Sqn Hornets, based in Singapore, achieved a total of 4,500 operational sorties over their five year tour of duty, more than any other squadron in the FEAF. However, with the evolution of longer-range jet-powered fighters such as the de Havilland Vampire, de Havilland Venom and Gloster Meteor, the Hornet became obsolete fairly quickly and on 21st May 1955, just as with the Spitfire a year earlier, the Hornet flew its last RAF operational sortie; another last flight of an RAF aircraft during this Malayan Emergency.

Sadly, the Hornet also had an Achilles heal. The glue which de Havilland used to bond its plywood skins proved susceptible to breaking down in the high heat and humidity of the tropics. The resulting de-lamination problems, coupled with termite issues have resulted in there being no complete examples of the Hornet remaining in existence today. However, remains of a de Havilland Sea Hornet, the aircraft carrier version as used by the Navy's Fleet Air Arm, was discovered in 2016 dumped on the edge of a Canadian airfield, and is now in the process of restoration in New Zealand. If it gets to fly, this will be one very rare aircraft.

While its predecessor, the Mosquito, appeared in that book made famous by the big screen, it is possible that the Hornet may have its own literary claim to fame by being flown by none other than Biggles!


Le Cygne Jaune

In Le Cygne Jaune, a 1946 Biggles graphic novel by W. E. Johne, illustrated by Francis Bergèse, the Second World War is over and Air Commodore Raymond urgently persuades Biggles, Algy, Ginger and Bertie to join a special unit at Scotland Yard specialising in crimes committed with aircraft. 

Spur prototype?

To intercept airborne criminals, Biggles takes delivery of a Spur prototype which is still undergoing tests. The aircraft was a twin engined, advanced high performance, long-range fighter which was only prevented from making history by the termination of the war. Sound familiar? 

While the Spur is, of course, a fictional aircraft, as Johns needed an advanced, late war design, it is not surprising that Francis Bergèse's Spur looks so much like that of a real Hornet!

Bergèse's remarkable attention to detail

This scene at Croydon Airport shows Bergèse's remarkable attention to detail. With Croydon's apparently famous control tower, a Mosquito on the left and the Spur ... or may be a Hornet ... on the right!

---

The model:

Make: Frog 
Model: DH Hornet F.Mk.3 Long Range Fighter
Scale: 1:72
Item code: F239
Year of Release: 1971


Sunday, 19 July 2020

Supermarine Spitfire PR.XIX

I had originally planned to use this model, the Airfix Supermarine Spitfire PR.XIX, as the base for my 'Camoutint Pink' photo Reconnaissance Spitfire but after discovering that Airfix had included decals for an historic Spitfire which flew during the Malayan Emergency, where my father completed a tour of duty while serving in the British Army, I naturally had to adjust my plans! 

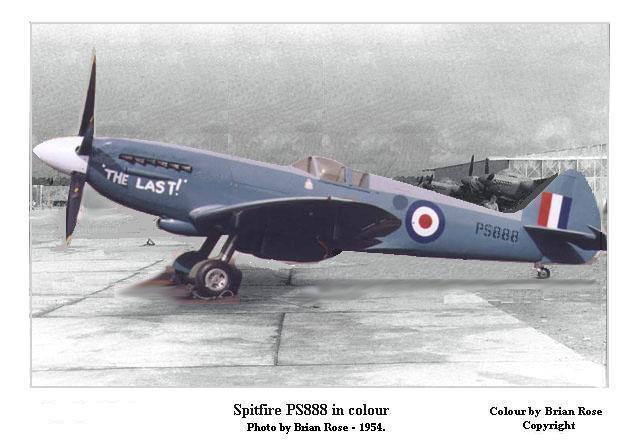
Today's model, therefore, has been finished in the colour scheme of PR.XIX PS888 flown by Sqn Ldr Swaby, of 81 Squadron, RAF Seletar, Singapore, who on April 1st 1954, flew the Supermarine Spitfire's last ever RAF operational sortie over Malaya. I do now wonder whether my Father ever saw it fly over him as he cut his way through the Malayan jungle when he was there in the early 1950s.

PR.XIX PS888 of Sqn Ldr Swaby, 81 Squadron, Singapore

The story of 'The Last' Spitfire ..

The Spitfire PR.XIX first entered service with the RAF in May1944 as an unarmed Rolls-Royce Griffon powered reconnaissance aircraft, arguably the ultimate version of the Spitfire. Unlike my 'Camoutint Pink' Spitfire FR.IXc, the low level and most heavily armed of the RAF's reconnaissance Spitfires, the PR.XIX had to rely on speed and stealth to survive in the combat area. This aircraft proved to be the perfect platform to do this, achieving speeds of over 100 mph faster than those Spitfires which fought in the Battle of Britain and capable of attaining far greater altitudes. Indeed, one such Spitfire PR.XIX flew to a record height of 51,500 ft. on 5th February 1952 when Flight Lieutenant Ted Powles was on a reconnaissance flight over Hainan Island (People's Republic of China) from Kai Tak Airport, Hong Kong. 

Factoid about why the Spitfire was over Hainan Island. One official line I've seen was that Powles was taking meteorological readings for a new commercial air route ... but I've also seen reference to Hainan Island being targeted at the behest of US Naval Intelligence for RAF overflights. This coincides with, a year earlier, the island being the last Chinese province to be taken control of by the Communists and the outbreak of the Korean War; tensions were high right across the area!  

RAF Spitfires joined Operation Firedog, the name given to the Royal Air Forces’ contribution to the Malayan Emergency, from the very start of hostilities. This conflict between the pro-independence fighters of the Malayan National Liberation Army (MNLA), the military wing of the Malayan Communist Party, and British Commonwealth Forces broke out on 16 June 1948 when soldiers of the MNLA killed three British rubber-planters at Sungai Siput, Perak. This conflict, which descended quickly into a guerrilla war primarily against British colonial rule, was to last for the next 12 years. 

The Spitfire’s first role over Malaya was one of photographic reconnaissance (PR) in support of ground forces taking tactical photographs to seek out MNLA positions and in providing systematic 'Block Cover' of the whole country from which up-to-date maps were prepared. Three weeks into the Emergency, fighters from 81 Squadron were called to enter the fray launching air to surface rockets against an MNLA camp as located by their PR colleagues. While the conflict in Malaya primarily involved ground forces in jungle warfare, the 16 Spitfires from 60 and 81 Squadrons, based in Singapore, flew some 1,800 missions against Communist positions. The last offensive sortie made by RAF Spitfires was flown on 1 January 1951 when four fighters from 60 Squadron, led by Grp Capt Wilfrid Duncan Smith, flew in an operation on a target near Kota Tinggi, Johor. Rolls Royce and Vickers Armstrong subsequently presented them with a silver model Spitfire to commemorate the event!

Sqn Ldr W P Swaby

With 60 Squadron now having laid claim to the honour of flying the Spitfire’s last sortie in 1951, you would be right to point out the error in my opening comment of it being 81 Squadron's flight in 1954 to achieve this accolade. However, the RAF at the time were working on the assumption that PR flights did not count as ops and so the 1951 date was to stand ... that was, until Sqn Ldr W P Swaby, 81’s Squadron Commander, decided to take the matter up officially, and in a letter to Far East Air Force Headquarters it is said he wrote:

"It is noted that the flying carried out by the Spitfires of No. 81 Squadron should not have been classified operational with effect from January 1st 1951, and you are therefore requested to transfer the total of 1874.25 hours and 1029 operational sorties flown from that date to the training columns. Alternatively, the squadron will be pleased to accept an 18 inch high silver model of a Spitfire from the Commanding Officer of No. 60 Squadron in commemoration of current operations!"

As a result of this, on November 21st 1954, Rolls Royce and Vickers Armstrong made amends by presenting 81 Squadron with their own silver Spitfire. The presentation was even made by Jeffrey Quill, the former Supermarine Chief Test Pilot who had flown every mark of Spitfire, including the first prototype in 1936. 


The picture above shows my Spitfire PR Mk XIX PS888 with the words, "The Last!" painted on the port side engine cowling. These words were in fact applied about an hour after the aircraft returned from its mission – a photo-recce sortie over a suspected MNLA camp in Johore – by one George Travis, 81 Sqn member, and ex sign-writer. Once duly painted, Sqn Ldr Swaby, the pilot, and 81 Sqn CO, along with the Station CO, Grp Cpt T King, conducted a small ceremony out by the aircraft, and that was it. In the Spitfires' place and for the next 6 years of the conflict it was the role of the new jets, the de Havilland Vampires and Canberras. 

And finally here's an amusing closing anecdote recounted by David Taylor, author of the 2002 book, Seletar - Crowning Glory: A History of the RAF in Singapore ..

"To end the sour grapes by 60 Sqdn at having had the honour rightfully wrested from their grasp, that the matter should be ended once and for all by an air to ground attack on 60 Sqdn lines. Approval was apparently forthcoming, (Sqn Ldr Swaby, in his quest for justice, again went right to the top and this raid was given ‘Firedog1 status, with authority to use 200 sheets of ‘Aunty Mary’ issue Bog Rolls. Bog Rolls were duly armed to unravel upon release and installed in the Spitfire PR 19 bomb rack flaps and 1/4 flaps selected. It is said that PS 888, still bearing 'The Last!’ livery, was used for this operation."

Boys will be boys!


---

The Model ...


Make: Airfix 
Model: Supermarine Spitfire Pr.XIX 
Scale: 1:72
Item code: A02017A
Year of Release: 2017

Monday, 13 July 2020

Supermarine Spitfire FR.IXc

After dropping down to terre ferme for a few tracked vehicle builds, inspired as I was by the D-Day anniversary and the part these landships played in liberating France from Nazi tyranny, my latest build returns to the air. This scale model is of one of the most iconic aircraft of WW2, but obviously with a twist. 

This is the Supermarine Spitfire FR.IXc, MK716, in the colours of 16 Sqn, No.34 (Reconnaissance) Wing based near Bayeaux, France, during September 1944.  And yes, it is pink and has stubby wings! MK716 was one of only 15 Mk. IX Spitfires converted to the pale pink scheme to fly high risk low level photo reconnaissance missions, pictorially recording the location and configuration of German military defences pre and post the D-Day landings.

Supermarine Spitfire FR.IXc, MK716

And for those who are interested, here is the extended back story ... 

At the start of the second world war, the RAF had no aircraft ideally suited to the photo reconnaissance role. Long range reconnaissance was given to the Bristol Blenheim light bombers, which to its fame, took to the air on the day that war was declared on Germany, when a Blenheim Mk IV, N6215, piloted by Flying Officer Andrew McPherson was the first British aircraft to cross the German coast to perform a high altitude reconnaissance mission. Short range reconnaissance was to be the domain of the Westland Lysander army cooperation aircraft, which were later to be more commonly seen ferrying agents behind enemy lines on clandestine missions. Neither, however, were really suitable for the role; they were far too vulnerable to anti aircraft fire and modern enemy fighters. 

The idea of using a fast fighter for reconnaissance had been proposed before the outbreak of war, however, there were too few aircraft available to be spared for non-combat operations; or at least that was until on 22 September 1939, Sidney Cotton, an Australian inventor, adventurer, aviation and photography pioneer, was commissioned to set up the RAF's 1 Photographic Development Unit (PDU). In October 1939, Sidney was provided with two Spitfire Mk Is to develop as photo reconnaissance aircraft. These two aircraft were the first of around one thousand Spitfires to be either converted or built from scratch for the reconnaissance role. This short ranged fighter would roam as far as Berlin, providing the Allied armies with vital intelligence throughout the war.

Rare colour picture of 16 Sqn's FR.IXc Spitfires 

The first Spitfire flown high-speed, high-altitude photo-reconnaissance (PR) mission of the war took place on 18 November 1939 when Flt. Lt. "Shorty" Longbottom took off from Seclin and attempted to photograph Aachen from 33,000 ft. Flying PR missions was not an easy assignment, Spitfire pilots often flew missions lasting at least a full working day, in today's money, in a freezing cramped cockpit. The introduction of heating and, later in the war, pressurisation, was to pilots a luxury which made the job a little more bearable. Early PR Spitfires also lacked radios but, even when added in later versions, the pilot was expected to maintain radio silence throughout the flight. If you have ever seen the classic 1953 movie The Malta Story where Alec Guinness plays the role of a Spitfire PR pilot, you'll understand why radio science was so important!

A number of various paint schemes were used by the early photo-reconnaissance Spitfires with an overall "PRU Blue" being adopted for the majority of medium to high altitude aircraft. Spitfires engaged in low altitude missions were often painted in a very pale "Camoutint Pink", which was found to provide the ideal camouflage when viewed against low cloud or during dawn and dusk when the sun is low and the sky can have a pink hue.

 Mk IX, the RAF's most heavily armed reconnaissance Spitfire

Low-altitude PR sorties, called "dicing" missions, were required to photograph specific and smaller targets such as radar stations, V1 launch sites and defensive positions, were obviously much more dangerous than those at high-altitude. At high speed and low altitude there was also little time to aim the oblique camera and the pilot had to become skilful in estimating when best to start taking photographs. This was not a job for the faint hearted!

My Spitfire depicts one of these low level PR specialists but with 2 unique features; not counting its pink camouflage! Its first unusual attribute is that this was the most heavily armed reconnaissance Spitfire, the IXc. Produced in small numbers, rather than having all its guns stripped out as was more common for a PDU Spitfire, the IXc carried the standard armament of the Mk IX fighter, with one rather than two obliquely mounted F.24 cameras housed in the fuselage over the pilot's left shoulder. 

The second unique feature is its clipped wings. Clipping a Spitfire's wings is often questioned from an aesthetic perspective and this is why you'll probably never see many in this trim flying at airshows, the classic elliptical wing being regarded by many as the key to its beauty. So why clip a Spitfire's wings? In August 1941, long after the Spitfires had won the Battle of Britain against the Messerschmitt Me109, a new Luftwaffe fighter appeared in the sky over Europe. This was the Focke-Wulf Fw190, which owing to its incredible rate of roll and manoeuvrability, soon proved to have superiority over even the Spitfire. Something had to be done to stem the losses being suffered. Aircraft engineers identified that in order increase the roll rate and improve its combat fighting qualities, the wingspan needed to be shortened. Fortunately, the Spitfire's wingtips are a separate construction, attached with few bolts and a number of small screws. It was thus an obvious and easy solution to simply remove the wingtips and fit a fairing in its place. 

Non clipped wing version in flight

In a test flight performed between a standard winged Spitfire Mk V and the new shortened version at various heights up to 25,000 feet, it was discovered that the clipped wing made the aircraft 5mph faster at 10,000 feet and gave an improved acceleration across all tests. In a dive, the clipped wing Spitfire could pull away from the standard version and most critically, in a dogfight its improved roll rate meant it could shake off the pursuing unmodified Spitfire. There was minimal change in climb performance and with no noticeable change to the take-off and landing performance the shortened wing was a winner. There was also another benefit to the PR pilot. The Spitfire wing is quite large and actually blocks out a lot of the ground from the pilot’s view, so as the removal of the wingtips shaved over four feet from each side, it improved his downward view considerably. 

Performance improvements were so noticeable that it was not surprising that during the latter stages of the war the clipped wing configuration became a very common sight. Indeed, it was almost the standard specification on all later Spitfire variants, particularly as high altitude sorties became fewer and low level missions, such as ground strafing and photo reconnaissance, became the priority. 

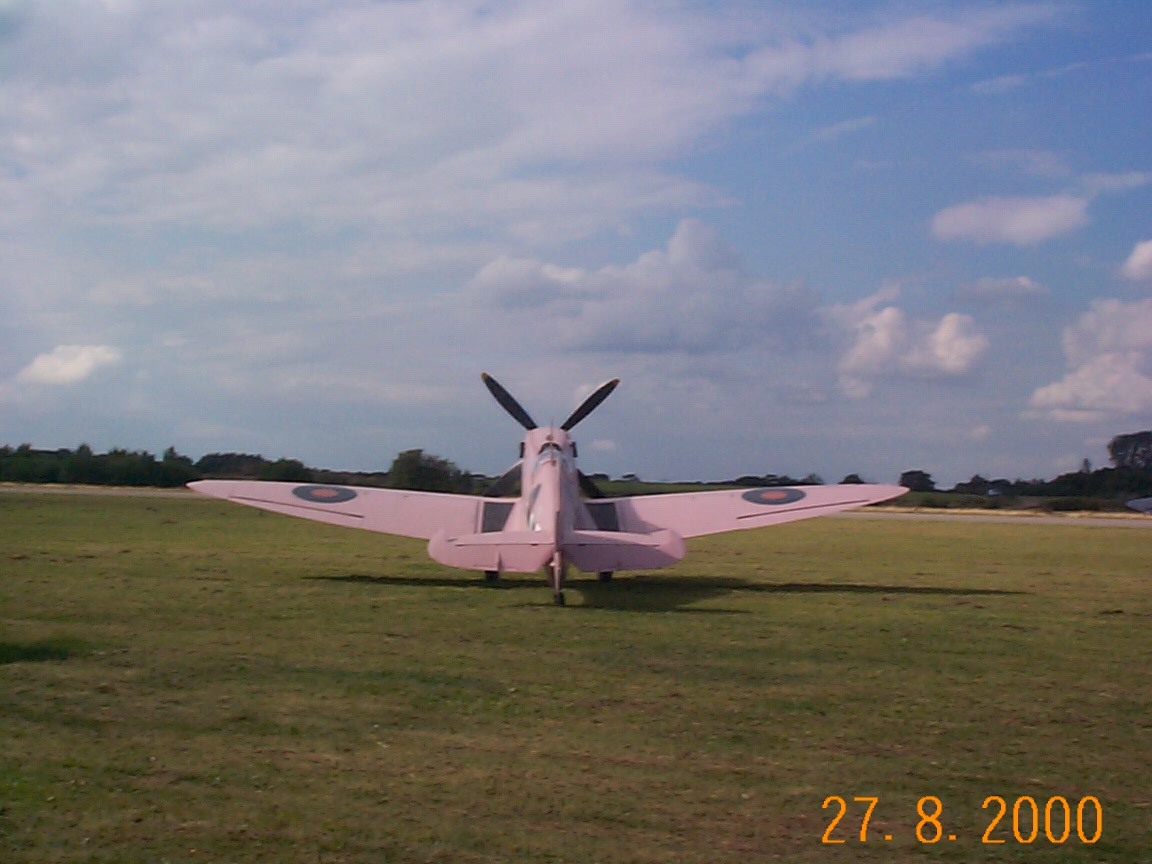
Finally, here are a couple of amateur shots of a rather brighter than original pink, later Spitfire Mk PRXI that I found in my photo archive from a Duxford Airshow 20 years ago. 


Model Supermarine Spitfire Mk PRXI
Registration: G-MKXI
Construction Number: 6S-504719
Code Number: PL965 / R

---------

The model

Brand: Kovozávody Prostějov (KP)
Title: Supermarine Spitfire FR.IXc New Tool Model
Number: KPM0176
Scale: 1:72
Released: 2020 | Rebox (Changed decals)

Sunday, 12 July 2020

Operation Goodwood - Cromwell, King Tiger & Stug III

So, as promised,  here's part 2 of my tracked vehicle medley. Following the Hobart Funnies which kicked off this 'land ship' excursion, I acquired 3 additional Airfix models of tanks used in and following those Normandy landings. These were, two tanks making the debut in the field of combat, the Tiger II and Cromwell, and a surprising tracked vehicle, the Stug III. As a backstory to these models, I selected the Allied's July operations to break out from the Normandy beachheads and subsequent the liberation of two strategic towns, St Lo and Caen, which opened the way to Paris and the Franco-German border.

Having successfully landed at Sword & Juno beaches on the opening day of Operation Overlord, D-Day 6th June 1944, the British and Canadians armies hit a brick wall at Caen. Bisected by the river Orne, it was a vital road and rail junction which Montgomery had planned to take on D-Day itself, however, congestion in the beachhead delayed the arrival of armour and allowed the Germans, recognising Caen's strategic importance, to consolidate their forces for counter attack. 

If you had to design anti-tank defences, one would be hard pushed to create anything more effective than the ditches and high banks topped with thorny hedges found surrounding the farmland along the Normany coast; this was a landscape soon to be known, to the Allied soldiers cost, as the bocage. These banks, ditches and hedges not only offered excellent defensive positions in which to hide anti tank guns, mortars and snipers but were also very difficult to launch a viable attack against. The roads were narrow, in some cases too narrow for tanks and if wide enough, there was normally insufficient room to traverse a turret, so tanks could be taken out by those lying in wait, at their leisure, like sitting ducks! 


Cromwell, Stug III, King Tiger standoff!

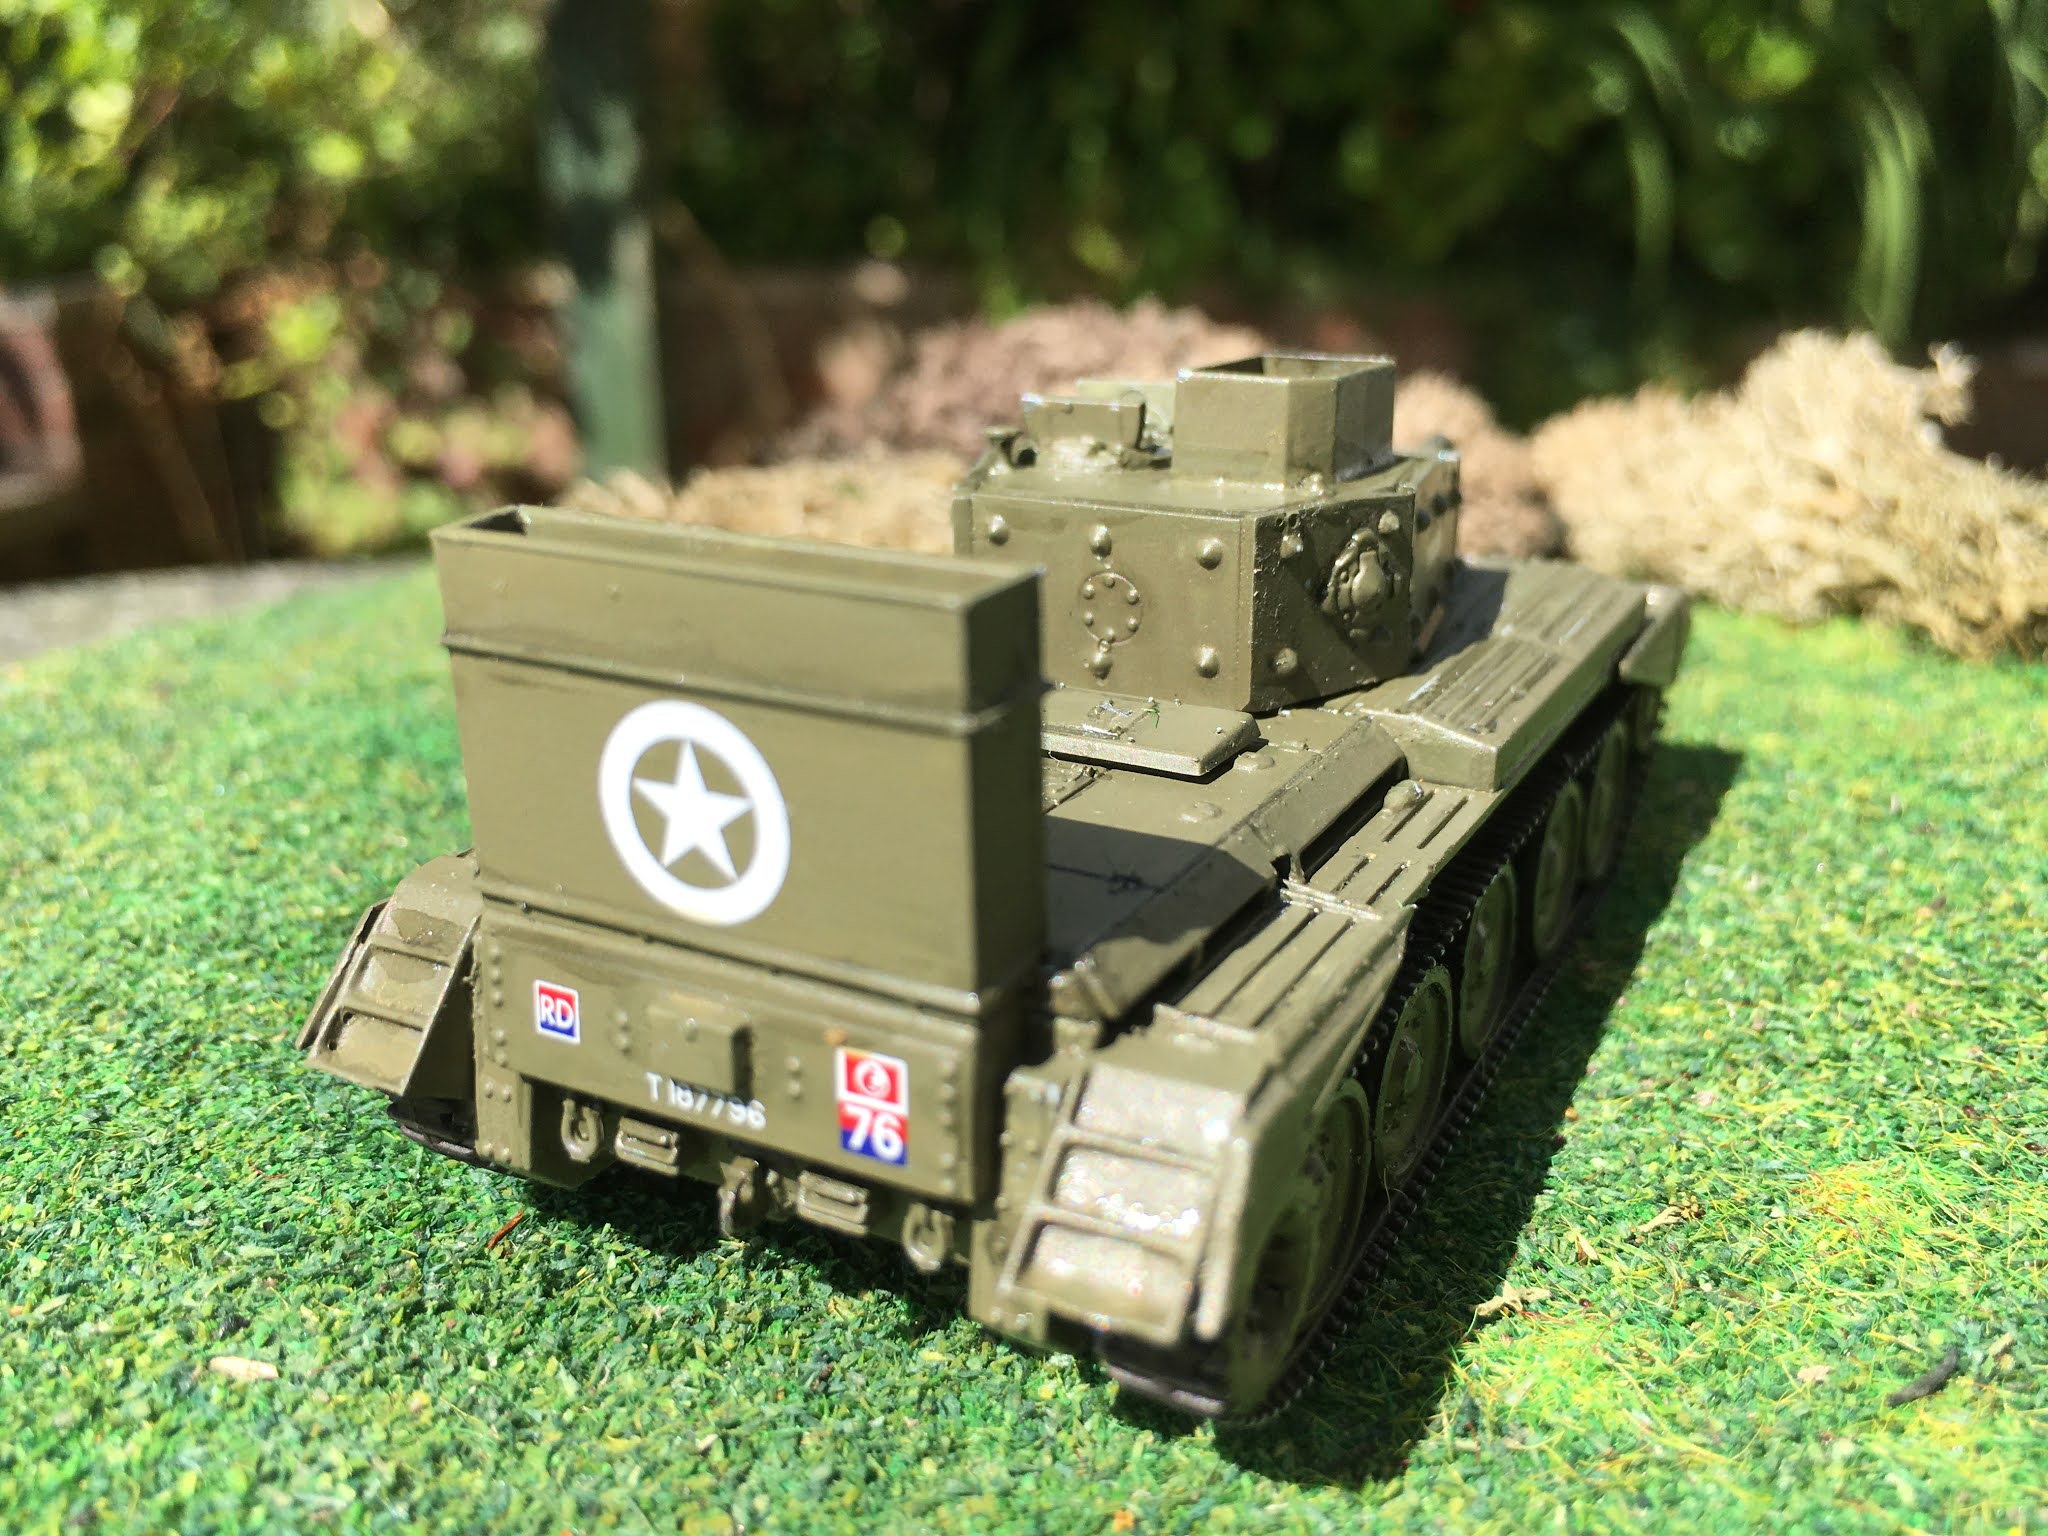
Naturally, these conditions were known to the planners and this was why Britain's newest edition to its armoured division, the Cromwell tank, also know as the Cruiser Mk VIII, was fitted with a specialised hedge clearing attachment. While not specifically one of Hobarts Funnies, which I shared in an earlier post, I think the Cromwell tank's accessories should at least warrant an honouree entry in his inventory, 

Cromwell tank with hedge clearing attachment

as in addition to the hedge clearing attachment, it could also be fitted with a snorkel over its engine vents so as to allow it to wade ashore from its landing craft! While probably never in reality seen on the same vehicle at the same time, making full use of artistic license, I've ensured both of these accessories were seen fitted to my model of this D-Day equipped version.

An interesting factoid about the decals on this model: the white star, usually associated with the American forces, was actually adopted for all Allied ground vehicles during the second world war, so it is very much OK to see it adorning this British Cromwell tank.

Cromwell tank with snorkel

So, what about Operation Goodwood? Well, while there were a two preceding operations (Epsom & Charnwood) in the attempt to liberate Caen, Goodwood was distinctive in that Montgomery, commander of the Allied ground forces, went against his mechanised battle doctrine of never using tanks without infantry support. It was July 1944, the British Army were struggling to fill gaps in its ranks but had plenty of tanks. Montgomery was under pressure from the RAF to secure forward airfields, from Churchill to capture the V1 sites which had started launching flying bombs on London and from the Americans to take the pressure off their Operation Cobra to liberate St Lo. So, Montgomery released 3 armoured divisions of 2,650 tanks to envelop Caen in the largest tank battle that the British ever fought. While it was costly in men and machines, with a third of the entire British tank strength in Normandy lost, its success was seen some 60km to the west, where as the Germans believing this British flank attack to be the most dangerous, emptied St Lo of vital supplies. This left the door open for the Americans to break out toward Falaise and encircle what was to be known as the Falaise Pocket. Operation Goodwood had effectively been a decoy enabling the breakout and the ultimate destruction of most of Germany's Army Group B west of the Seine.

The Normandy campaign, saw both the British and Germans bring 2 new tanks into the war. The Germans introduced their very expensive heavy tank, the Tiger II or King Tiger, while the British rolled out their medium tank, the Cromwell, a scaled down version of the Churchill tank, which you may recall was the base vehicle for many of Hobarts Funnies.  The Cromwell was powered by a Rolls Royce Meteor engine, which was inspired by the famous Merlin engine of the Spitfire after many from crashed aircraft were actually converted for earlier tank use. It could reach an impressive 40 mph and cover 170 miles on its 500 litres of fuel, meanwhile, the King Tiger, could only reach 25 mph and had to stop to replenish its 860 litre tank at least every 100 miles. While the inadequacy of its original 6lb main gun was resolved by boring it out to take the same 75mm shell used by the Sherman, it did enter the conflict with an improvement over the Sherman, in having a lower profile, harder to hit, and thicker armour enabling it to sustain more damage. That said, it would need its superior speed and unique ability to lay down accurate fire on the move to out gun the King Tiger!


Stug III

While the King Tiger ay have been latest edition to Germany’s highly effective war machine, it already had 2 very powerful and feared stablemates in the form of the Tiger I and Panther, both of which were more than a match for most of what the Allied forces could at the time muster.  However, another interesting factoid: it was neither of these new nor existing heavy tanks which made the biggest impact on Allied tank losses; indeed it was not even a tank, but the Stug III self propelled gun and tank destroyer. This was basically a 75mm gun stuck on the body of an old Panzer III. While less easy to aim, it costed a third of the price of a turreted Panzer III, and found success due to its considerably lower profile, making it the perfect weapon to camouflage in wait for its prey, protected by the ditches, banks and hedges of the Brocade. 

It was the most prolific tracked vehicle to be produced by Germany during the war, and it occurs to me that, due to its low cost, its effectiveness on the battlefield, and for being in service from the start to the end of the war, it could be somewhat likened to the Allied’s extensive use of the mass produced American Sherman tank and a-typical of what I had considered to have been Germany’s usual approach: to create and exploit the most expensive and bespoke new armaments possible! 

Lovers of flight may be be please to learn that my next post will return us again to the air.

-------

The Models:


Brand: Airfix
Title: Tiger Ausf.B 'King Tiger' Starter Set
Number: A55303
Scale: 1:76
Type: Full kit
Released: 2012 | Rebox (Model set)


Brand: Airfix
Title: Stug III 75mm Assault Gun Vintage Classics
Number: A01306V
Scale: 1:76
Type: Full kit
Released: 2018 | Rebox (Changed box only)


Brand: Airfix
Title: Cromwell MkIV Starter set
Number: A55109
Scale: 1:76
Type: Full kit
Released: 2011 | Rebox (Model set)


Monday, 6 July 2020

Tiger II

While lockdown has eased slightly this week, the war with C-19 has not gone away and neither has my build factory! Today, I had planned to bring you another medley of tracked vehicles but the material I dug out on the king of these seemed to demand its own entry. So, I’ll return with part 2 very soon. In the meantime, here’s a view and backstory on the King Tiger.

The Tiger II was Germany’s most expensive tank of the Second World War. It was unofficially known, to those who fought with them, as Königstiger (Bengal tiger), and by Allied troops, after a rather poor translation, the King Tiger. Porsche and Henschel were originally invited to design prototypes to carry the 88mm anti aircraft gun, which the Luftwaffe had so successfully used against Allied tanks. While Henschel finally won the contract, both the Porsche and Henschel turret designs were used in the production vehicles. An interesting factoid about the turrets is that they were actually both designed by Krupp, Porsche and Henschel designed the hulls, engines and running gear. The "Porsche turret" had a stylish rounded front that was both difficult and expensive to manufacture and which was also discovered to be less than effective; a well aimed shot could be fatally redirected via the rounded front into the gap between the turret and hull! The first fifty tanks were fitted with this early turret while the next 442 Tigers to run off the production line were fitted with the simplified, more thickly armoured and flat faced designed "Henschel turret", with no shot trap! 

The Tiger II first saw combat in July 1944, in the battle to hold back the tide of Allied advance following the Normandy D-day landings. In September 1944 Tiger IIs were sent east in a vain attempt to slow the relentless advance of Russian forces as they drove towards Berlin. While a very formidable weapon, the Tiger II was phenomenally expensive; costing $300,000 per vehicle compared to $30,000 for the Sherman, the Allies most prolific tank. In the end, while it was said to take at least 3 Shermans to knock out a Tiger II, the Allies won the battle of the tanks through the simple war of attrition. The Americans were able to mass produce so many Sherman tanks that in the end, the Germans were just unable to compete. 

Production of the Tiger II was severely hampered by air raids, in which it is estimated that over 50% of production was lost. It was also found to be unreliable; suffered from destructive oil leaks, under powered running gear and the lack of trained drivers caused many to become unserviceable. Combined with its thirsty engine and the severe fuel shortages of 1944, as the Germans lost control of their oilfields, many Tiger IIs were just abandoned having run out of fuel. If anyone has watched the 1960s film, The Battle of the Bulge, you'll know what I am talking about!

Airfix PzKw VI Ausf.B 'King Tiger', Normandy, 1944


My Tiger 2 model is supposed to be of  No. 113, from 503rd SS Heavy Panzer Battalion but my research points to tank No. 113 having been a member of the 101st Battalion, so it is this tank which inspires my backstory. 

After seeing some action in Normandy with their old Tiger Is, in August, 101st SS Heavy Panzer Battalion were re-equipped with 14 Tiger IIs, all with the production model turret (the "Henschel turret"). One of which was No. 104 on display at the Bovington Tank Museum.


Tiger II No. 113 in Beauvais, France. Late August 1944.

On the 3 September, my Tiger II, No. 113, was reported to be in combat with Task Force Lovelady of the US 3rd Armored Division when it was abandoned in Jemappes, Belgium. Its turret was left facing backwards supposedly towards the attacking American forces, just as the crew had left it when it ran out of fuel!


Note: I don’t know if Airfix have made an error in suggesting my tank is No. 113 or if this tank’s history was just less interesting and it disappeared without trace, but either way, modelling it with the "Porsche turret" is wrong for my backstory as the pictures of No. 113 clearly show it having the "Henschel turret"! Airfix don’t normally get these things wrong, and do usually pick on a source with a well known backstory, so this one is quite perplexing and perhaps requires more research ..

-------
The Model


Brand: Airfix
Title: Tiger Ausf.B 'King Tiger' Starter Set
Number: A55303
Scale: 1:76
Type: Full kit
Released: 2012 | Rebox (Model set)

Saturday, 20 June 2020

Hobarts Funnies

Continuing my lockdown scale modelling project, I've switched to another peculiar interest of mine, the land ships of military combat; post 1917, the tank. Following my build of the D-day Hawker Typhoon, I thought I'd focus this build on the armour used to support our allied forces in the D-day landings. I finally decided on an epic construction of 6 models, 5 of which are a creation of one man, an engineer and expert in mechanised warfare, Percy Hobart; and the 6th is the craft which landed them all.

Major General Percy Hobart

Major General Percy Hobart had an interesting military career and was the creator of an equally interesting military division, whose impact on some of the critical campaigns in the latter years of World War 2 can not be over emphasised.

Hobart joined the army in 1904 as an officer in the Royal Engineers and having been inspired by the invention of the tank during the 1914-18 war, he volunteered to be transferred to the Royal Tank Corps in 1923. His vision for the new mechanised form of warfare did not, however, meet with the agreement of the established army leadership who, being still dominated by conservative cavalry officers, were most resistant to his ideas. In spite of this, he was promoted to Major General in 1937 and sent to form and train the "Mobile Force (Egypt)", which later became the 7th Armoured Division, famous as the "Desert Rats". 

His unconventional ideas on how armoured warfare should be conducted, however, still kept him out of favour with the top brass and so when General Sir Archibald Wavell took over command in Africa in 1940, he dismissed Hobart into retirement! Hobart returned to England, and joined the Home Guard as a Lance Corporal! Meanwhile, Churchill, unhappy with the way the desert campaign was proceeding under Wavell, demanded a different approach. Amazingly, against senior army leadership's wishes, he appointed Hobart to to train 11th Armoured Division and then he was given the opportunity to raise and train a new armoured division, the 79th Armoured Division. 

In March 1943, when the the division was on the brink of being disbanded due to lack of resources, General Sir Alan Brooke,  Chief of the Imperial General Staff, took the unprecedented decision to invite Hobart to convert his 79th Division into a unit of specialised armour. Hobart was given free rein to use his extensive engineering experience and armoured warfare expertise to address a number of military challenges. His mission was to devise solutions to overcome the inability of regular tanks and infantry to cope with fortified obstacles in an amphibious landing, as had so disastrously been demonstrated during the raid on Dieppe in August 1942. This, understandably, was all in preparation for the Allied invasion of Europe and what was to be known as Operation Overlord, the D-Day Landings. 

79th (Experimental) Armoured Division Royal Engineers

In its conversion, the division was renamed the "79th (Experimental) Armoured Division Royal Engineers"with unit insignia of a black bull's head with flaring nostrils superimposed over a yellow triangle. Under Hobart's leadership, the 79th assembled units of modified tank designs collectively nicknamed "Hobart's Funnies". These were used in the Normandy landings and were credited with helping the Allies get ashore. 

Example of how the resources were distributed in the D-Day Landings

The majority of the designs were modified forms of the Churchill and Sherman tanks as both were available in large numbers. The Churchill had good, though slow, cross-country performance, heavy armour, and a roomy interior while the Sherman's mechanical reliability was valued.

Among the many specialist vehicles and their attachments were:

Crocodile: A Churchill tank modified by the fitting of a flame-thrower in place of the hull machine gun. An armoured trailer, towed behind the tank, carried 400 gallons (1,800 litres) of fuel. The flamethrower had a range of over 120 yards (110 metres), far greater than man-portable units. Regarded as a powerful psychological weapon, this flame tank proved highly effective at clearing bunkers, trenches and other German fortifications.


AVRE (Assault Vehicle Royal Engineers): A Churchill tank adapted to attack defensive fortifications. The AVRE's main gun was replaced by a petard mortar that fired a forty-pound (18 kg) HE-filled projectile (nicknamed the "flying dustbin") 150 yards (137 m); it was capable of destroying concrete obstacles such as roadblocks and bunkers. The mortar had to be reloaded externally by opening a hatch and sliding a round into the mortar tube from the hull! 


ARK (Armoured Ramp Carrier): was a turret-less Churchill tank, carrying a bridge capable of spanning 30ft (9.14m) gap on its deck, complete with hydraulic system which would lift the bridge on a pivoting arm and lay it horizontally in front of the vehicle. It was then disconnected and the vehicle withdrawn, leaving the bridge in position for the advancing combat tanks to use. With the turret removed, the fighting compartment was largely filled with hydrolic machinery to operate the bridge arm. The bridge could support a 60 ton (60,964kg) weight. 


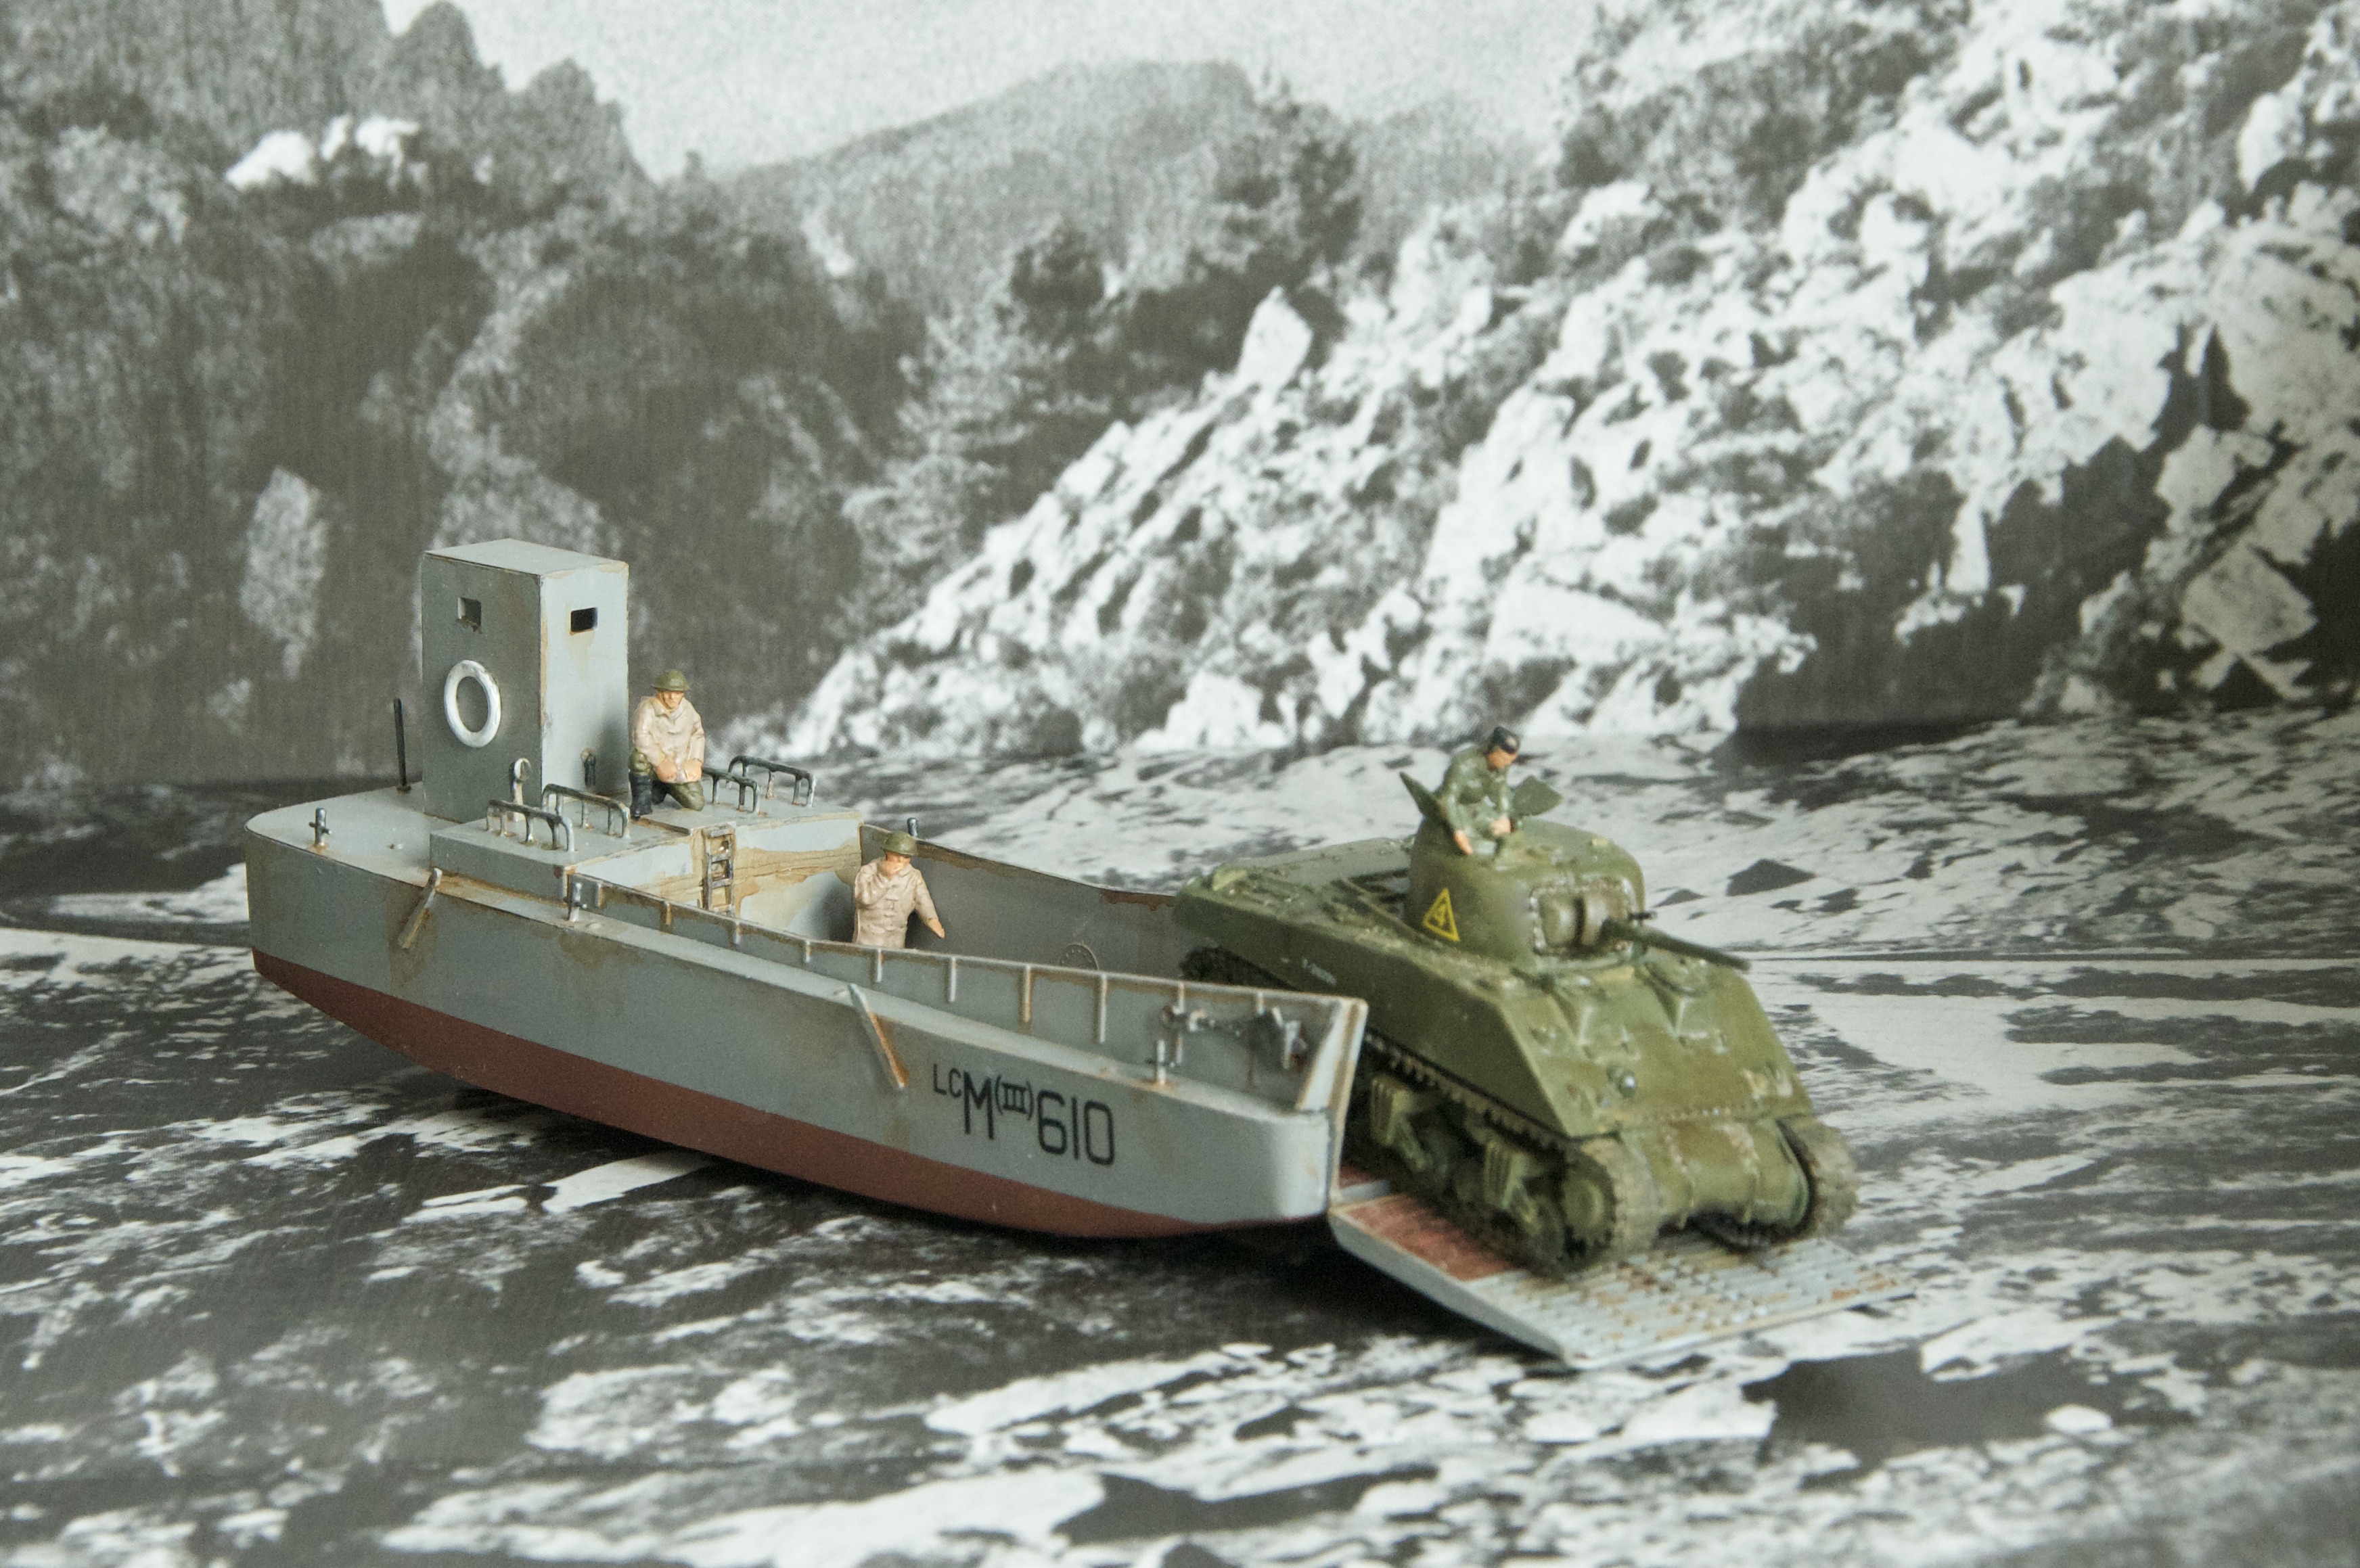
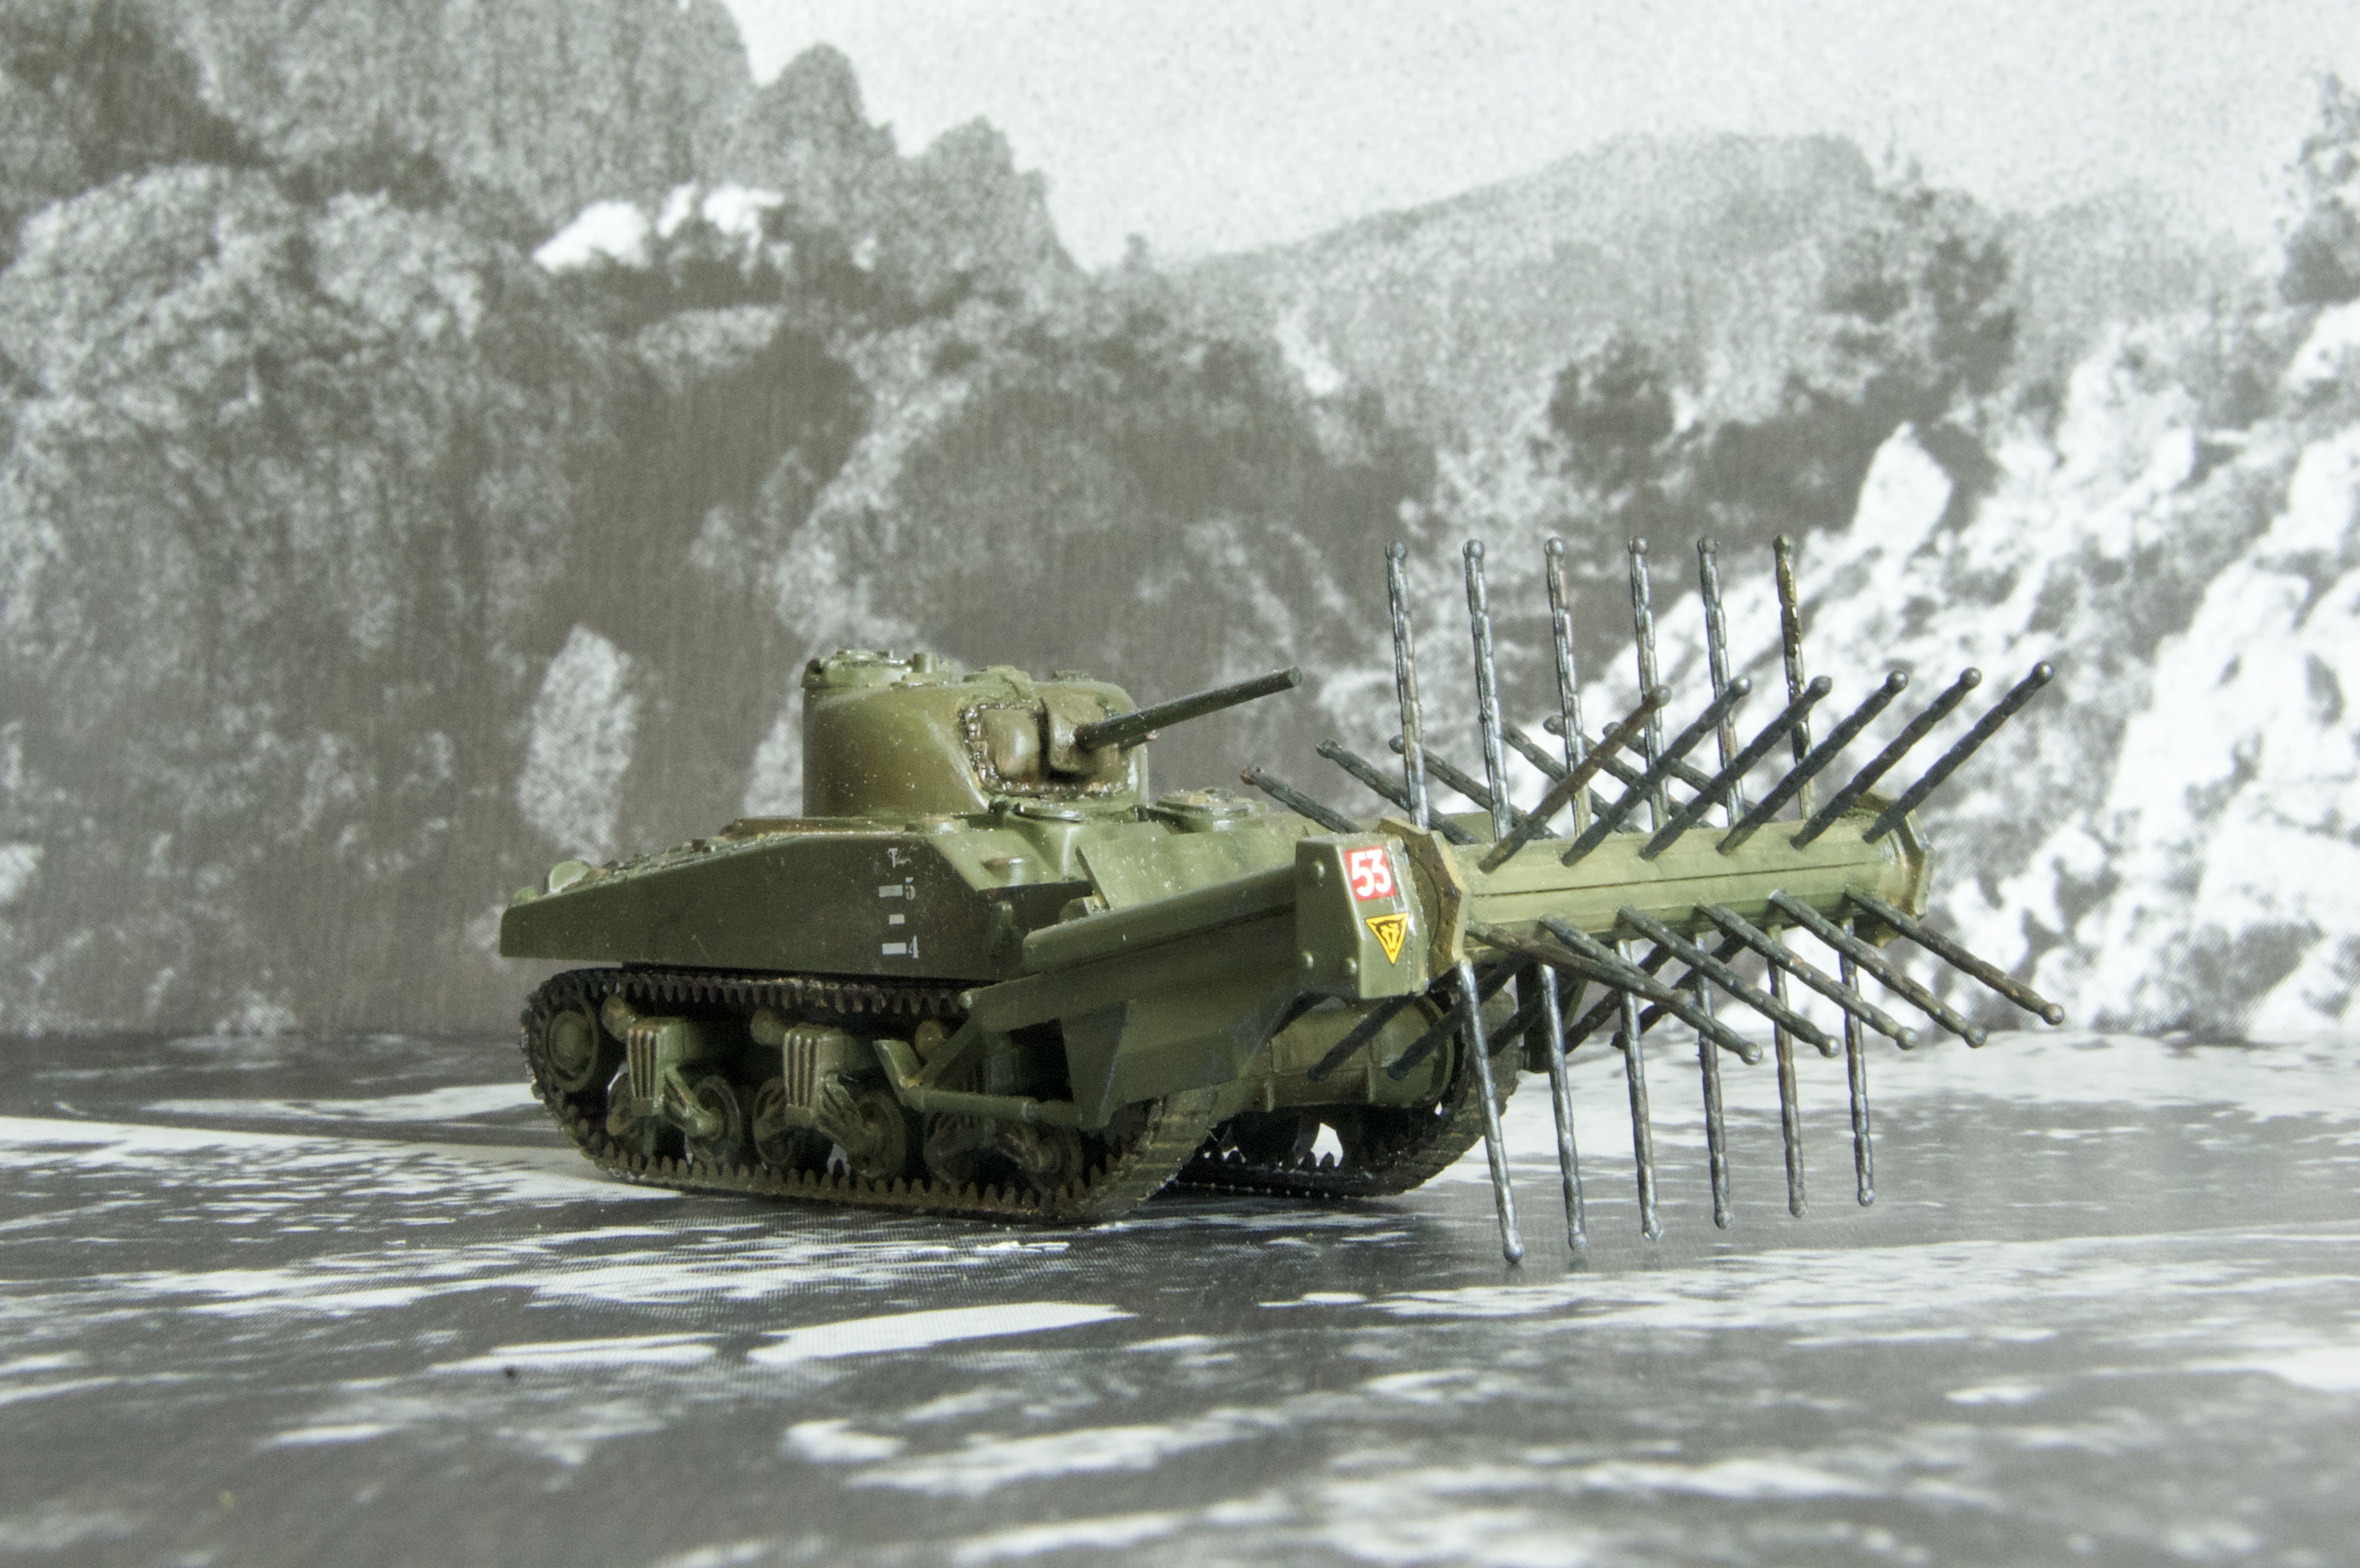
Crab: Once combat power rolled onto the beaches, the next challenge posed would be the tens of thousands of mines and other obstacles. Many options were considered with Hobart finally settling on a version which he had found some success in desert conditions fitted to the Matilda and Valentine tanks in Egypt. Using modified Sherman tank, the most capable modern platform, engineers equipped it with a mine flail; a rotating cylinder of weighted chains that exploded mines in the path of the tank. After being landed on the D-day beaches by an LCM (landing craft mechanical), the Sherman Crab's primary role was to clear paths and secure the exits, minesweeping and with direct fire power. While not sufficiently manoeuvrable to be employed as infantry support, it could on exceptions be used against pillboxes and strongpoints! 


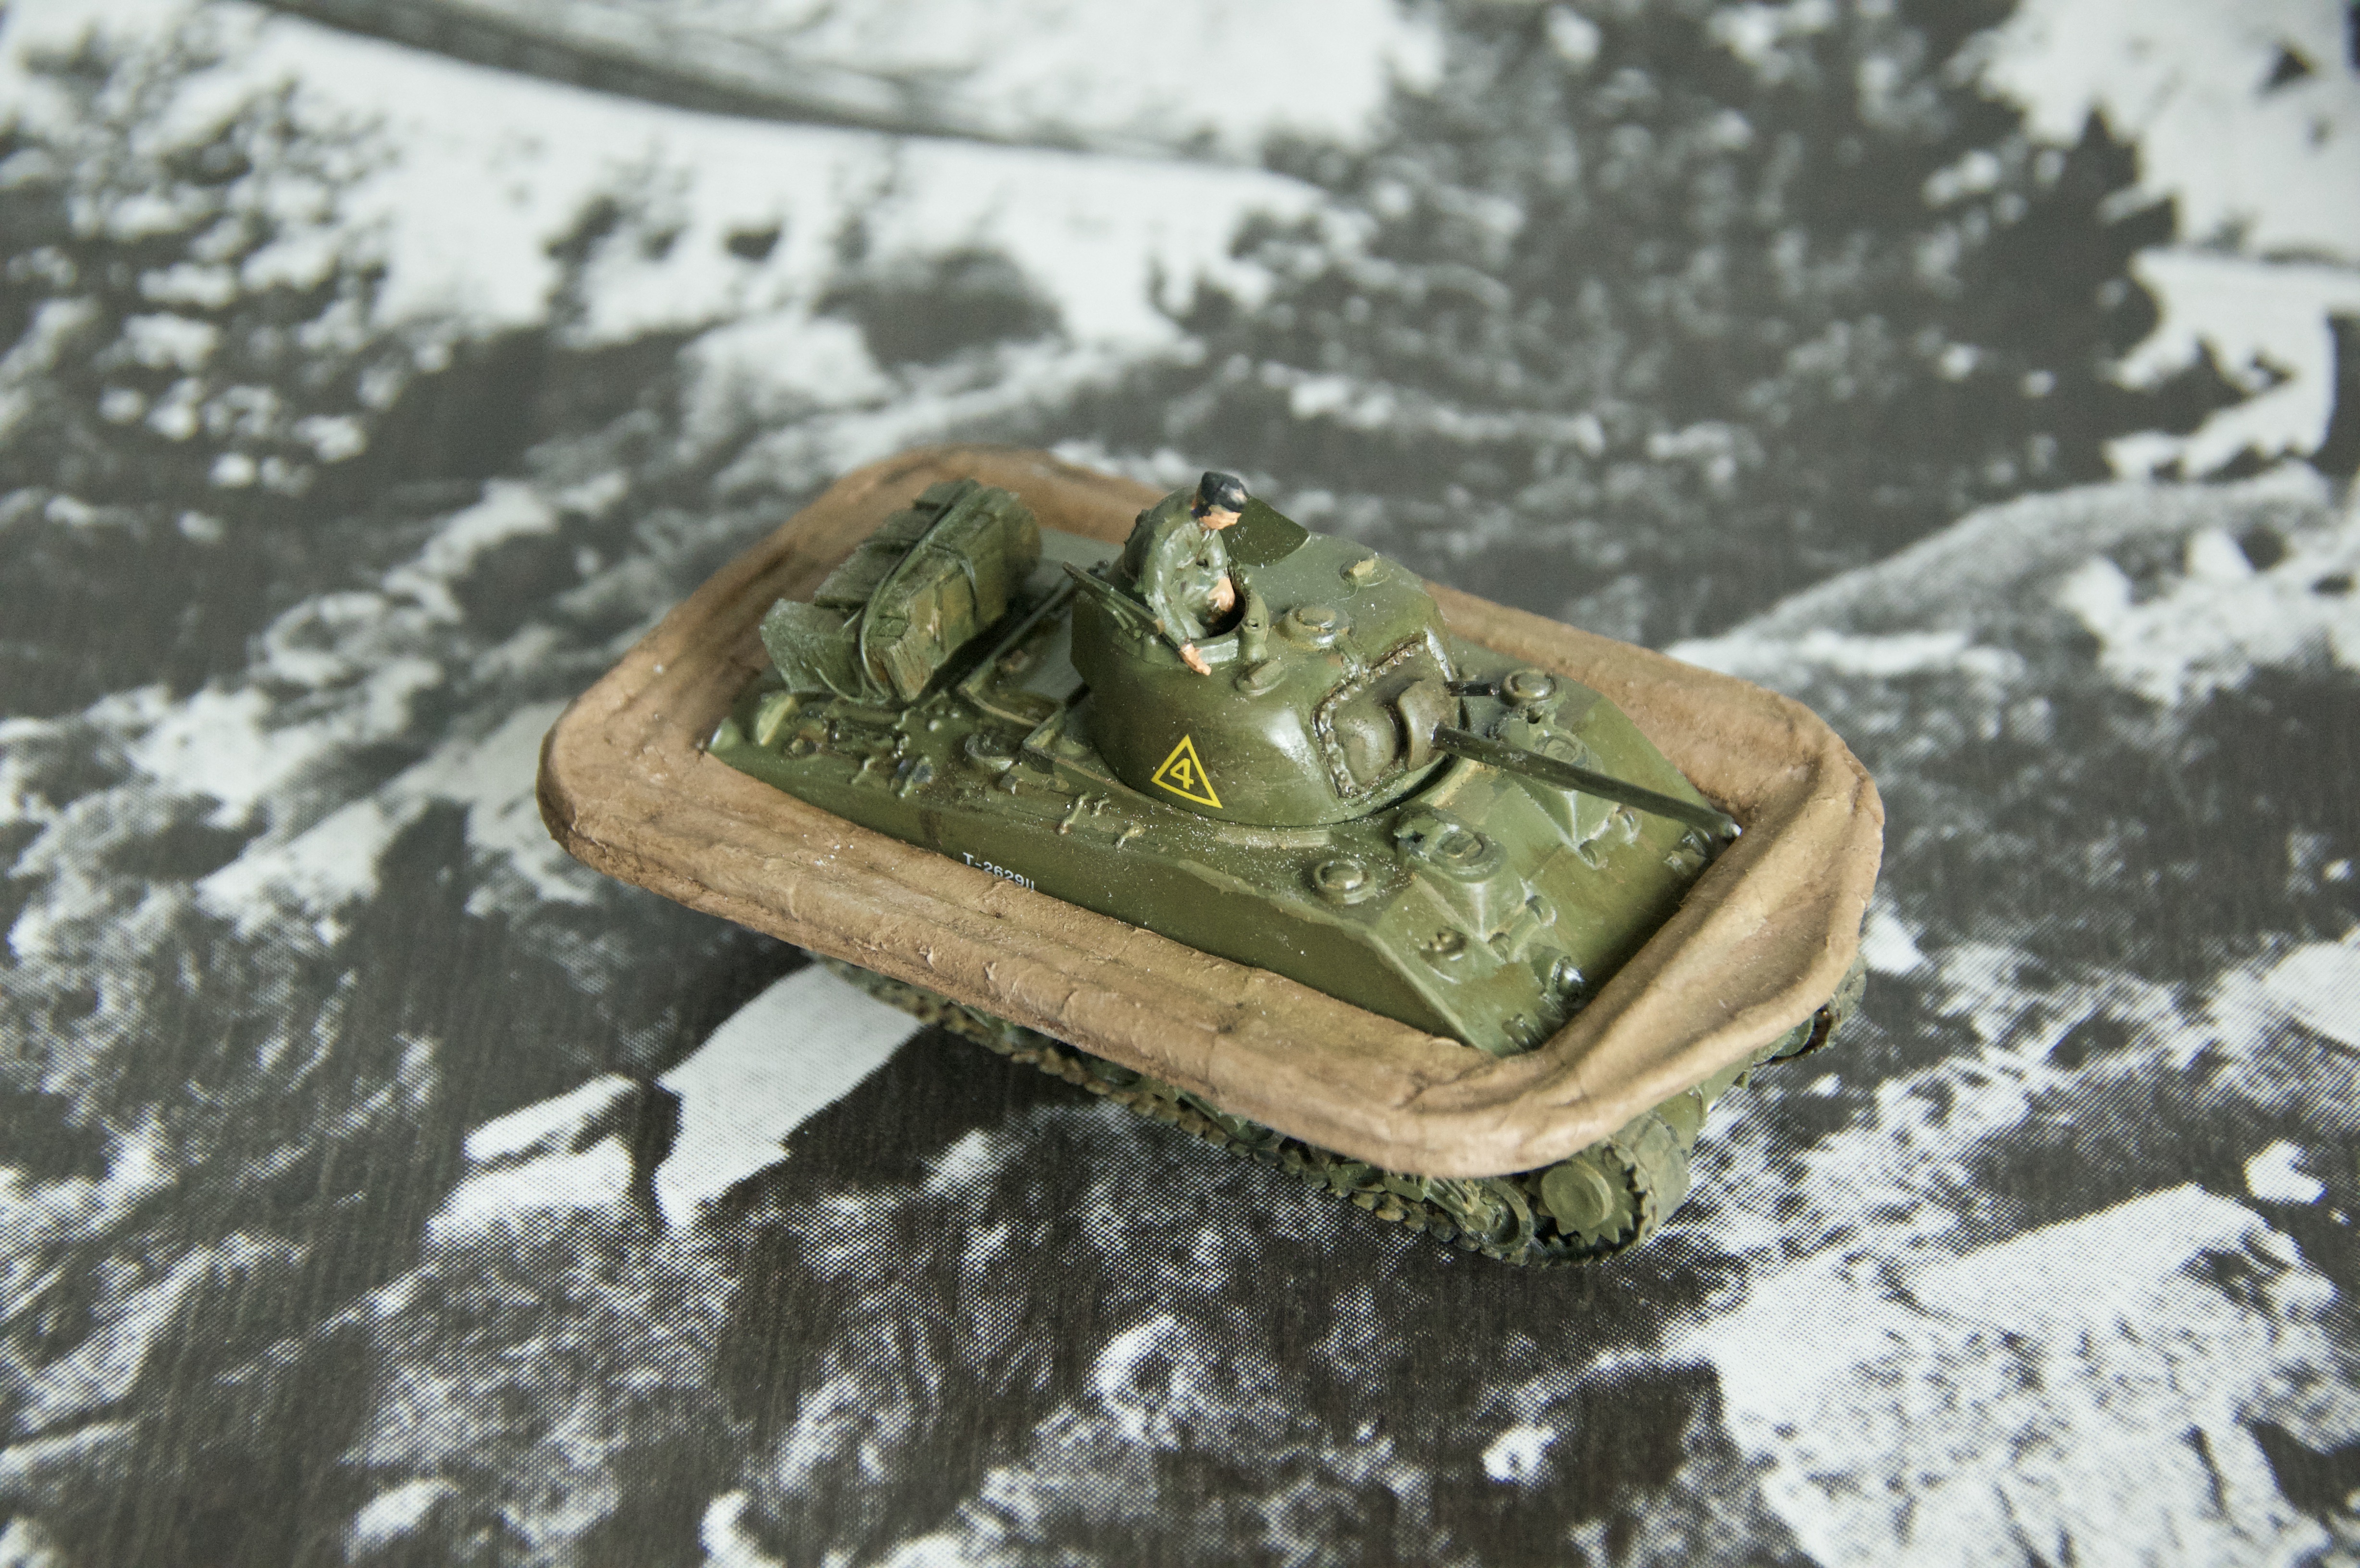
DD tank (Duplex Drive): An amphibious M4A1 or M4A4 Sherman fitted with a large watertight canvas housing able to float and reach the shore after being launched from a landing craft up to several miles from the beach. They were intended to give support to the first waves of infantry that attacked the beaches. On D-day, they had mixed results due to weather, yet they were very effective when landing in numbers. 

The DD landing details were as follows: at GOLD beach the initial infantry assault went in without DD-tank support as the 4th/7th Royal Dragoon Guards found sea conditions unfavourable for launching, thus all had to be shore landed; on JUNO Beach the 6th Canadian Armoured Regiment landed 21/29 launched, while complicated by worsening sea conditions and the later than planned arrival of armour, the 10th Canadian regiment landed all by LCTs; and on SWORD Beach the 13th/18th Royal Hussars had the most successful deployment of the day, landing 31/34 tanks launched and arriving just after the leading Crabs and AVREs to provide timely support. Meanwhile to the west at UTAH Beach 70th Tank Battalion landed 29/30 launched; at OMAHA Beach 741st Battalion landed just 2/29 launched, while 743rd Battalion shore landed all its tanks from LCTs.


The 79th's vehicles were offered to all of the forces taking part in the landings of Operation Overlord, but the Americans declined all except the amphibious Sherman DD tank. The result was that on OMAHA and UTAH Beaches the US suffered 40% casualties amongst their engineers clearing the exit lanes of obstacles and mines, and it was late in the day before these were secured to enable the  beach itself from being cleared.

There is a view that had General Omar Bradley, the American commander, made use of all Hobart's Funnies that the US army may not have got so bogged down and incurred so many losses during their landing on Omaha beach. Perhaps in recognition of this mistake, Bradley ensured that the American forces did at least make use of the Sherman Crab after D-Day.

.. and here are a few shots of the real thing..


In its 3 short years, the 79th Armoured Division had amassed almost seven thousand vehicles and realised a great number of accomplishments in the performance of its specialised mission. Although disbanded on 20 August 1945, the 79th's tactics, techniques and procedures have survived through various permutations, and its influence can still be seen in today's operations of amphibious assault, use of armour in an urban environment, strongpoint assault, obstacle breaching and river crossing operations.

Monday, 8 June 2020

Hawker Typhoon Mk1b

No. 8 in my Lockdown Scale Model Project is the Hawker Typhoon Mk.1b, affectionately known by the RAF pilots as the ‘Tiffie’.

As the RAF's first 400 mpg fighter using the new 24 cylinder Napier engine, the Typhoon was intended as a high-speed, high-altitude interceptor-fighter to replace the Hawker Hurricane and the Vickers Supermarine Spitfire. However, its comparative lack of performance at altitude, the price for speed and a rushed engine development, led to the decision in 1943 to focus Typhoon operations primarily on the ground attack role, particularly prior to and following the invasion of Normandy in June 1944.

266 Squadron Typhoon RB478 ZH-Q 

Being slightly larger than the Hurricane and Spitfire, the Typhoon possessed great structural strength and its comparatively thick wing section provided large internal capacity for fuel tanks and for the housing of its heavy 4 x 20mm cannon. Together, this made it perfect for ground attack, being able to add external carriage of 2 x 1,000lb bombs or 8 x 3-inch rockets with 60lb of warheads or even drop tanks to extend its range for those special behind the lines missions.

4 x 20mm cannon

This model is of the later Mk.1b variant in the paint scheme of Squadron Leader Ronnie Sheward of No. 266 (Rhodesia) Squadron, RAF 2nd Tactical Airforce which, together with 17 other Typhoon Squadrons, took part in the D-Day invasion. The squadron was used to attack enemy transport and troop concentrations in the period before D-Day, using 500lb bombs and after the D-Day landings to provide close support for the army, using the 'cab rank' system. This involved aircraft circling over the battlefield waiting for controllers travelling with the troops to make a call for air support.

Invasion stripes on fuselage and wings

In choosing my paint scheme for this model, I moved the clock forward a month, in that Airfix intended it to depict the the squadron flying missions in Holland and Germany between April/May 1944, meanwhile, in recognition of this weekend's D-Day anniversary, I felt the need to include invasion stripes!

Typhoon Mk.1b being refilled and rearmed

Invasion stripes were alternating black and white bands painted on the fuselages and wings of Allied aircraft to reduce the chance that they would be attacked by friendly forces during and after the Normandy Landings; a major issue experienced during the Dunkirk evacuation when British, French and Belgian forces could not tell the RAF from the Luftwaffe with obvious consequences! Three white and two black bands were wrapped around the rear of a fuselage just in front of the empennage (tail) and from front to back around the upper and lower wing surfaces. The order affected all aircraft, whose duties might entail overflying Allied anti-aircraft defences, with the exception of four-engined heavy bombers, as there was little chance of mistaken identity.

One month after D-Day, the stripes were ordered removed from planes' upper surfaces to make them more difficult to spot on the ground at forward bases in France. They were completely removed by the end of 1944 after achieving total air supremacy over France.

And the real thing ...


Picture shows 266 Squadron Typhoon RB478 ZH-Q which was S/L Ronnie Sheward's in the summer of 1945

266 Squadron group photo 1945

Squadron Leader Ronnie Sheward is sat centre, front row.

As I've exhausted my supply of aircraft, for the time being at least, next up is something which greatly supported our forces off the beaches and into Europe. Stay tuned ..

BLOGGER IS DEAD LONG LIVE FACEBOOK & INSTAGRAM

It's been a blast Blogger, but not being able to upload any photos of my builds to this blog really makes you meaningless going forward....