This is its story ...
Interior
The quality of this big Airfix kit looks amazing as I make a start on the cockpit. I’m just loving the interior detail but sure how much will be visible once the fuselage is joined.
Now that no figures are provided, it is disappointing Airfix still do not provide a set of harness decals for their kits. I, therefore, sourced and fitted an after market set of Eduard USAAF seatbelts. While I don't find these that convincing, I am hoping that being just visible through the canopy they will at least provide some interesting detail.
It was then pointed out to me by a fellow scale modeller that the wartime B-17 pilots did not have shoulder straps! Hey ho! I'm guessing they won't be that visible behind the final glazing and hopefully not many will know that anyway.
Engines
As with the interior, the detail and engine construction is amazing. I’ve not shown them in their best light here as what I want to show is how it’s all lost when the cowlings are fitted!
I guess if you wanted to display the Fortress stripped for maintenance then it would be fine, but I’m rather regretting the hours I’ve spent building and painting all that detail now!
Gun Turrets
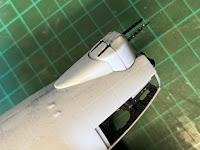
For the front turret, Airfix include a two piece moulding with rear glazing, into which two guns and mount are attached. Having masked the glazing ahead of installing, it was soon apparent that once the cowling was fitted the glazing would not be visible. I'm starting to get serial déjà vu here!
The rear turret is comprised of three pieces of glazing, a large part of which the instructions suggest needs painting both internally and externally. So internal and external masks applied, and the interior is base coated in black and then given its silver interior colour.
 |
I forgot to fit that bit to the left, but once complete,
I can not see that it would have been visible anyway! |
Glazing
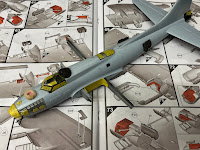
This single piece canopy fits perfectly. Masking is, however, more challenging as each piece of masking tape needs shaping. Unlike other canopies I've masked in the past, none of my standard sized rolls of tape are the right size!
So glad to be back working on the Airfix B-17 Flying Fortress for a therapeutic afternoon of masking. I am, however, thinking I may invest in a pre-cut set for my Academy Memphis Bell.
I then just had time to apply some grey primer which has shown up a little bit of gap smoothing for when I get back to the bench at the weekend.
Finally, as I've built the Academy B-17F to the same stage as my Airfix B-17G, its time to paint!
I'm happy that the multiple layers of grey primer I've used will be more than suitable for the underside of this pre natural metalled finished Fortress that 'all' I need to add is the olive drab to the upper surfaces. It's just amazing, however, just how much masking these aircraft need and how long it takes.
I've still yet to fit the wings as I've found masking and painting the fuselage so much easier with them out of the way. I'll probably fit them next so that I can get on adding all the fiddly bits.
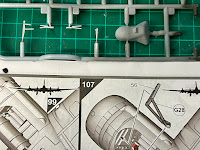
What a dilemma! The Airfix B-17 undercarriage looks superb but half of the struts have not been extruded. Just look at parts G27 & G28!
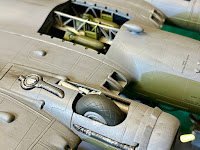
While this is also used in the wheels up configuration it’s neither structural nor really visible, so wheels up we go!
Finished!
B-17G #42-31534 "Shilaylee" as flown by Lt. Mark Roberts of 349th BS/100th BG while based at Thorpe Abbotts in February 1944.
I now just need to work out how I'm going to display it!
Epilogue
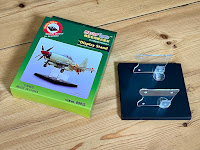
I found this excellent little stand, no holes or slots required. Unfortunately it's made in China but that is still the way of things.










No comments:
Post a Comment
Note: only a member of this blog may post a comment.