Sunday, 11 May 2025

Supermarine Spitfire F Mk.XVIII

 Next up, another Spitfire! 

This is one I’ve been waiting for the right moment to build as it has a bit of a story. 

Today would have been my father’s 90th birthday. He passed Christmas 2021 and while I was up at my parents’ Cumbria home doing that eldest brother thing, I got a call from Airfix’s Michael Clegg asking if he could use two of my Sea King helicopters in a spread he was working on for his Workbench blog.


See here: https://uk.airfix.com/community/blog-and-news/workbench/mitchells-masterpiece-inherits-griffon-power

This not only helped take our minds off the  reason why I had had to dash north but also introduced me to a fact about one of my favourite aircraft which I had not previously known. 

One of the last fighter versions of the Spitfire, the Mk.XVIII flew on “Operation Firedog” in Malaya during the 1950s Emergency just my father was out there with the British Army, or at least en route. 

At the time I was talking to Michael Clegg about the Sea Kings he kindly offered to send me an Airfix kit in return for using my models and story. I naturally suggested the Spitfire would be the perfect one considering its significance:  my father having served in Malaya at more or less the same time, and for it being unveiled in the same article as my Sea Kings. Anyway, despite many a friendly follow up on my part, nothing ever arrived from Michael and so, I was fortunate enough to have sufficient  Airfix flying hours to ensure I secured a kit before it sold out, and it’s been in my stash ever since. 

It now seems only right to mark this, my father’s 90th birthday, to finally build it. 

Development of the Spitfire F Mk.XVIII the 'Super Spitfire' was started towards the end of 1943 and the first Mk.XVIII Griffin 65 powered Spitfire was delivered to the RAF on 28 May 1945. 99 aircraft were completed for the fighter/bomber role with the provision for wing mounted bombs and rockets. 

One of the first tasks when building this kit  is to drill out holes for either bombs or rockets. Airfix’s painting instructions, state they were in Kuala Lumpur in 1947, but it wasn’t actually until the end of June 1948 that 60 Sqn provided a detachment of their Spitfires to the Taskforce at Kuala Lumpur, which was also the first time they used rockets too which is what I’ve gone for. More on their use in the Malayan Emergency later.


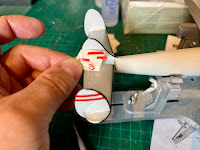
Some will hate my approach with the cockpit interior. Being so beautifully moulded it seems horrifying not to paint and weather every nook and bump. However, having built the Spitfire FR Mk.XIV last year with pilot installed, I know you can see nothing at all of that interior once it's all put together. So as my new mantra is, only paint what you can see I've fitted the pilot in his seat and added a little of putty to his arm joints ready for one of my favourite bits, the detail brush painting. 

Meanwhile, here’s how and when the first Spitfire to be delivered was reported. 

JANUARY 1947 (OPERATIONS)  F/O QUILTER

“There has been little flying on the Squadron this month, principally because of a shortage of aircraft.  On the 15th our first Spitfire Mk.XVIII was flown from Seletar by the Commanding Officer, Squadron Leader Constable Maxwell DFC, DFC but apart from this one Spitfire there has only been our Harvard and another Harvard obligingly loaned by 81 Squadron. 

Our home field, Tenah, only became serviceable for limited flying as recently as the 29th, of this month when our two aircraft were flown over from Seletar. The flying we had managed to do previously had entailed our making the tiresome journey to Seletar by road everyday, thereby shortening our airborne hours even further.

Next month, fortunately, holds brighter prospects as several more of our keenly awaited Spitfires are very near completion and the Tenah runways should become closer to full serviceability.”

I feel my building of of TP222 is one of the Spitfires keenly awaited though it is still some way off being completed 

Thursday, 1 May 2025

Lockheed Super-G Constellation

 Next up … Minicraft’s 1:144 scale, 1950’s airliner, the Lockheed Super-G Constellation, “Super Connie”. 

Very much a break from my usual subject matter but a build I’ve agreed to do for, Roy a friend from my Seaton Scale Modelling Group, he’s provided the kit and me the glue!


It looks a straightforward enough kit although light on detail, I guess that’s the a symptom of the small scale.

Time now to let these bits cure. 

This Constellation has to be one of the most unusual aircraft to have taken to the air. It reminds me of those futuristic looking craft the IR Thunderbird’s had to go and rescue when I was a boy! 

This kit is nice and simple though every bit is heavily covered in flash and will need quite a bit of filler along the seams but I’m enjoying it, however, I've discovered that Farrell & Gold’s modelling paste is more like Vallejo’s Plastic Putty which dries like rubber and won’t sand.


Hoping I’d managed to leave sufficient filler in the gaps, I dug out the Humbrol Maskol to mask the smallest glazing I’ve ever seen. I did start off with masking tape, but the canopy was just too small. 

Then, as much of the Constellation’s TWA paintwork is natural metal and I find white sprays best over silver, it was out with the Liquid Metal. Unfortunately this showed up the failings in Farrel & Gold’s filler, as the fuselage seams are still too visible for me. So, once the silver has cured I’m going to give the more chalky AK Modelling Putty a go, this I have found does sand but it also shrinks … I hate filling!!

That seam along the top of the fuselage has been driving me insane! SO much so, that I tried an approach I’ve never considered before and it’s something others may want to make note of. I masked a corridor either side of the seam and loaded it was 'sandable' filler, not the rubbery stuff! I then smoothed the filler and removed the masking tape to leave a ridge like a Mohican haircut along the length of the fuselage. Today, now dry, I sanded the area smooth and the results, not perfect but definitely passable and 100% better than my earlier attempts … did I say I hated filling - almost as much as commissions!

What I neglected to also say was that when smoothing the filler I thought I’d use a wetted finger, you know, just as you would to smooth mastic in a bathroom. However, I’d forgotten that I’d filled my water pot with Tamiya’s lacquer thinner which proceeded to burn off a large section of paint from the wing! Much fine sanding and repainting seems to have restored the wing to its former glory but it was touch and go at one point! 

After waiting a few days for that Liquid Metal silver to 100% cure it was time for some complex upper wing masking. Vallejo’s Liquid Metal is great stuff but it does like sticking to masking tape! I would have shown you the masked area but all you’d have actually seen was a mummified aircraft shape! The end result, I think if you look closely, is much more rewarding.


The next challenge was masking for the painting the fuselage which, inexplicably has to be white. Painting today’s airliners must be so much easier! 


So I’ve masked and applied white to the fuselage and tail fin, leaving just the black for the wing de-icing leading edges and nose cone. 

Oh yes, it’s also suggested I mask up paint thin black lines around that light grey panelling on the wing surfaces and add double bands around the tails. I’ve placed an order for a set of line decals as I’m concerned any masking will remove that paint. For me not only does Liquid Metal  lift easily, not much sticks to it very well either.

I think I’ll start work on the black detailing and engines next.

Having hand painted the wing de-icing leading edges and nose cone, those decals I bought for the wing outlining did not really add anything for the effort required to fix them, so I have gone without!

Time now to tackle those decals.


I first tested the Liquid Decal Film on a set of decals from the kit that I won't be using. While the decal stayed together with the film, because they were already crazed on the backing paper, the cracks in them remained very visible and the deck itself was now noticeably thicker. I, therefore, decided to risk trying to go without the film and fit them piece by piece. 


While challenging, this worked for the OK for the tail, but the large fuselage decal which I first attempted on the port side of the aircraft broke into so many pieces it probably took me an hour to get them anywhere near lined up - but once in place, there was absolutely no way to move them in unison to make those fine adjustments in alignment. So, where they lay was where they stay! 

For the starboard side, I felt I had to go with the Liquid Decal Film and suffer the cracked look. As it happened, the film prevented hidden faults from breaking it into many more pieces as it did on the port side, so this was a plus. It also, however, allowed the decal still to break along larger cracks permitting me to align the decal better on the aircraft. 

I now hope a final application of decal softener will get them sucked down nice and tight to the model, as the edges of these old decals did show signs of curling, just cause a bit more angst!

Next up will be the undercarriage, engines and propellers and then a final gloss coat. Should still be on target for next Wednesday's social.

Well, that’s the Super-G Constellation build complete. I just hope it will live up to Roy's expectations when he sees it in its full plastic glory!

I had to pull out all the tools in my toolbox to complete what I hope is a reasonable representation of this incredible looking aircraft. 


The decals had not aged well over their 27 years in the box and indeed, although Minicraft have rereleased this kit 9 more times through to 2014 this is a genuine 1998 version 1 release! I notice that one of my favourite model companies, Academy, re-boxed this kit in 2024 and released it in a most unusual scheme as a USAF EC-121 Warning Star. 

Meanwhile, I decided to finish this TWA aircraft with a satin varnish as opposed to gloss feeling that airliners are shiny but not usually a high gloss of a classic car. 


I’m pleased I managed to get it finished ahead of our Wednesday evening social, it was a close run thing with those decals! 

Supermarine Spitfire F Mk.XVIII

 Next up, another Spitfire!  This is one I’ve been waiting for the right moment to build as it has a bit of a story.  Today would have been ...