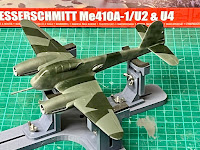
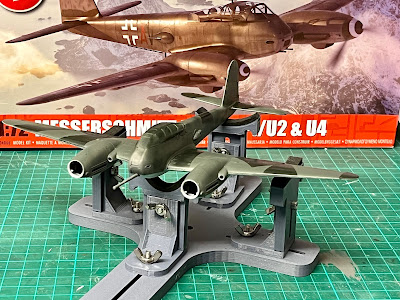
Next up is an Airfix’s 1/72 Messerschmitt Me 410 commission for a collector customer of mine.
Need to decide whether to build the U2 or U4 version. It’s the U2 which is to be found at the RAF Museum Midlands (Cosford) and which was LIDAR scanned by Airfix for the outline accuracy of this kit.
Slow but positive progress made this afternoon on the Me410. I’m now at stage 14/77 of the Airfix instructions. This isn’t a quick or simple build, that’s for sure.
I’ve completed the build of the front cockpit tub and rear crew member’s station. Airfix provide split instrument panel decals but the moulding is so raised that getting these to stick I feel would be close to impossible. Also, the decals are predominantly black, which would never been seen with a few white blobs which would be very easy to add with a brush. The decals were thus discarded. Further research showed that some of the buttons may have even been red and so, for added interest, I included these too. Before I close the canopy, I will also attempt to add a scratch built harness which it would have made more sense for Airfix to have provided in place of the instrument decals.
I’m now just waiting for the inner bulkhead Graublau paint to cure before fitting the cockpit and fuselage together. The rear crew member’s seat is being left to the very last moment to install as I understand if it’s not positioned correctly it will foul the cockpit decking.
Harness made and fitted, and cockpit installed within the fuselage.
Back on the 1/72 scale Airfix Me410 and time to add the rear pod and the wings to the fuselage.
I read that these fit well which in some ways the do, but I can’t help thinking that a jig wouldn’t go a miss to get everything aligned. In the absence of a jig I’ve resulted to trussing it up with tape.
I’m just praying that once it hardens off it looks as good as it did when first dry fit.
This afternoon’s activity involved the fitting of the rear seat and engine nacelles.
This is certainly a very detailed and weighty kit. The odd gap here and there between joining surfaces is a little annoying but it’s all part of the hobby and I’ve seen worse.
Flaps & guns fitted and masking removed from gunners window.
This Airfix Me 410 is not a quick & easy nor a relaxing build. I’m just hoping the details show through in the end to make all the effort worthwhile.
I hate this Airfix Me410 canopy! 🤦♂️
It comes in 4 pieces reminiscent of the old Airfix Storch that some may remember.
The instructions suggest pre constructing it off the aircraft but again, I found that a jig would have been useful here as it needs some form of support. I’ve seen it recommended that one fixes the sides and then the section including screen and top, which is what I’ve attempted.
Having done such a detailed job on the interior, I really want this canopy to look great, but Airfix continue to conspire against me with this kit. I even found the sprue attaches too close to the glazing such that even with a clean cut and gentle sanding I still see marks in the canopy. I’m hoping the frame will hide these once painted!
I so want to love this kit but in truth I’m having more of a love hate relationship with it!
I wasn’t at all happy leaving it as is, so I’ve removed the Airfix Me410’s canopy and re-glued it off the aircraft.
I’m hoping, once it’s dried off, that it holds together sufficiently for me to coat it in Klear which, fingers crossed, will both give it strength and clean up the sprue damaged glazing. It didn't - replacement requested from Airfix.
The replacement canopy sprue for my Messerschmitt Me410 has arrived from Airfix.
Just check out that sprue though … look at all the tabs to remove! Each one presents the scale modeller with the risk of shattering or scarring the fragile and brittle clear parts. What were you thinking Airfix design team?
04-Mar: Back from the Peterborough Scale Model Show and I could not put off checking in on my Airfix Me410 canopy which Id left glueing to the fuselage before the weekend.
The fitting to the fuselage looks strong and close which is good, but look closely and you’ll see a gap in one of the top joins 😩
Fear not though, a small brush of clear glue and a bit of tape should see this closed.
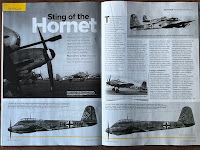
My copy of Airfix Model World Magazine has just landed and look what’s the subject of this month’s 'In Focus article'!
My copy of Airfix Model World Magazine has just landed and look what’s the subject of this month’s 'In Focus article'!
There’s no putting it off … time to get back to the Airfix Me410!
The canopy of finally in position and it’s time to mask and prime.
I don’t usually buy canopy masks but felt it essential for the greenhouse glazing on this Me410.
I really didn’t think this day would ever arrive!
That’s the camouflage added. RLM 76 Lichtblau to the underside, RLM 75 Grauviolett to the lower sides, RLM 74 Graugrun and RLM 70 Schwartzgrun disruptive patter to the wings and mottling on tail and sides.
Next up I’ll probably start applying the decals and then the fiddly bits as there are 63 of them and having a clear line of sight will be beneficial !
Decals applied and now time to prepare the bits and bobs to complete the build. I did have a few scares in applying the decals: firstly, the white fuselage band broke up, but that was OK as they are always made of too thin a decal such that the paint beneath is usually all to visible. A quick bit of masking and a spray of white sorted this. Then I ridiculously lost a couple of the red dotted "no walk" lines for the upper wing surface. I'm hoping my random spacing hides this error and it can be assumed the aircraft has had a panel repair where the camouflage has been applied but not the line. Finally, the spiral decal for the propeller spinners just would not lie flat on the rounded surface ... more on this later!
The first of the bits and bobs are the undercarriage struts and exhausts. These now need to harden before fitting the wheels and more fiddly bits as the struts, for one, are notoriously fragile! I did, however, think I'd have a go at the kill markings on the 50mm canon, an addition my customer had specifically requested.
Having done a not too bad a job on this, I thought why not now try paining the white spiral on the spinner? As eluded to earlier, Airfix did provide a decal for this, but despite a bucket of softener it failed to lay flat and became so puckered that I thought I'd bin them and just go with a painted white cap to the spinners as I've also seen evidence of the Me 410 using. I don't, on reflection think this turned out that bad either.
7 weeks after starting this kit, the longest build I think I've ever done, and the Me410 is complete!


